Can You Sand Epoxy? Tips for a Smooth, Glossy Finish
Yes, you can sand epoxy to smooth imperfections, prepare it for finishing, and achieve a durable, glossy surface.
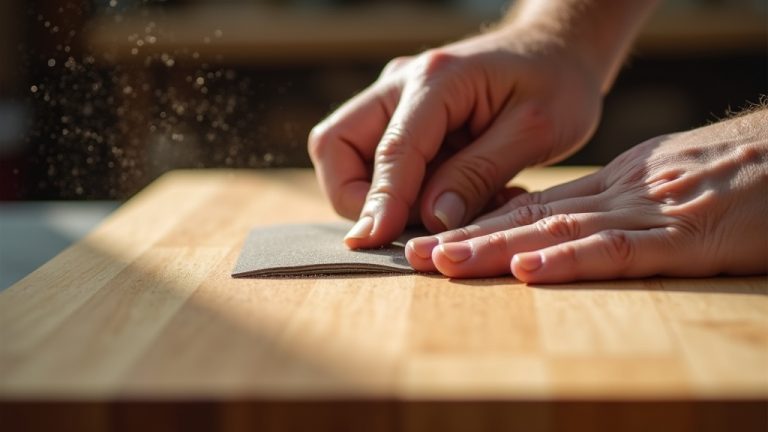
Start with dry sanding using coarse grits to level high spots. Then switch to wet sanding at finer grits like 1200 to reduce dust and prevent overheating.
Using a random orbital sander or hand sanding with a block guarantees even abrasion without marks. Proper safety gear is essential to protect against fine dust. The next steps cover techniques, safety, and finishing details.
Key Takeaways
- Yes, epoxy can be sanded to smooth imperfections and prepare for polishing or topcoating.
- Start with dry sanding using coarse grit to remove high spots and shape the surface.
- Transition to wet sanding with fine grit (e.g., 1200) to reduce dust and achieve a smooth finish.
- Use a sanding block or orbital sander with overlapping motions for even abrasion and consistent results.
- Always wear protective gear and sand in a well-ventilated area to avoid inhaling fine epoxy dust.
Why Sand Epoxy Resin?
When you sand epoxy resin, you smooth out imperfections like drips, high spots, and uneven areas to create a uniform surface. This process is essential for preparing epoxy for finishing steps such as polishing or topcoating.
Sanding removes cured surface irregularities that can interfere with adhesion and clarity. By progressively using coarser to finer grits, you eliminate scratches and guarantee a flat, consistent texture.
Sanding also enhances the epoxy’s durability by preventing weak spots caused by uneven curing or surface defects. Additionally, it helps achieve the desired aesthetic by removing blemishes and enabling a mirror-like finish after polishing.
Without sanding, epoxy surfaces remain rough and prone to damage, diminishing both function and appearance. Proper surface preparation, including sanding, is crucial to ensure optimal adhesion of subsequent coatings and finishes.
When to Wet Sand vs. Dry Sand Epoxy Resin?
When it comes to sanding epoxy resin, you really want to think about the method that suits your needs best.
For those initial stages, dry sanding is your go-to, especially if you’re dealing with large surfaces. A random orbital sander works wonders here, allowing you to remove material quickly and efficiently.
Now, once you move on to those finer grits, like 1200, wet sanding becomes the star of the show. It helps to cut down on dust and gives you that smooth, mirror-like finish you’re after.
Maintaining proper drying and curing conditions before sanding is essential to avoid surface defects and achieve the best results.
Wet Sanding Benefits
Often, wet sanding proves essential for achieving a smooth, dust-free finish on epoxy resin, especially at finer grits like 1200.
By lubricating the surface with water, you reduce friction and prevent sanding dust from becoming airborne or clogging the abrasive paper.
This keeps the grit sharp longer and helps you maintain consistent pressure, avoiding surface heat buildup that can damage epoxy.
Wet sanding also reveals scratches more clearly, allowing precise control to achieve a mirror-like finish.
It’s particularly useful after progressing through coarser dry sanding stages, where fine imperfections remain.
Using wet/dry sandpaper, you’ll find it easier to track your progress without dust interference, ensuring uniform coverage.
For best results, ensure the sanding surface is stable and secure to avoid uneven abrasion or damage during the process, similar to securing materials when cutting plexiglass.
Dry Sanding Uses
While wet sanding excels at fine finishing and dust control, dry sanding plays a key role in the early stages of epoxy surface preparation. You’ll use dry sanding with coarse grits (80-120) to quickly remove high spots, drips, and uneven areas, especially on large surfaces.
Employ a random orbital sander with overlapping right-to-left passes to guarantee even material removal. Dry sanding allows faster stock removal but produces dust, so wear proper protection and work in ventilated areas.
Once you’ve leveled the surface and removed major imperfections, switch to finer grits and wet sanding to minimize dust and achieve a smoother finish. Remember, dry sanding is effective for shaping and leveling, while wet sanding refines and polishes the epoxy for the final surface quality.
Using waterproof sandpaper soaked in soapy water during wet sanding helps to reduce clogging and extend the sandpaper’s lifespan.
Choosing Sanding Methods
Deciding between wet sanding and dry sanding depends on the stage of your epoxy project and the desired finish quality.
Use dry sanding with coarse grits (80-120) for initial shaping or removing uneven areas, especially on large surfaces with a random orbital sander.
This method efficiently removes high spots but generates dust, so wear protection and work in ventilated areas.
Shift to wet sanding when you reach finer grits, typically 800 to 1200, to minimize dust and achieve a smooth, mirror-like finish.
Wet sanding with wet/dry sandpaper lubricates the surface, preventing clogging and overheating.
Remember to wipe the surface frequently to monitor progress.
Choose wet sanding for final smoothing and polishing; dry sanding suits aggressive material removal and early-stage sanding.
Sanding epoxy should be done with care to preserve the underlying wood’s durability and UV resistance when used in outdoor applications.
Choosing the Right Grit for Epoxy Sanding
When you’re getting started with sanding epoxy, it’s best to kick things off with some coarse grits. Think around 80 to 120. This will help you knock down any high spots and imperfections that might be hanging around.
Once you’ve tackled the rough stuff, it’s time to move on to medium grits, like 180 to 240. This step is all about smoothing things out and getting rid of those pesky scratches from your earlier sanding.
Finally, you’ll want to finish strong with some fine grits, going up to 1200. At this stage, using wet sanding can really help you achieve that smooth, dust-free surface, which is perfect for polishing and getting that professional look.
Make sure your epoxy is fully cured before sanding to avoid damaging the finish and to achieve the best results with self-leveling formulas.
Coarse Grit Selection
Select the appropriate coarse grit to efficiently remove high spots, drips, and uneven areas on your epoxy surface. Typically, choose sandpaper between 80 and 120 grit for these initial corrections.
Using a grit too coarse risks gouging the epoxy, while too fine prolongs the process without effective material removal. Attach the sandpaper to a random orbital sander or sanding block for even pressure and control.
Apply overlapping right-to-left passes, ensuring full coverage to avoid patchiness. Maintain moderate pressure to prevent surface damage.
Since coarse grit sanding generates significant dust, wear appropriate safety gear and work in a ventilated area. Avoid aggressive sanding; your goal is to level imperfections, not remove excessive epoxy.
Proper coarse grit selection sets the foundation for smoother subsequent sanding stages. For enhanced efficiency and durability, consider using a diamond sharpening stone to maintain your sanding tools’ edges during the process.
Progressing Through Grits
After leveling high spots and drips with coarse grit, you’ll want to refine the epoxy surface by gradually moving through finer grits. Move next to 180-240 grit sandpaper to remove scratches left by coarser grits, using about five overlapping passes in a right-to-left pattern followed by perpendicular sanding.
Then, progress to 400 grit, performing seven passes while tracking progress with zigzag marker lines to guarantee even abrasion. Continue to 800 grit, repeating the same technique for a smoother finish. At each stage, wipe the surface clean to monitor scratch removal effectively.
Using a random orbital sander or sanding block helps maintain flat contact and prevents uneven sanding. This systematic grit progression guarantees a consistent, scratch-free epoxy surface ready for final fine sanding steps. For an even smoother finish, you can finish with 600 grit sanding and buffing, as used in fine finishing processes.
Final Fine Grits
Typically, you’ll rely on fine grits like 1200 for the final sanding stage to achieve a smooth, mirror-like epoxy surface.
Use wet sanding here to control dust and prevent clogging, ensuring consistent abrasion.
Avoid marker lines at this step; instead, focus on uniform coverage with overlapping, circular motions.
Maintain a flat sanding block or pad to keep even pressure and prevent uneven spots.
After completing this stage, thoroughly wipe the surface with a clean, damp cloth to remove residue.
This grit level preps the epoxy perfectly for polishing or topcoating, eliminating fine scratches left from coarser grits.
Skipping or rushing this step compromises clarity and gloss.
Always ensure you wear appropriate PPE to protect yourself during sanding and finishing.
How to Sand Epoxy Evenly With a Random Orbital Sander?
When you sand epoxy evenly with a random orbital sander, you’ll want to move the tool in overlapping, circular motions to guarantee consistent abrasion across the surface.
Use a right-to-left, top-to-bottom pattern with about 50% overlap on each pass. Start with coarse grits for leveling, then move through finer grits, ensuring full coverage without lingering too long in one spot.
Monitor progress with zigzag marker lines and wipe dust frequently. Applying a protective wax coating after sanding can help preserve the surface and prevent rust or stains.
| Step | Description |
|---|---|
| Motion | Overlapping, circular |
| Coverage | Right-to-left, top-to-bottom |
| Passes | 5-7 depending on grit |
| Dust Control | Frequent wiping, use tack cloth |
This technique prevents uneven spots and prepares epoxy for fine finishing.
How to Hand Sand Epoxy Without Marks?
Master hand sanding epoxy by applying even pressure and using consistent, controlled motions to avoid visible marks.
Use a sanding block or pad to maintain flat contact and prevent uneven abrasion.
Begin with a finer grit like 400, progressing through 800 and finishing at 1200 grit for smoothness.
Employ circular or back-and-forth strokes, covering the entire surface evenly to prevent patchiness.
Avoid spot sanding, which can cause uneven textures.
Mark the surface with a zigzag line when possible to track sanding progress and ensure uniform removal.
Frequently wipe the surface with a clean cloth to remove dust and inspect for scratches.
Finish with wet sanding at 1200 grit to minimize dust and enhance surface clarity before polishing or topcoating.
Safety Tips for Sanding Epoxy Resin
Always prioritize your safety while sanding epoxy resin, as the fine dust particles can pose serious health risks if inhaled or come into contact with your eyes.
Always wear a high-quality dust mask or respirator rated for fine particulates to prevent respiratory irritation.
Use safety goggles or glasses with side shields to protect your eyes from airborne particles.
Work in a well-ventilated area or outdoors to reduce dust concentration.
Whenever possible, opt for wet sanding techniques to minimize dust by keeping the surface and sandpaper damp.
Frequently wipe down your work area with a damp cloth to capture dust and prevent it from becoming airborne.
Avoid aggressive sanding with coarse grits to reduce dust generation and surface damage.
Following these precautions will keep your sanding process safe and effective.
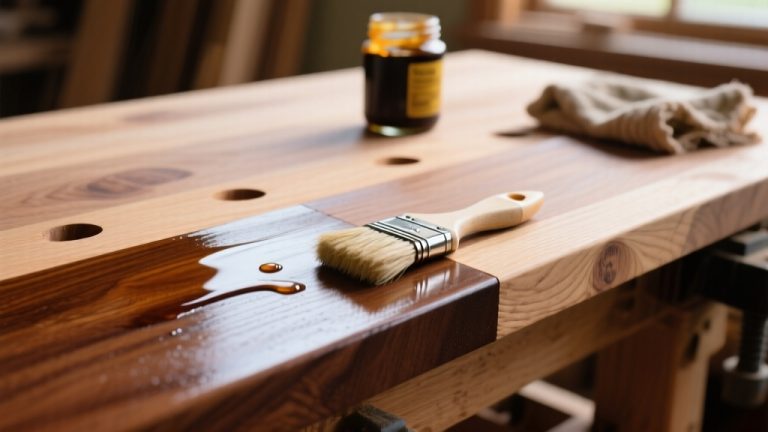
Finishing Steps After Epoxy Sanding for a Glossy Surface
After sanding epoxy safely and thoroughly, your next step is to prepare the surface for a glossy finish.
Begin by cleaning the area with mild soap and water to remove all dust and residue.
Then, use a polishing compound or buffing wheel to refine the surface after your final 1200 grit sanding.
This step enhances clarity and mirror shine.
Finally, apply a protective topcoat to seal and preserve the glossy finish.
Follow these three essential finishing steps:
- Clean the surface meticulously to avoid contamination.
- Polish using a compound or buffing wheel for maximum gloss.
- Seal with a topcoat to protect and enhance durability.
These steps guarantee your epoxy surface achieves a smooth, high-gloss appearance.
Frequently Asked Questions
Can Epoxy Sanding Damage the Underlying Material?
Yes, sanding epoxy can damage the underlying material if you’re too aggressive or use coarse grits improperly.
You should start with a coarse grit to level uneven spots but avoid prolonged pressure that might cut through.
Always progress methodically through finer grits and maintain even coverage to protect the substrate.
Using proper tools, overlapping passes, and wet sanding techniques minimizes risk, ensuring you smooth epoxy without harming what’s beneath.
How Long Should Epoxy Cure Before Sanding?
You should let epoxy cure for at least 24 hours before sanding to make certain it’s hard enough to handle abrasion without gouging.
For best results, wait 48 to 72 hours if temperature and humidity are low, as curing slows down.
Avoid sanding before it’s fully cured to prevent smearing or clogging your sandpaper.
Always check manufacturer recommendations, since cure times vary by epoxy type and environmental conditions.
Can I Reuse Sandpaper After Sanding Epoxy Resin?
Think you can reuse sandpaper after sanding epoxy resin? You can, but it depends on grit and cleanliness.
Coarser grits clog quickly with epoxy dust, reducing effectiveness.
Fine grits used in wet sanding last longer but still need cleaning to maintain performance.
Wipe or rinse your sandpaper thoroughly between uses to avoid contamination and uneven sanding.
Ultimately, replace sandpaper once it loses abrasiveness for best results and surface quality.
Is It Safe to Sand Epoxy Indoors Without Ventilation?
No, you shouldn’t sand epoxy indoors without ventilation.
Epoxy sanding produces fine dust particles harmful to your lungs and eyes, so you must wear a dust mask and eye protection.
Wet sanding reduces airborne dust, but good airflow is still essential to avoid inhaling particles.
Always work in a well-ventilated space or use exhaust fans to maintain air quality and keep your workspace safe during sanding.
What Are the Best Alternatives to Sanding Epoxy Resin?
You might think sanding is your only option, but you can also use chemical solvents like acetone or isopropyl alcohol to smooth epoxy surfaces gently.
Another alternative is using a heat gun for slight surface melting, which levels minor imperfections without abrasion.
For precision, micro-abrasive blasting offers controlled smoothing, but requires specialized equipment.
Each method demands caution; test small areas first and always use proper protective gear to avoid damage or health risks.
Boost Your Epoxy Finish With Proper Sanding Techniques
Sanding epoxy is essential to achieve a smooth, professional finish, whether you’re prepping for paint or polishing to a glossy sheen.
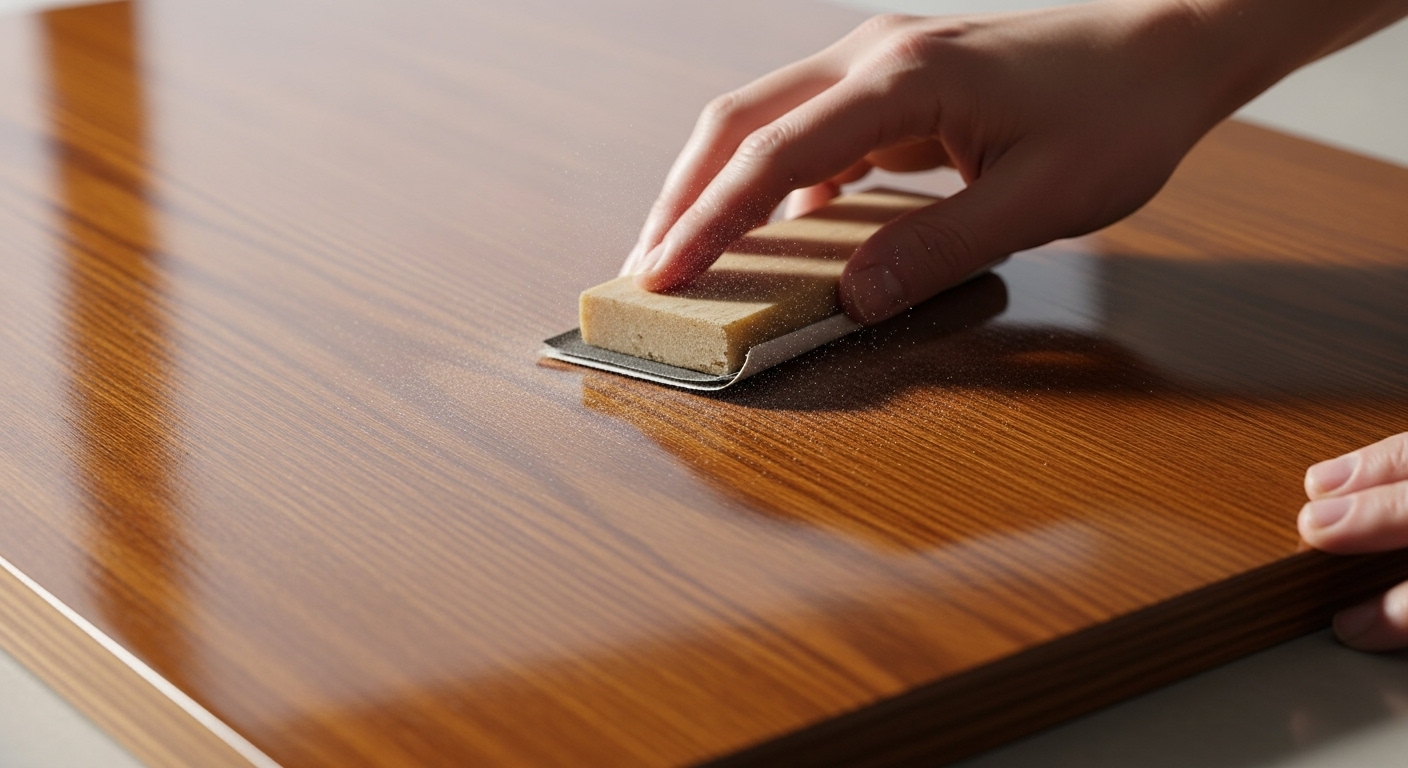
For example, a woodworker refinished a tabletop by wet sanding epoxy with 400-grit paper, avoiding dry sanding dust and ensuring even abrasion.
Remember to choose the right grit and technique to prevent scratches or uneven surfaces. With proper sanding and safety measures, you’ll enhance durability and appearance efficiently every time.