How to Take a Link Out of a Chainsaw Chain? Step-By-Step
To take a link out of your chainsaw chain, first wear gloves and eye protection. Loosen chain tension and secure the chain in a chain breaker tool, aligning the rivet under the punch.
Apply steady pressure to press out the rivet without deforming links. Separate and discard the removed link carefully.
Reassemble the chain by looping it around the sprocket, adjusting tension, then tightening bar nuts. Following this method guarantees safe, precise link removal—more detailed steps can help you master the process.
Key Takeaways
- Secure the chainsaw chain in a vise and ensure the chain tension is fully loosened before starting removal.
- Use a chainsaw chain breaker tool to press out the rivet partially without deforming the links.
- Gently pry apart the links with a flathead screwdriver once the rivet is loosened or partially removed.
- Discard the removed link and rivet; do not reuse old rivets to maintain chain safety and integrity.
- Reassemble the chain by looping it around the sprocket, adjusting tension, and tightening guide bar nuts properly.
Tools and Safety Equipment Needed
Before you begin removing a link from a chainsaw chain, gather the essential tools and safety equipment to guarantee a precise and safe process.
You’ll need a chainsaw chain breaker tool to push out rivets without damaging the chain, plus a heavy-duty hammer or small mallet for gentle tapping. Use a flathead screwdriver or pry bar to separate links once rivets loosen.
Needle-nose pliers help hold components securely, and an adjustable wrench or socket set assists in adjusting the chain breaker. Safety gear is vital: wear heavy-duty gloves, safety goggles, and long sleeves to protect from sharp edges and metal shards.
Secure the chain using a vise or clamp to ensure stability during work. Ensuring a stable work setup minimizes the risk of injury and improves accuracy.
For enhanced precision and efficiency, consider using a Bench Mounted Chain Breaker tool, which easily presses out rivets and is compatible with various chain pitches.
Preparing the Chainsaw and Chain
How do you guarantee safe and efficient chain removal? Begin by disconnecting the chainsaw from all power sources and engaging the chain brake.
Place the saw on a stable, flat surface or secure it in a vise with soft jaws to prevent movement. Considering user comfort can also improve the safety of your working environment.
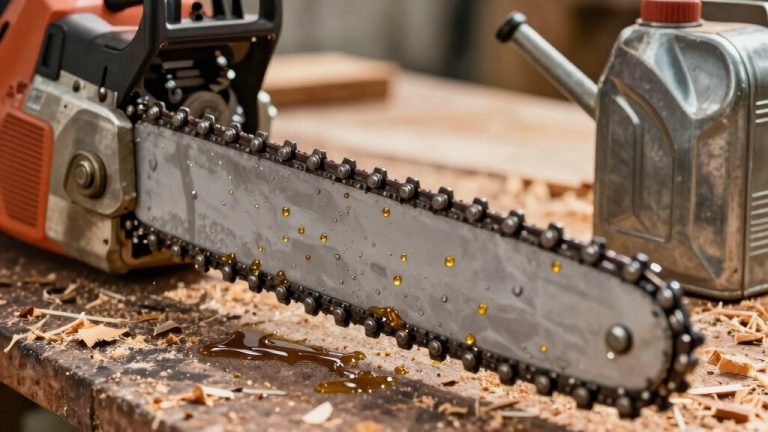
Clean the chain and guide bar thoroughly using a brush or compressed air to remove debris, then wipe with a mild solvent to eliminate sap and grime. This initial cleaning step is crucial as it helps to prolong chainsaw lifespan and ensure smooth operation. Check the chain oil reservoir to avoid spills during cleaning.
Loosen the nuts or screws securing the guide bar and use the tension adjustment screw to slacken the chain until it lifts easily from the bar. Confirm the chain moves freely without tension. Wear protective gloves and ensure your tools are within reach before proceeding.
Identifying Which Link to Remove
Once you’ve prepared the chainsaw and slackened the chain, focus on pinpointing the exact link to remove. First, decide whether you’re shortening the chain or replacing a damaged link.
Inspect the chain thoroughly for wear or damage, then align it flat to locate the target link. Confirm the chain tension is minimal to avoid stress during removal.
Typically, you’ll remove a drive link or a cutter tooth link depending on your need. It is important to ensure that the chain’s drive link count matches the old chain or bar specifications to maintain proper fit and function, as matching chain and guide bar numbers is essential for optimal operation.
| Factor | Purpose | Identification Method |
|---|---|---|
| Link Location | Target correct link position | Lay chain flat, count links |
| Damage Assessment | Identify worn/damaged links | Visual inspection |
| Chain Tension | Ensure slack for removal | Manual tension check |
| Chain Alignment | Prevent misalignment errors | Align chain on flat surface |
| Removal Purpose | Shortening or repair | Define before removal |
Using a Chain Breaker to Remove the Rivet
Place the chainsaw chain securely on the chain breaker’s base, aligning the rivet precisely under the punch to guarantee accurate force application.
Using an adjustable anvil on the chain breaker helps ensure better alignment and a cleaner break. Confirm the chain orientation so the punch presses on the rivet head, preventing damage to adjacent links.
Apply steady, controlled pressure on the lever to press the rivet out partially without deforming the chain plates. Ensuring precise alignment is critical, as improper setup can lead to structural modifications or damage to the chain components.
Aligning Chain Breaker Tool
Before you begin removing the rivet, you’ll need to align the chain breaker tool accurately to make certain of effective and damage-free operation.
Insert the breaking tip into the chain pin spring, resting it beneath the tip head for stability. Position the chain link so one chain pin end fits into the alignment bolt’s end and the other into the tool body’s hole.
Firmly secure the alignment bolt against the side plate without over-tightening to prevent misalignment. Confirm the breaking tip is fully supported by the alignment bolt and that the chain is held steady in the tool’s guides.
Adjust the alignment bolt to hold the pin firmly; loosen slightly if the tip doesn’t enter smoothly. Always wear safety glasses when breaking chain to protect your eyes from debris.
Double-check central alignment before proceeding. Ensure the tool is properly secured and aligned to prevent damage during the breaking process.
Pressing Out the Rivet
Although pressing out a rivet demands careful alignment, you’ll find the process straightforward when you position the chain breaker’s rivet pusher directly over the rivet head targeted for removal. Make certain the tool is perpendicular to the rivet to prevent bending the chain.
Secure the chain firmly on a flat surface to avoid shifting. Gradually press the tool’s handle to drive the rivet out, applying steady, firm pressure. If the rivet resists, press from the opposite side if accessible, but avoid excessive force that could damage adjacent links.
It is important to use a pocket breaker with notches matching chain pitch to ensure proper fit and effective rivet removal. Proper tool alignment is critical to avoid damaging the chain’s structural integrity during removal.
Use a flat-head screwdriver to pry out rivet heads that don’t fully release. After pressing both rivet heads, gently separate the chain. Remember, never reuse old rivets; always replace them to maintain chain integrity and safety. This practice helps prevent chain failure and ensures safe operation.
Removing and Discarding the Link
After driving out the rivets, carefully separate the chain links at the marked removal point to avoid damaging adjacent links.
Manual chain breaking involves supporting a nut with a block of wood or steel, positioning the chain on a flat surface with the rivet aligned with the punch, and striking sharply to deform and break the rivet tie strap manual chain breaking.
Applying a suitable lubricant can ease the separation process and reduce wear on the chain tools. Handle the removed link with gloves, then discard it properly to maintain workspace safety. Keep the remaining chain organized for efficient reassembly and tension adjustment.
Separating Chain Links
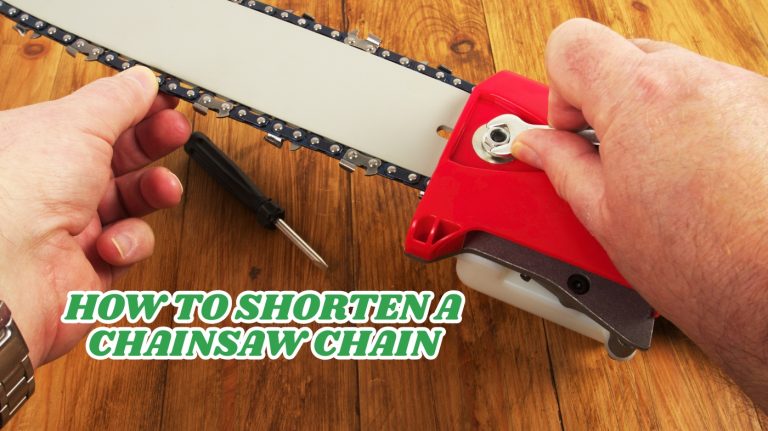
When you’re ready to separate the chain links, start by positioning the chain rivet tool carefully over the rivet head of the link you’ve marked for removal. Align the tool precisely to avoid damaging adjacent links.
Apply firm, steady pressure to push the rivet partially or fully out. Repeat this on the opposite rivet of the same link to free it completely. It is important to note that removing a drive link does not affect the chain pitch, as pitch is determined by the center distance of three rivets.
If a rivet resists, use a flat-head screwdriver gently to assist its removal. Once both rivets are sufficiently pushed out, gently separate the marked link from the chain on a stable work surface or chain holder.
Keep the chain orientation intact to maintain cutter direction. Discard the removed link properly, ensuring no debris remains that could interfere with chain reassembly.
Handling Removed Links
Once you remove the marked link from the chainsaw chain, handle it carefully to preserve the surrounding links and maintain chain integrity. Gently detach the link to avoid damaging adjacent components. Prioritize safety measures such as wearing gloves and eye protection to prevent injury during this process.
Inspect the removed link closely for wear or defects before deciding on reuse or disposal. Store reusable links separately in a labeled container to prevent mix-ups. It is important to use proper tools when removing and handling links to avoid accidental damage.
Avoid bending or altering the link, as this compromises its structure and complicates reassembly. When discarding, clean the link of oil and debris, then recycle it through appropriate metal waste facilities, adhering to local regulations.
Always wear protective gloves and eye protection during handling. Maintain records of removed links and their condition to support accurate chain maintenance and ensure operational safety.
Reassembling the Chain After Link Removal
Although removing a link alters the chain’s length, you’ll need to carefully reassemble it to guarantee proper function and safety.
Start by disconnecting the spark plug lead and engaging the chain brake. Remove the clutch cover and guide bar nuts, then slide the guide bar off. Always wear cut-resistant gloves during this process to protect your hands from injury.
Position the guide bar back onto the studs, sliding it fully toward the clutch. Loop the chain around the clutch drum, ensuring drive links engage the sprocket and chain teeth face the correct direction. Seat the chain in the guide bar groove, passing it around the nose and sprocket.
Replace the clutch cover, hand-tighten the guide bar nuts, then adjust chain tension with the tensioning screw while pulling the guide bar away. Confirm smooth chain movement and proper tension before fully tightening the nuts.
Final Chain Maintenance and Safety Checks
How do you guarantee your chainsaw operates safely and efficiently after adjusting the chain length? Begin by inspecting the chain brake and safety systems—test the brake band for wear and ensure the chain brake engages properly.
Verify the throttle trigger lockout and top switch function to confirm reliable engine shutdown. Regular maintenance, such as checking blade tensioning systems, can also improve overall safety.
Examine the chain for cracks or worn rivets; sharpen it if needed. Check and adjust chain tension daily, rotate the guide bar to equalize wear, and clean its groove and oil holes. Confirm the automatic oiler functions and the lubrication hole is clear. Monitor oil levels and refill as required.
Inspect fuel and lubricant tanks for leaks, clean air filters and spark plug, and check fuel filters monthly. It is also important to clean carburettor surfaces regularly to maintain optimal engine performance.
Lastly, clean debris from the clutch area, inspect mechanical components, and lubricate bearings weekly to ensure peak performance.
Frequently Asked Questions
Can I Remove a Link Without a Chain Breaker Tool?
Yes, you can remove a chainsaw link without a chain breaker tool by using basic hand tools like a hammer and punch to carefully deform rivets.
Grinding rivet heads with a bench grinder or filing them down manually also works but takes more time. Pliers with wire can help remove quick links.
However, you must proceed cautiously to avoid damaging the chain or compromising safety. Investing in a chain breaker tool is still best for reliability.
How Do I Know if the Chain Length Is Correct After Removal?
You’ll know the chain length is correct if it fits snugly on the bar groove without slack or excessive tightness.
Mount the chain, adjust tension so it moves slightly but doesn’t sag. Rotate it by hand to ensure smooth travel without binding.
Count drive links to confirm they match your saw’s specifications. Finally, run the chainsaw briefly, then recheck tension and listen for unusual noises indicating improper fit.
What if the Rivet Gets Stuck During Removal?
Don’t assume forcing the rivet out will solve the problem—it often makes things worse. If the rivet gets stuck, back off your chain tool slightly to relieve pressure and try again slowly.
Apply penetrating oil around the rivet to loosen corrosion, then gently tap the tool with a small hammer. Make certain proper alignment of the tool pin and rivet pin. Avoid driving the rivet completely through to prevent chain damage.
Can I Reuse the Old Rivet After Removing a Link?
You shouldn’t reuse old rivets after removing a link. The rivets deform during removal, compromising their strength and flaring ability. Reusing them risks chain failure, which can lead to injury or damage.
Always replace rivets with new ones or use a master link for secure fastening. Using proper rivet tools ensures correct installation, maintaining chain tension and safety. Invest in fresh rivets to guarantee reliable performance and avoid costly repairs.
How Often Should I Adjust Chain Tension After Link Removal?
You should check and adjust chain tension before every use and frequently during cutting, especially after removing a link. The altered chain length changes tensioning range, so monitor it closely until the chain stretch stabilizes.
Expect to adjust tension more often initially to prevent slack and maintain safety. Always follow proper tensioning procedures and inspect for wear or damage to keep your chainsaw operating efficiently and safely.
Take Every Step Seriously for Safe Chainsaw Use
Removing a link from your chainsaw chain is like tuning a precision instrument—every adjustment matters. By carefully following each step, from preparing your tools to performing final safety checks, you guarantee the chain operates smoothly and safely.
Remember, accuracy in removing and reassembling links preserves your chainsaw’s performance and longevity. Always prioritize safety and double-check your work before use to keep your equipment—and yourself—running efficiently and protected.