How to Cut a 60-Degree Angle on a Miter Saw? Easy Guide
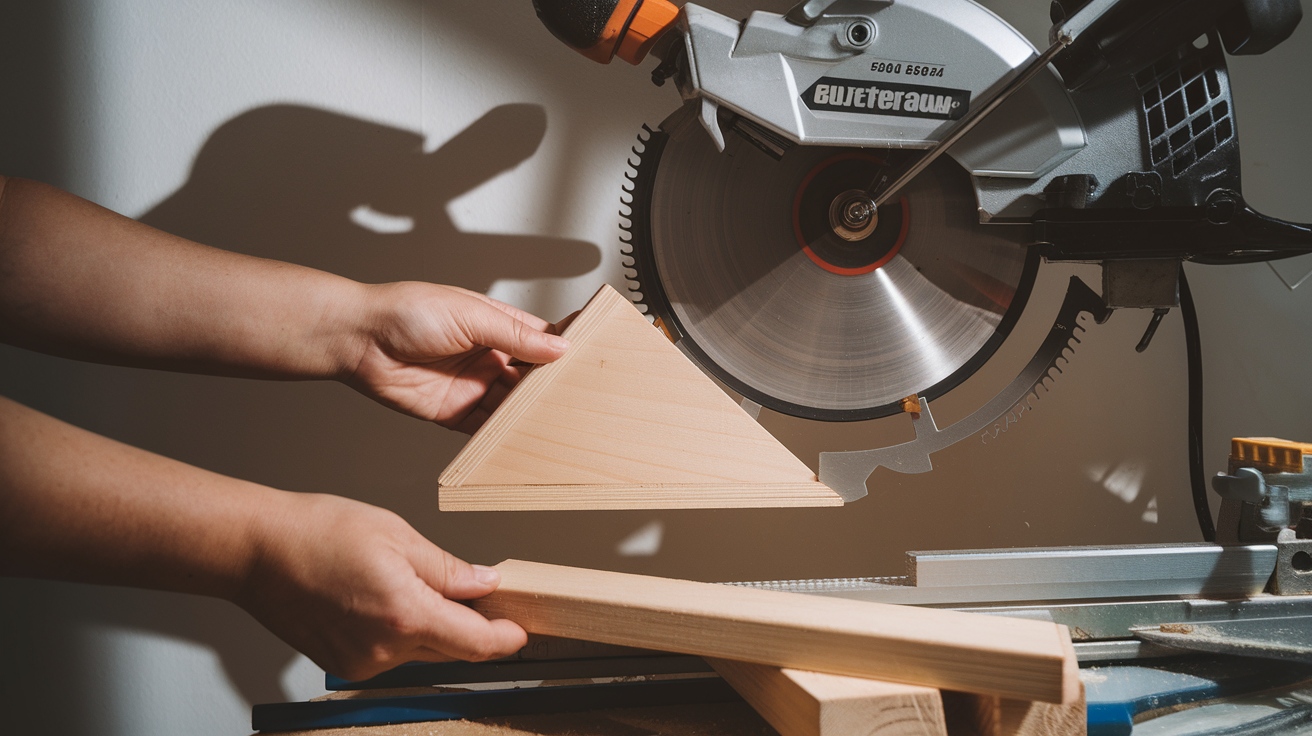
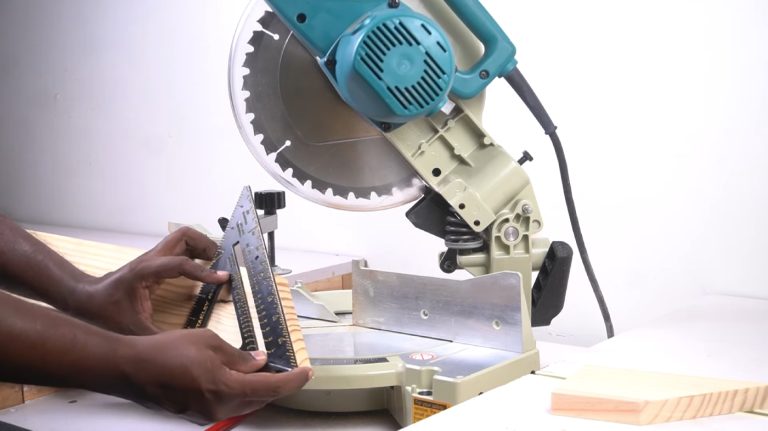
To cut a 60-degree angle on your miter saw, first set the miter angle to 15 degrees. Use a guide board cut at a 45-degree angle for accuracy. Secure this guide against the saw’s fence with hot glue.
Next, clamp your workpiece firmly against the guide. Always wear safety gear, including safety glasses and gloves, before powering on the saw.
Slowly lower the blade onto the wood to make the cut. After cutting, double-check the angle for precision and adjust as necessary. There’s more to mastering angles and techniques for your projects, so keep exploring.
Key Takeaways
- Set the miter saw to a 15-degree angle to achieve a 60-degree cut by adjusting the miter settings.
- Create a guide board by cutting a scrap piece of wood at a 45-degree angle for accurate alignment.
- Secure the workpiece against the fence using clamps to prevent movement during cutting.
- Double-check the angle settings and ensure the blade is sharp before making the cut.
- Keep hands at least 6 inches away from the blade while cutting for safety.
Understanding Miter Saw Angles
When using a miter saw, understanding the angles is essential for making accurate cuts. The 0° mark actually indicates a 90° square cut, which serves as your reference point.
You adjust the miter angle by pivoting the saw base left or right, while the bevel angle is altered by tilting the saw head backward. A high-powered motor is needed to cut through dense materials effectively.
For more complex cuts, you can combine miter and bevel angles. If you need to cut angles beyond 45°, like a 60° angle, you’ll first subtract 45° from 60°, resulting in a 15° setting for the miter saw.
The miter gauge is calibrated so that a 0° setting corresponds to that 90° cut, making this calculation straightforward. To achieve accurate cuts, consider utilizing a sacrificial fence when building a jig to support your workpiece.
Required Tools and Materials
To cut a 60-degree angle accurately, you’ll need specific tools and materials. Start with a miter saw, measuring tape, and clamp for precise cuts, along with safety gear like glasses and a dust mask.
Additionally, prepare a guide board using scrap wood and adhesive to enhance stability and accuracy during the cutting process.
This guide board will help you achieve precise cuts at various angles during your project. Make sure your miter saw is equipped with a high tooth count blade for the best cutting performance.
Essential Cutting Tools
Achieving accuracy in cutting a 60-degree angle on a miter saw requires the right tools and materials. First, you’ll need a miter saw capable of cutting at least 45 degrees. A compound miter saw or chop saw is ideal for this task.
To create a guide board or jig, gather 1×6 or 1/2-inch thick scrap wood, along with two 3/4-inch thick pieces for the sacrificial fence and a 1-inch thick piece for the jig base.
You’ll also require a 1/2-inch thick scrap for setting blade height. It’s important to ensure that the miter saw table height aligns with your elbow height for optimal control and comfort during the cut.
For setup, use a tape measure or a pen/pencil to mark your wood accurately. To secure your guide board, employ a hot glue gun or cyanoacrylate (CA) glue, and speed up adhesion with a CA activator.
A bevel gauge or protractor will help you measure angles accurately, while a digital angle gauge offers precise measurements. Clamps are essential for securing your workpieces during cuts.
Consider a zero-clearance miter saw fence for enhanced alignment and a stable workbench to ensure your cutting setup is secure and precise.
Safety Gear Requirements
Proper safety gear is essential for anyone operating a miter saw, especially when cutting angles like 60 degrees. Wearing the correct protective equipment not only safeguards your health but also guarantees a more efficient cutting process. Here’s a quick overview of the required safety gear:
| Safety Gear | Purpose | Additional Notes |
|---|---|---|
| Eye Protection | Shields against flying debris | Use safety glasses or goggles |
| Hearing Protection | Prevents hearing damage from noise | Opt for earmuffs for extended use |
| Hand and Finger Protection | Prevents cuts and abrasions | Use gloves; avoid loose clothing |
| General Safety Equipment | Guarantees overall site safety | Wear hardhats and steel-toed boots |
| Dust Protection | Protects against inhalation of dust | Use a dust mask when necessary |
It’s crucial to prioritize miter saw safety by ensuring that all crew members are equipped with the necessary protective gear before beginning any cutting tasks.
Material Preparation Supplies
Gather the necessary materials and tools before you start cutting a 60-degree angle with your miter saw. You’ll need a piece of scrap wood, ideally a 1×6, to create a guide board.
Confirm your miter saw can make cuts of at least 45 degrees and has an adjustable fence. A cutting blade suitable for wood is essential for clean cuts.
For securing your guide board, get a hot glue gun and clamps to hold the workpiece firmly in place during cutting. You’ll also need a measuring tape or ruler for precise measurements, along with a square or angle gauge to verify your angles.
Don’t forget your safety glasses and confirm your workspace is clean to minimize hazards. Accurate angle measurements are crucial for successful cuts, so make sure to double-check your settings before proceeding. Additionally, using a laser guide can significantly enhance your cutting precision.
Before making the cut, set your miter saw to 15 degrees. Cut the guide board at a 45-degree angle and secure it using hot glue. This setup will help you achieve the desired 60-degree angle. Always perform a test cut to verify accuracy before working on your actual piece.
Step-by-Step Guide to Cutting
To cut a 60-degree angle on a miter saw, start by setting the saw to 15 degrees. This is because the miter saw setting must be subtracted from 90 degrees to get the actual angle cut on your workpiece. Verify your miter saw is properly calibrated before proceeding.
Next, secure your workpiece firmly against the fence of the miter saw. Use clamps if necessary to prevent any movement during cutting. Remember to wear safety glasses, ear protection, and a dust mask to protect yourself from debris.
Miter saw angles determine material removal during cuts, so it’s crucial to set your saw accurately. Additionally, it’s important to ensure blade sharpness to minimize the risk of kickback and achieve clean cuts.
Once everything’s in place, double-check your angle setting. With your hands at least 6 inches away from the blade, power on the saw and slowly lower the blade onto the wood, ensuring a steady motion.
After completing the cut, raise the blade and turn off the saw. Inspect your cut for accuracy. If it isn’t perfect, you might need to make adjustments and try again.
Always keep the blade guard in place for safety, and maintain a clean work area to avoid accidents.
Using a Guide Board
Using a guide board can greatly enhance the accuracy of your 60-degree cuts on a miter saw. Start by cutting a scrap piece of wood at a 45-degree angle to create your guide board.
Next, adjust the miter saw to 15 degrees; this will allow you to achieve the desired 60-degree angle when cutting. Secure the guide board against the saw’s fence using hot glue, which provides a temporary hold that won’t damage the equipment when removed.
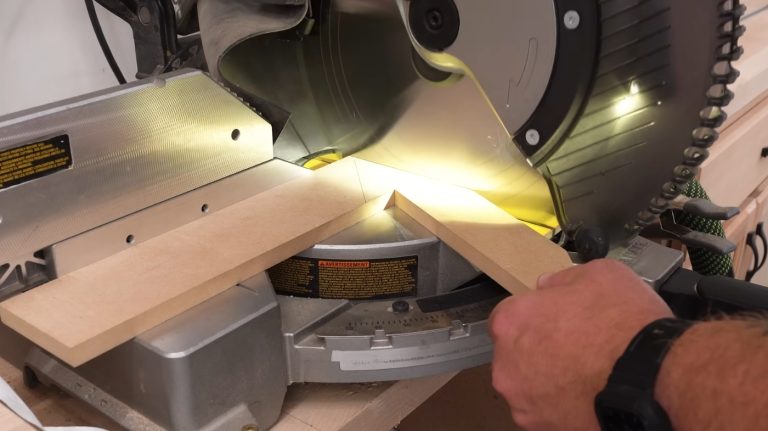
Align the board you intend to cut with the angled guide board. This setup guarantees that your cuts remain flush and accurate, reducing the likelihood of errors. When setting up your cut, ensure the blade depth is adjusted to match the baseboard thickness for clean cuts. Perform the cut at the set 15 degrees, and you’ll produce a precise 60-degree angle.
Using a 1×6 piece of scrap wood is ideal for the guide board, allowing for versatility across various projects. Additionally, this method allows you to cut three boards to the desired angle, maximizing efficiency.
While this method does impose some limitations, such as relying on the initial 45-degree cut for accuracy and the use of hot glue preventing angle adjustments, it’s an effective way to achieve clean, precise angles.
Always prioritize safety with proper hand placement and consider using clamps for added stability. Keeping a stable stance during cutting can also help in preventing injury from kickback.
Creating a Cutting Jig
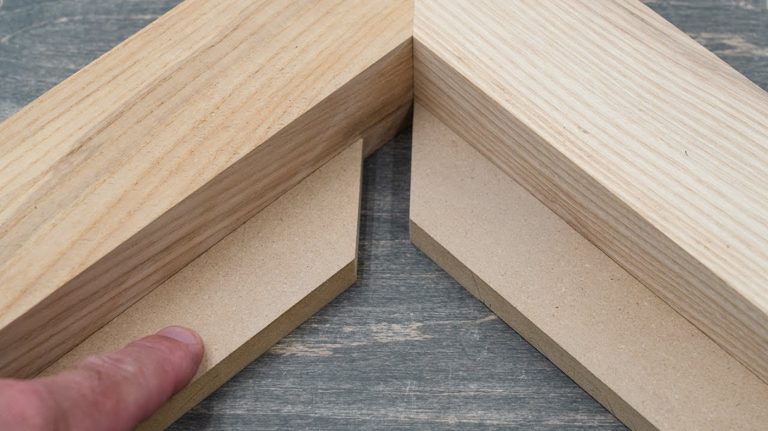
To create an effective cutting jig, you’ll need specific materials: a base, two fences with 45º miters, and triangle support blocks. This jig is designed to eliminate the limitations of standard miter saws and provide precision in woodworking tasks.
To ensure stability, use secure clamps to hold your workpiece firmly in place during cutting. Follow a step-by-step assembly guide to guarantee everything aligns properly and remains stable during use. This setup will enable you to cut precise 60-degree angles that your miter saw alone can’t achieve.
Materials Needed for Jig
Creating a cutting jig for a miter saw requires specific materials to confirm accurate angles and stability during use.
You’ll need a compound miter saw as your primary tool. Start with two 3/4-inch thick pieces of wood or MDF, cut to the length of your saw table. Additionally, grab one piece of wood or MDF that’s at least 1 inch thick, also cut to the same length.
You’ll also need a base that’s roughly the size of your miter saw base, and two fences with 45-degree miters on the ends for accurate alignment.
To support these, include two triangle support blocks and a 1×6 scrap wood piece for the guide board. Using a jig made from leftover cuts, you can ensure that your miter saw is capable of achieving precise 60-degree angles.
CA glue and a CA activator are essential for attaching the sacrificial fence securely to the base. For precise angle marking, have a pen or pencil ready.
Clamps will be necessary for securing your workpiece to the jig, so consider various clamping methods for ideal stability.
Step-by-Step Assembly Guide
When you’re ready to assemble your cutting jig for a 60-degree angle on the miter saw, the process begins with constructing a sturdy base. Cut a base that matches the size of your miter saw base, ensuring it provides stability and aligns perfectly.
Additionally, ensure that the base is placed on a clean, level surface to enhance safety during the cutting process. Regular checks on blade alignment are also essential to maintain cutting accuracy.
Next, attach a fence with a 45-degree miter on its end to the base, aligning it with the back edge and making sure it’s flush with the miter saw’s fence. To maintain the fence’s straightness, attach triangle support blocks.
Secure the jig by clamping the back fence to the miter saw’s fence. Utilize the depth stop on the saw to mark score lines every 5 degrees on the jig, labeling each mark accordingly, starting from zero (which corresponds to 45 degrees). Align the edge of the jig with the blade’s edge and clamp it firmly.
For creating an acute angle jig, cut two fences with 45-degree miters, attaching the second fence behind the first. Calculate your desired angle by subtracting 45 degrees from your target angle. Set the miter saw to this calculated angle to achieve your 60-degree cut.
Setting the Miter Saw Angle
Setting the angle on a miter saw for a 60-degree cut involves a straightforward yet effective technique, as standard miter saws can only cut angles up to 45 degrees directly.
To achieve your desired 60-degree angle, you’ll need to create a jig using a scrap piece of wood. Start by cutting a 45-degree angle on one end of the wood. Next, set your miter saw to a 15-degree angle.
This combination effectively adds 45 degrees to the 15-degree cut, giving you the 60-degree angle you need. Miter saws can be particularly useful for these types of precise cuts.
To calculate the correct angle setting, subtract your desired angle from 45 degrees. For a 60-degree cut, the math is simple: 60 minus 45 equals 15 degrees, so set your miter saw to 15 degrees.
Using a 1×6 piece of scrap wood for the guide board is ideal. Secure the guide board with hot glue for stability, ensuring it aligns accurately when making cuts. Calibration ensures accurate cuts is essential to achieving precision in your woodworking project.
Line up your workpiece with the angled guide board, clamp it if necessary, and make the cut. You’ll achieve a precise 60-degree angle without needing a miter saw that exceeds 45 degrees.
Safety Precautions to Follow
As a precaution, you should follow the following safety procedures before starting to cut:
Blade Safety Measures
Blade safety measures are crucial for preventing accidents while using a miter saw. Start by inspecting the blade guard. Verify it’s in place and functioning properly; a damaged or missing guard can greatly increase your risk of injury.
The guard should cover the blade’s sides and top, providing a critical barrier between your hands and the blade. Regular inspection of the blade guard ensures that it functions correctly and helps maintain a safe working environment.
When operating the saw, always wait for the blade to come to a complete stop before raising it. This prevents kickback, which can lead to serious injuries.
Allow the motor to reach full speed before making a cut, and maintain a consistent feed speed to avoid binding. Remember not to overreach; keep your footing stable and balanced.
Also, handle the blade safely. Touch it only when the power is off, particularly during adjustments. Personal protective equipment is crucial: wear safety glasses to shield your eyes from debris, a dust mask to avoid inhaling particles, and hearing protection against noise.
Proper Clamping Techniques
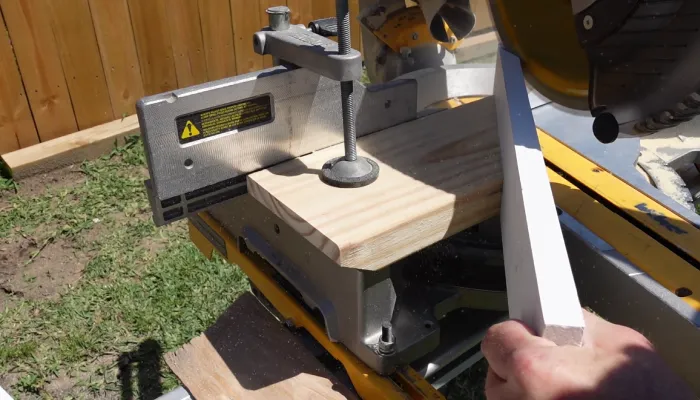
Proper clamping techniques are essential for ensuring safety and accuracy when using a miter saw. To prevent kickback, always secure your workpiece against the fence and the turn base.
Use vertical or miter saw clamps to keep your hands safely away from the blade and to minimize material movement during cuts.
Make sure clamps can move freely across the fence and table, allowing for easy adjustments. Never use your hands to hold the workpiece in place while operating the saw—this is vital for preventing accidents. Avoid freehand operations; always clamp the material securely.
For thin materials, consider using additional supports for stability, while thick materials should be clamped directly to the saw table with the fence clamp.
When making angled cuts, utilize the saw’s versatile base plate or specialized clamps to hold materials at the correct angle. Additionally, using the appropriate tungsten carbide tip blades will enhance cutting performance and ensure cleaner cuts.
For vertical cuts, front clamps are critical to keep the material against the fence. Always inspect your materials for warping or twisting, as these can lead to binding and kickback.
Common Mistakes to Avoid
Many common mistakes can undermine the accuracy of your 60-degree cuts on a miter saw, leading to frustrating results. One significant issue is incorrect angle indication.
If the angle marking plates aren’t properly calibrated, you risk cutting at the wrong angle. Make certain to align them by loosening the screws and adjusting the gauge plate.
Additionally, small inaccuracies in your cuts can compound, causing larger errors in your projects. Even slight misalignments can lead to gaps in joints, so always verify your cuts after adjustments.
Material issues also play a significant role. Confirm your material’s edges are flat against the fence; otherwise, you might end up with incorrect angles. Use a joiner or hand plane to achieve flatness.
Moreover, proper setup is essential. Using a guide board or jig is necessary, especially for angles greater than 45 degrees. If you miscalculate the supplementary angle, it could lead to incorrect cuts.
Tips for Accurate Cuts
Achieving accurate cuts on a miter saw starts with understanding the correct angles and setup. To guarantee precision, follow these essential tips:
- Adjust your miter saw to a 15-degree setting for a 60-degree angle.
- Utilize a guide board with a 45-degree miter angle to help with deeper cuts.
- Clamp your workpiece securely to avoid any movement during the cut.
- Double-check your settings before cutting to verify everything is aligned. Additionally, remember that angles can be divided by 2 for easier cutting, which makes it simpler to achieve complex cuts.
Here’s a quick reference table to keep in mind:
| Step | Action | Purpose |
|---|---|---|
| Miter Angle Setting | Adjust to 15 degrees | For accurate 60-degree cuts |
| Guide Board | Create a 45-degree miter | Provides stability |
| Clamping | Secure the board | Prevents movement |
| Calibration | Align the blade | Guarantees precision |
| Safety Check | Use protection gear | Keeps you safe |
Finalizing Your Project
Finalizing your project involves guaranteeing that every detail is meticulously addressed for a successful outcome. Follow these steps to perfect your 60-degree angle cuts:
- Set the miter angle: Subtract your desired angle from 45 degrees. For a 60-degree cut, set your saw to 15 degrees.
- Create a guide: Use scrap wood to craft a guide board with a 45-degree miter angle. This will help maintain precision.
- Attach the guide: Secure the guide board to the miter saw fence with hot glue. This guarantees stability during cutting.
- Check for safety: Before cutting, wear protective gear and clamp your workpiece securely, keeping your hands at least 6 inches away from the blade.
Once you’ve made your cuts, carefully remove the guide.
After cutting, check your angles for accuracy and make necessary adjustments. If you encounter issues, verify your calculations and consider practicing with test cuts.
Frequently Asked Questions
Can I Cut a 60-Degree Angle With a Standard Miter Saw?
You can’t cut a 60-degree angle directly on a standard miter saw, as they’re typically limited to 45 degrees.
However, you can create a workaround using a jig. Cut a 45-degree angle on a scrap piece of wood, then set your saw to 15 degrees.
Secure the jig to your saw fence, and it’ll guide you to achieve that 60-degree cut accurately.
Just remember to follow safety precautions while working.
What Types of Wood Are Best for Cutting at 60 Degrees?
When cutting at a 60-degree angle, choose woods that minimize splintering and guarantee clean cuts.
Hardwoods like oak and maple excel due to their dense structure and smooth finishes. For softwoods, consider fir or cedar, as they offer straight grains that reduce tear-out.
Engineered woods like plywood and MDF provide stability, while exotic options like teak and mahogany deliver durability.
Always ensure your material is properly supported to achieve precise, clean angles.
How Do I Maintain My Miter Saw for Accurate Cuts?
Maintaining your miter saw for marvelous, meticulous cuts involves several steps.
Start by checking and calibrating the bevel gauge to guarantee accuracy. Next, square and align the fence, confirming it’s parallel to the blade.
Regularly clean the saw, inspecting the blade for sharpness and damage. Don’t forget to lubricate moving parts according to the manufacturer’s instructions.
Are There Alternative Methods to Cut a 60-Degree Angle?
Yes, there are several alternative methods to cut a 60-degree angle.
You can use a guide board by cutting a 45-degree angle on scrap wood, then setting your miter saw to 15 degrees.
Another option is to utilize a vertical cutting technique on a table saw, tilting the blade to 30 degrees.
Additionally, routers or shapers with specific bits can provide precise bevels.
Confirm you prioritize stability and safety throughout the process.
How Do I Dispose of Scrap Wood Safely After Cutting?
As you stand amidst the sawdust, remnants of your project, it’s essential to think about safe wood disposal.
First, check for untreated lumber; if it’s clean, recycle it at a local center. If it’s cut into smaller pieces, consider composting or using it as mulch.
For any treated wood, landfill disposal’s your only option.
Grasp the Art of Precision: Perform 60-Degree Cuts with Your Miter Saw
So, now that you’ve mastered cutting a 60-degree angle on your miter saw, you’re practically a woodworking wizard—just don’t forget your safety goggles, or you might end up with more than just a sharp edge!
Remember, precision is key, and while it might be tempting to wing it, your project deserves better than that. So, grab those tools, channel your inner carpenter, and let’s make those cuts—unless, of course, you fancy a new coffee table made entirely of “creative angles!”

