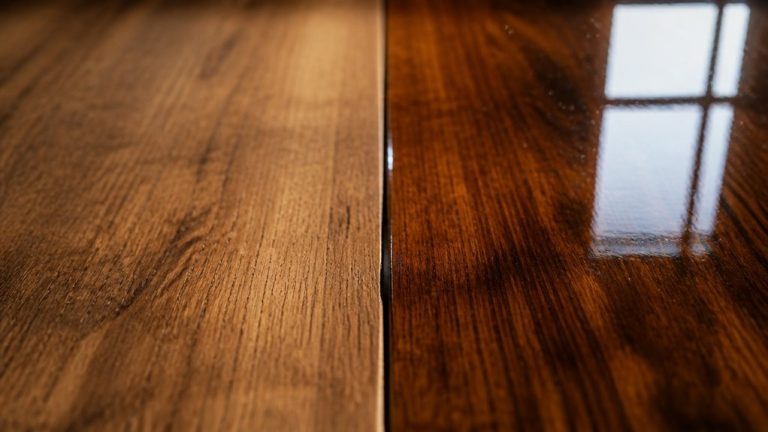
What Grit to Sand Before Stain: Tips for a Smooth Finish
You should start sanding raw wood before staining with 120 grit to open the grain and smooth surface imperfections without removing too much material.
Avoid sanding finer than 220 grit because it closes the pores, reducing stain absorption and resulting in a lighter, uneven finish.
For softwoods, finish around 180–220 grit, and for hardwoods, aim for 150–180 grit to maintain texture.
Using the right grit and technique guarantees even stain penetration and a better finish overall.
More details can help you choose the perfect grit for your project type.
Key Takeaways
- Start sanding with 120 grit for most projects to smooth surfaces and open wood grain for better stain absorption.
- Avoid sanding finer than 220 grit before staining, as it closes the wood grain and reduces stain penetration.
- Softwoods should be finished between 180 and 220 grit for optimal stain absorption and texture retention.
- Hardwoods need a final sanding grit of 150 to 180 to prevent overly smooth surfaces and uneven color.
- Always sand with the grain and clean dust between grits to ensure even stain application and avoid scratches.
What Grit to Start Sanding Raw Wood Before Stain?

When you start sanding raw wood before staining, begin with a grit that effectively smooths the surface without over-aggressively removing material.
For most projects, 120 grit is the ideal starting point. It’s coarse enough to level minor imperfections and open the grain for better stain absorption, but gentle enough to avoid deep scratches.
Starting with 120 grit balances smoothing imperfections and preparing wood grain without causing harsh scratches.
If the wood is rough or has noticeable defects, you might need to start with 80 or 100 grit to quickly remove surface flaws.
However, avoid skipping directly to very coarse grits unless necessary. After this initial sanding, you’ll move up to finer grits to refine the surface.
Always sand with the grain and remove scratches from the previous grit before progressing to make certain an even, stain-ready finish.
Proper grit selection and progression from coarse to fine are essential for achieving a professional, flawless finish with optimal stain absorption through grit progression.
Why Avoid Sanding Too Fine Before Staining?
Although sanding wood to a very fine grit might seem like the best way to prepare it for staining, you should avoid going beyond 220 grit. Sanding too fine closes the wood grain, reducing stain absorption and leading to a lighter, uneven finish. This limits the depth and richness of your stain color.
| Sanding Grit | Effect on Wood Surface |
|---|---|
| 120 | Opens grain, deeper stain |
| 180 | Balanced smoothness, good absorption |
| 220 | Smooth surface, moderate absorption |
| 320+ | Grain closes, poor absorption |
| 400+ | Surface too sealed for stain |
Stick to 220 grit or less to maintain proper stain penetration and achieve a vibrant, consistent finish.
Picking the Right Final Sanding Grit for Hardwood vs. Softwood
Choose your final sanding grit carefully based on whether you’re working with hardwood or softwood, as each type responds differently to stain absorption.
Selecting the right final sanding grit depends on whether your wood is hardwood or softwood.
For softwoods like pine or alder, finish sanding between 180 and 220 grit. This range smooths the surface without overly sealing the wood, especially for water-based stains.
If you’re using oil-based stains on softwoods, stopping at 180 grit helps maintain enough texture for deeper color penetration.
Hardwoods such as maple or oak require a different approach; aim for 150 to 180 grit as your final sanding step. Over-sanding hardwoods can create an overly smooth surface that resists stain absorption, leading to uneven coloring.
Adjust your grit choice to balance smoothness with the wood’s natural porosity for the best stain results. Be cautious not to sand beyond 320 grit to prevent closing wood pores, which can reduce oil absorption and affect the finish, a key factor when preparing for staining with fine grit sandpapers.
Best Sanding Grits for Interior and Exterior Staining Projects
Prepare your wood surface by selecting the appropriate sanding grits tailored to interior or exterior staining projects.
For interior wood, start sanding between 100 and 150 grit, then finish with 180 to 220 grit to guarantee smoothness and good stain absorption.
Exterior wood usually requires a coarser start, around 80 to 120 grit, especially if the surface is rough or weathered.
After leveling, move up to 180 or 220 grit for a uniform finish that accepts stain well.
Remember to sand with the grain and remove scratches from each grit before moving finer.
Avoid sanding too finely beyond 220 grit, as it can reduce stain penetration, especially on softwoods.
This approach balances surface smoothness with optimal stain absorption for both indoor and outdoor projects.
For best results on challenging woods like maple, consider using a gel stain to reduce blotching and enhance grain control.
Tips for Sanding Techniques to Get Smooth, Even Stain Results
Now that you understand the ideal sanding grits for interior and exterior staining, focusing on your sanding technique can greatly improve your results.
Always sand with the wood grain to avoid cross-grain scratches that show under stain. Progress gradually through grits; don’t skip from coarse to very fine so each sanding step removes scratches left by the previous grit.
Apply even pressure and keep your strokes consistent to prevent uneven surfaces. Stop sanding once scratches from the prior grit vanish; over-sanding can smooth the wood too much, reducing stain absorption.
For best results, clean dust thoroughly between grits and before staining. This approach guarantees your surface is smooth yet porous enough for stain to penetrate evenly, delivering a rich, uniform finish every time.
Using overlapping sanding passes ensures even abrasion and helps avoid patchiness during the sanding process.
Frequently Asked Questions
Can I Use a Sanding Block Instead of a Power Sander Before Staining?
Yes, you can use a sanding block instead of a power sander before staining. It gives you more control, especially on smaller or delicate pieces, helping avoid over-sanding.
Just make certain to sand evenly with the grain and progress through grits gradually, removing scratches from each step. While it takes more time, a sanding block guarantees a smooth, consistent surface ready to absorb stain properly without the risk of damaging the wood.
How Long Should I Wait After Sanding Before Applying Stain?
You should wait about 15 to 30 minutes after sanding before applying stain. This lets the wood’s surface dust settle and any raised grain relax, ensuring better stain absorption.
Make sure to wipe the surface clean with a tack cloth or vacuum to remove all dust. Avoid waiting too long, as open wood pores can dry out and absorb stain unevenly, leading to blotchy color.
Should I Clean the Wood Surface After Sanding Before Staining?
Yes, you should always clean the wood surface after sanding before staining. Dust and debris can prevent the stain from penetrating evenly and cause blotchy results.
Use a vacuum or a tack cloth to remove all sanding dust thoroughly.
You might also wipe with a damp cloth, but make sure the wood is completely dry before staining.
This step guarantees a smooth, consistent finish and better stain absorption.
Does Humidity Affect Sanding Grit Choice Before Staining?
Yes, humidity does affect your sanding grit choice before staining. When wood is damp or in a humid environment, it tends to swell and close its grain.
You might want to avoid sanding too finely, like above 180 grit, to guarantee the stain penetrates well. Also, sanding with coarser grits, such as 120, helps open the grain for better absorption.
Always sand with the grain and adjust grit based on moisture levels for best results.
Can Sanding Too Aggressively Damage the Wood Grain for Staining?
Yes, sanding too aggressively can damage the wood grain for staining. When you use overly coarse grit or press too hard, you risk gouging or unevenly roughening the surface.
This hinders even stain absorption and can cause blotchy or uneven color.
Always sand gradually, removing scratches from the previous grit, and avoid skipping steps. Sanding with the grain and using the right pressure preserves the wood’s texture for a smooth, uniform stain finish.
Final Thoughts on Choosing the Right Sandpaper Grit for Staining
Remember, “measure twice, cut once” applies to sanding too. Starting with a coarser grit and finishing with the right finer grit makes certain your wood absorbs stain evenly and beautifully.
Avoid sanding too fine to prevent blotchy finishes. Tailor your grit choice to the wood type and project location: hardwood, softwood, interior, or exterior.
With careful sanding, you’ll achieve a smooth, professional-looking stain every time. Take your time and sand smart for the best results.