How to Use Pocket Hole Jig: Get Stronger Wood Joints
Start by measuring your board’s exact thickness and set the drill bit’s depth stop to match.
Clamp the jig securely to the workpiece, ensuring it’s flush and stable.
Drill angled pocket holes steadily, allowing the stop collar to halt the bit at the correct depth while clearing chips frequently.
After drilling, align and clamp mating pieces, then fasten with pocket hole screws for strong joints.
Follow these precise steps to achieve clean, reliable connections and improve your joinery skills further.
Key Takeaways
- Measure your board’s actual thickness accurately and adjust the jig drill-guide to match for precise pocket hole placement.
- Set the drill bit depth by aligning the tip with the jig base and securing the stop collar at the measured thickness mark.
- Clamp the jig firmly to the workpiece using non-marring clamps to ensure stability and prevent movement during drilling.
- Drill pocket holes steadily with medium speed, keeping the bit aligned and backing it out periodically to clear wood chips.
- Assemble joints by aligning pieces, applying glue if needed, and fastening with square-drive screws spaced evenly for strong connections.
Measure Board Thickness to Match Your Jig

Start by accurately measuring the thickness of your board before setting up the pocket hole jig.
Use a caliper or ruler to obtain a precise reading, focusing on common thicknesses like 1/2 inch, 3/4 inch, 1 inch, or 1 1/2 inch.
This measurement guarantees you match the jig’s drill-guide setting correctly, which is critical for hole placement and joint strength.
Avoid assuming the board thickness based on nominal sizes, as actual thicknesses can vary.
Always measure the actual workpiece you intend to use, not just a sample.
Once measured, adjust your jig’s guide settings to correspond exactly with your board’s thickness.
Finally, test the setup on a scrap piece with identical thickness to confirm alignment and avoid costly errors on your final workpiece.
For enhanced joint durability, consider using threaded inserts for wood to reinforce your pocket hole connections.
Set Drill Bit Depth for Board Thickness
After matching your jig’s drill-guide to the board thickness, the next step is setting the drill bit depth accurately.
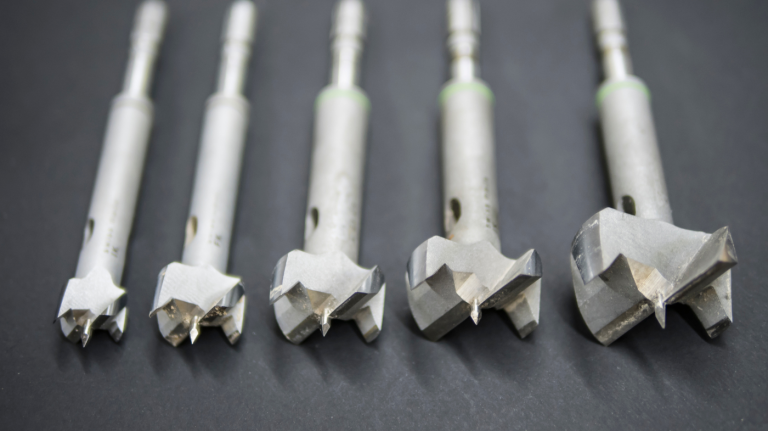
Insert the stepped drill bit fully into the guide until its tip aligns with the jig’s base reference point.
Slide the stop collar along the bit to the mark corresponding to your measured board thickness.
Use the included hex key or wrench to tighten the collar securely, ensuring it won’t shift during drilling.
Confirm the collar’s position stops the bit at the correct depth by testing on scrap wood of the same thickness.
Recheck and adjust the collar if you change the jig’s setting or workpiece thickness.
Proper depth prevents hole damage and guarantees tight joints, so precision here is essential before proceeding to drill pocket holes.
Using a precision combination square can help verify the drill bit depth accurately for consistent results.
Clamp Jig and Workpiece for Pocket Hole Drilling
When preparing to drill pocket holes, clamp the jig securely to your workpiece or a stable surface to prevent any movement that could misalign the hole angle.
Position the jig firmly at the board’s end or face, depending on your joint location, and use a reliable clamp to hold it in place.
Make sure the wood is stable and won’t shift during drilling, as any play can cause the drill bit to wander, resulting in misaligned holes.
Check that the jig sits flush against the board surface and that the clamping force doesn’t distort the wood.
Before drilling, verify the setup remains steady by gently testing for jig movement.
Keeping both jig and workpiece immobile guarantees consistent, accurate pocket hole placement throughout your project.
Using accessories with non-marring materials can help protect your workpiece during clamping and drilling.
Drill Pocket Holes Correctly Using the Jig Guide
Position the drill bit firmly in the jig’s guide hole and drill steadily until the stop collar contacts the jig, assuring consistent hole depth.
Secure the drill bit in the jig guide and drill steadily until the stop collar touches for precise hole depth.
To drill pocket holes correctly, follow these steps:
- Use medium drill speed for better control and clean holes.
- Keep the bit aligned within the guide to maintain the correct drilling angle.
- Back the bit out periodically to clear wood chips and prevent overheating.
- Drill all required holes before assembling to streamline your workflow.
Maintaining steady pressure and consistent speed prevents bit wandering and uneven holes.
Always verify stop collar settings and test on scrap wood before final drilling to assure precision.
This technique guarantees pocket holes with accurate depth and angle, essential for strong, reliable joints.
Using tools with precision locking systems enhances the accuracy and consistency of your pocket hole drilling.
Assemble Pocket Hole Joints for Strength and Fit
Align the mating pieces carefully before fastening to guarantee a tight, accurate joint. Begin by clamping the parts together to maintain alignment during screw insertion.
Apply wood glue if added strength is required, especially for load-bearing or furniture joints. Use pocket-hole screws driven with a square-drive bit, inserting them through the angled holes into the adjacent board.
Make certain you use at least two screws per joint to maximize stability. Position screws so the heads sit about 1/16 inch below the surface for a clean finish.
Check that pocket holes are centered in the board thickness and spaced evenly, typically 4 to 6 inches apart. Confirm the joint fits snugly without gaps before final tightening to assure structural integrity and precision.
For best results, maintain even clamp pressure during assembly to ensure strength and stability.
Frequently Asked Questions
Can I Use a Pocket Hole Jig on Metal or Plastic Materials?
You generally shouldn’t use a pocket hole jig on metal or plastic because it’s designed for wood’s density and grain.
Metal requires specialized drill bits and clamping methods to prevent slippage and damage.
Plastics can crack under the jig’s pressure.
If you must join these materials, consider alternatives like welding for metal or adhesives and mechanical fasteners for plastics.
Ensure you use tools and techniques suited to each material’s properties.
How Do I Maintain and Clean My Pocket Hole Jig for Longevity?
You should regularly clean dust and wood chips from the jig’s drill guide and clamps using a brush or compressed air.
Lubricate moving parts lightly with machine oil to prevent rust and assure smooth operation.
Check and tighten all screws and bolts periodically.
Store the jig in a dry place to avoid moisture damage.
Also, inspect the drill bit for wear and replace it when dull to maintain precise, clean holes consistently.
What Types of Screws Work Best With Pocket Hole Joints?
Think of pocket hole screws as the backbone of your joint, designed to lock pieces tightly like a handshake.
You’ll want coarse-thread screws for softwoods and fine-thread screws for hardwoods to ensure maximum grip without splitting.
Self-tapping screws with a flat or washer head work best, preventing stripping and providing a flush finish.
Using screws specifically made for pocket holes guarantees strength, precision, and durability in your woodworking projects.
Can Pocket Hole Joints Be Disassembled and Reused?
Yes, you can disassemble pocket hole joints, but reuse depends on screw and wood condition.
When removing screws, use a square-drive bit to avoid stripping.
Inspect screw holes carefully; repeated assembly may loosen the joint due to wood compression or hole wear.
For secure reuse, consider using longer screws or filling holes with wood filler before re-drilling.
Keep in mind, pocket hole joints are primarily designed for permanent assembly.
What Are Common Mistakes to Avoid When Using a Pocket Hole Jig?
Don’t rush setup; you’ll regret skipping thickness measurements or drill depth adjustments.
If your jig isn’t clamped firmly, holes will wander, ruining alignment. Avoid drilling too fast; overheating dulls bits and weakens joints.
Watch screw depth: too shallow or deep compromises strength. Also, never forget to test on scrap wood first.
These common mistakes can sabotage your work, but careful precision keeps your pocket hole joints strong and reliable every time.
Pocket Hole Jig Tips for Stronger, More Precise Joints
Now that you’ve mastered measuring, setting, clamping, drilling, and assembling with your pocket hole jig, you’re just one step away from flawless joints.
But here’s the catch: the strength and precision of your project hinge on every single detail you’ve learned.
Skip one, and the fit won’t hold. Follow each step exactly, and you’ll create joints that are not only strong but also professional-grade. Ready to build with confidence?