Bunk Bed Ladder Ideas: Stylish & Functional Options
You can choose from vertical, angled, or alternating-tread ladder styles to fit your bunk bed and space perfectly.
Opt for sturdy 2×4 rails and 2×2 rungs cut to about 18 inches wide with 12-inch spacing for comfort.
Add grip padding like foam sleeves or handlebar tape for safety. Secure rungs with pocket hole joints and cable ties to prevent slipping.
With careful sanding and finishing, your ladder will be both functional and stylish. Discover tips to enhance its safety and installation next.
Key Takeaways
- Choose ladder styles like standard vertical, angled, or alternating-tread based on space and climbing comfort needs.
- Use sturdy 2×4 rails and 2×2 rungs, spaced 12 inches apart, with at least 18-inch ladder width for safe footing.
- Position the bottom rung about six inches above the floor and allow 12 inches clearance above the top rung.
- Enhance grip safety with foam sleeves, handlebar tape, or padded covers, secured with cable ties or two-sided tape.
- Assemble using pocket hole joints, clamps, wood glue, and finishing nails; sand edges thoroughly to prevent splinters.
Bunk Bed Ladder Types and Styles Explained
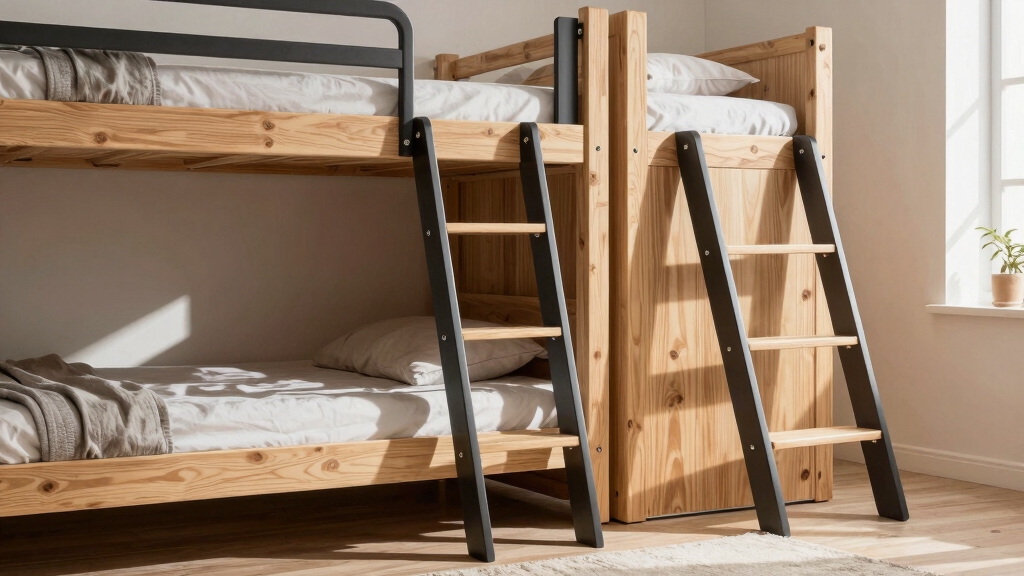
When choosing a bunk bed ladder, understanding the types and styles available helps you match both function and space constraints.
You’ll find standard vertical ladders offering a straight ascent, ideal for access openings around 21 inches wide. Angled ladders lean slightly, positioning the bottom rung about six inches from the base to accommodate structural needs.
If space is tight, alternating-tread ladders use left-right steps, mimicking stair climbing while minimizing footprint. Aesthetically, curved rail profiles with rounded ends enhance safety and style.
Construction details include pocket hole joints that hide screws beneath the ladder, blending durability with a clean look. Each style balances climbing comfort, spatial efficiency, and visual appeal, allowing you to pick a design that fits your bunk bed’s unique setup.
Using sturdy materials like 2×4 lumber and ensuring accurate measurements significantly improve the ladder’s stability and safety during use, as emphasized in construction steps.
Choosing the Right Ladder for Your Space and Needs
Selecting the right ladder means balancing your room’s layout with your daily needs, guaranteeing safety and comfort every time you climb.
Choosing the perfect ladder blends your space and needs for safe, comfortable climbs every time.
If space is tight, consider an alternating-tread ladder; its staggered steps save room without sacrificing ease of use.
For standard bunk beds with a 21-inch access opening, a vertical ladder fits perfectly, offering a straightforward climb.
Angled ladders provide extra stability and comfort by reducing the steepness, especially when the ladder’s base can’t sit flush with the floor.
Measure your available space carefully and match the ladder width to at least 18 inches for comfortable footing.
Don’t forget to leave a 12-inch clearance above the top rung to ease entry.
Choosing the right ladder design guarantees your bunk bed setup is both functional and visually appealing.
Additionally, considering ergonomic design can reduce physical strain when climbing and enhance safety.
Materials and Tools for Building a Bunk Bed Ladder
When you’re building a bunk bed ladder, one of the first things you’ll need is some sturdy 2×4 boards. Look for ones with straight grains. This will help ensure that your ladder is strong and durable, which is super important for safety.
Now, let’s talk tools. You’ll want to have some hole saws or Forstner bits that are about 1.25 inches. These will help you create clean and precise holes for the rungs. It’s all about making sure everything fits together nicely.
Don’t forget the wood glue! It’s essential for securing each step firmly in place. Having all these materials and tools ready means you’re setting a solid foundation for a ladder that’s not only safe but also complements the design of your bunk bed. Happy building!
Ensuring your cutting tools are properly maintained and aligned is crucial for making precise cuts, which will help your ladder fit together perfectly and safely, especially by checking blade alignment regularly.
Essential Wood Materials
Start your bunk bed ladder project by choosing sturdy, straight-grained 2×4 boards, typically 8 feet long, to serve as the primary rails. These boards provide the strength and stability needed for safe climbing.
For the rungs, select 2×2 lumber or solid dowels cut to about 15.5 inches, ensuring a comfortable 18-inch ladder width. Opt for wood with minimal knots and smooth texture to ease sanding and finishing.
Pay attention to grain direction; straight grains resist warping and enhance durability. Avoid overly dry or brittle wood to prevent cracking during assembly.
Using quality wood also improves the ladder’s aesthetic, allowing smooth, rounded rail profiles or clean edges after shaping. This careful material selection sets a solid foundation for a secure, visually pleasing bunk bed ladder. For added stability and resistance to warping over time, consider integrating Baltic Birch plywood components into your ladder design.
Recommended Construction Tools
While quality wood forms the backbone of your bunk bed ladder, having the right construction tools guarantees precision and durability throughout the build. You’ll want tools that help you create clean cuts, secure joints, and smooth finishes, essential for both safety and style.
For instance, drilling perfect holes for rungs requires specific bits, while sanding assures a splinter-free surface. Using the right tools also simplifies assembly and helps maintain consistent measurements.
Here are key tools you’ll need:
- Hole saw or Forstner bit (1.25-inch) for clean rung holes
- Power sander to smooth edges and surfaces
- Clamps for holding pieces during glue drying
- Cordless drill with screwdriver bits for secure fastening
- Carpenter’s square to ensure precise angles and alignment
For drilling the rung holes, a benchtop drill press with variable-speed control can provide the precision and clean edges necessary for a safe and sturdy ladder.
These tools make your ladder sturdy, safe, and visually appealing.
Designing Safe, Comfortable Ladder Steps
When you’re designing your ladder, aim to space the steps about 12 inches apart. This way, climbing feels smooth and natural. Plus, it makes it easier for everyone, especially kids!
Now, let’s talk about grip and comfort. Adding things like foam sleeves or handlebar tape really boosts safety and makes each step feel cozy underfoot. It’s all about that extra touch that makes a difference.
And don’t forget about the look! A well-thought-out step design not only serves a purpose but also adds a polished vibe to your bunk bed ladder. It’s all about balancing style with security, right?
For added safety, consider incorporating features that help prevent sudden movements to enhance control while climbing.
Step Spacing Standards
Although ladder design varies widely, adhering to precise step spacing standards guarantees both safety and comfort when climbing a bunk bed ladder.
You’ll want to maintain consistent spacing to promote a natural rhythm and reduce fatigue. The industry standard places rungs 12 inches apart. This guarantees each step feels secure and reduces the risk of slipping or missteps.
Additionally, allow at least 12 inches of clearance above the top rung for safe entry and exit.
Consider these spacing essentials:
- Rungs spaced 12 inches apart for comfort and safety
- Ladder width around 18 inches for easy foot placement
- 12-inch clearance above top and below bottom rung
- Rung length cut to 15.5 inches to match plank width
- Vertical rails about 5 feet 2 inches for proper ladder height
Following these standards makes your ladder both functional and inviting. Prioritizing safety by understanding tool limitations and proper design principles is essential when creating secure woodworking projects.
Grip and Padding Options
Enhancing ladder safety and comfort starts with choosing the right grip and padding options for each step.
You can slip insulating pipe foam or pool noodles, sliced lengthwise, over round rungs to soften the grip. Secure them firmly with cable ties.
For a sleek, functional look, wrap bicycle handlebar grip tape tightly around each rung. This adds texture and prevents slipping.
Curly spiral foam wraps offer another stylish padding alternative, providing cushioned support without bulk.
If your ladder has flat steps, consider attaching seat belt shoulder pads with Velcro for a soft, removable edge cover.
Remember to secure all padding with two-sided tape or cable ties to keep everything in place.
These thoughtful additions transform your ladder into a safer, more comfortable climb every time.
For enhanced safety during use, consider gloves with foam-padded knuckles to reduce impact to the hands when gripping ladder steps.
Adding Safety Features and Padding to Ladder Steps
When adding safety features and padding to ladder steps, consider materials that combine comfort with secure grip to protect little feet from slipping or injury. You want to enhance safety while keeping the ladder visually appealing and functional.
Start by choosing padding that fits snugly and stays firmly in place.
Here are some effective options to try:
Insulating pipe foam, slit lengthwise to fit over round rungs.
Pool noodles sliced and secured with cable ties.
Bicycle handlebar grip tape wrapped tightly around rung circumferences.
Curly spiral foam wraps cut to size and wrapped securely.
Seat belt shoulder padded protectors attached with velcro enclosures.
These solutions soften hard edges and provide traction, ensuring each step feels safe and comfortable for your child. For long-lasting safety, regular maintenance and inspection of the padding materials is recommended to prevent wear and slipping hazards.
Installing and Securing Your Bunk Bed Ladder
Since a securely installed ladder is essential for safe bunk bed access, you’ll want to guarantee every connection is tight and reliable.
Begin by aligning your ladder rails with the bunk’s frame, assuring the bottom rung sits about six inches from the base for stability.
Start by positioning the ladder rails flush with the bunk frame, keeping the bottom rung six inches above the floor.
Use strap hinges or screws, two per side of each step, to fasten the ladder firmly.
Reinforce glued rungs with finishing nails and consider cable ties to prevent step rotation.
Double-check rung spacing at 12 inches apart and maintain an 18-inch ladder width for comfortable climbing.
Finally, test the ladder’s sturdiness by gently applying pressure before use.
For long-lasting safety, periodically check and re-tighten screws to prevent loosening and sagging over time.
Finishing Touches: Sanding, Painting, and Invisible Joinery
Though the structural work is complete, the ladder’s final appeal and safety come from careful sanding, painting, and employing invisible joinery techniques.
You’ll want to smooth every edge and hole to prevent splinters, especially if kids will use it.
Painting adds personality and protects the wood, but make sure to let it cure overnight for durability.
Invisible joinery, like pocket holes, keeps screws hidden, maintaining a clean, streamlined look without compromising strength.
Consider these finishing touches:
- Sand rough edges and hole perimeters thoroughly.
- Use a mallet to tap rungs flush with rails.
- Apply quality paint with at least one overnight drying period.
- Employ pocket hole joints for screw concealment.
- Use scrap wood spacers to make certain even rung spacing before final assembly.
This approach blends safety, function, and style beautifully.
Frequently Asked Questions
How Do I Measure My Child’s Height for Ladder Step Placement?
To measure your child’s height for ladder step placement, have them stand straight against a wall barefoot.
Mark the top of their head with a pencil. Measure from the floor to this mark, then divide the height by the number of ladder steps you plan to install.
This guarantees each rung is spaced comfortably, typically about 12 inches apart, matching your child’s reach for safe, ergonomic climbing.
Can Bunk Bed Ladders Be Customized for Left or Right Side Access?
You can customize bunk bed ladders for left or right side access to perfectly fit your room’s layout.
By adjusting the angled ladder’s inclination or repositioning the vertical rails, you’ll create a seamless and safe climb on either side.
Using pocket hole joinery and carefully measured rungs spaced 12 inches apart, you’ll maintain both function and aesthetics.
Adding curved rail profiles or grip tape enhances safety and style, matching your design vision effortlessly.
What Is the Best Ladder Design for Small Children?
You’ll want an angled ladder with wide, flat steps for small children. It’s safer and easier to climb than a vertical one.
Adding padded grips or foam-wrapped rungs prevents slipping and softens hard edges.
Make sure rungs are spaced about 12 inches apart for comfortable climbing. Maintain a 12-inch clearance above the top step.
Rounded rail ends and smooth sanding make it both visually appealing and kid-friendly, combining safety with style.
How Often Should Ladder Safety Padding Be Replaced?
You should replace ladder safety padding every six months or sooner if you notice wear, tears, or loss of cushioning.
Kids’ constant climbing can compress foam or loosen grips, reducing protection.
Regularly inspect padding like pipe foam, pool noodles, or grip tape for cracks or slipping.
Swapping out worn padding keeps the ladder safe and comfortable, preventing accidents while maintaining that neat, finished look you want for your child’s space.
Are There Weight Limits for Homemade Bunk Bed Ladders?
Wondering if your homemade bunk bed ladder can safely support you? Yes, weight limits do exist, mainly depending on the materials and construction quality you choose.
Using sturdy 2×4 rails, secure dowel rungs, and strong joinery like pocket holes guarantees durability.
Typically, a well-built wooden ladder can handle 200-300 pounds, but always factor in safety padding and secure installation.
Isn’t your peace of mind worth that extra care?
The Secret to a Strong, Comfortable Bunk Bed Ladder
Think of your bunk bed ladder as the bridge connecting dreams and reality. Each step is carefully crafted for safety and style.
By choosing the right materials, designing comfortable steps, and adding thoughtful safety features, you’re not just building a ladder; you’re creating a seamless pathway to restful nights and playful days.
With proper installation and finishing touches, your ladder will blend beauty and function. It will support every climb with confidence and charm.