How to Stain Wood Filler: Achieving a Flawless Look
To stain wood filler effectively, choose a stainable filler with wood fibers and test on scrap wood first. Prepare the damaged area by cleaning and sanding, then apply filler slightly overfilled and feathered to blend. After thorough drying, sand smooth with fine grit.
Match filler color to your wood’s lightest tone for best results. Apply stain in thin coats, sanding lightly between layers for uniform absorption. For a flawless finish, proper preparation and color matching are key. Explore detailed techniques for optimum results.
Key Takeaways
- Choose a stainable wood filler with wood fibers that matches the lightest tone of your wood for better color blending.
- Apply filler in thin, feathered layers slightly above the surface and allow it to dry fully before sanding smooth.
- Sand the filler progressively with fine-grit sandpaper (120–320 grit), always sanding with the grain for a natural pore appearance.
- Test stain compatibility on scrap wood and apply stain in thin, even coats, feathering edges to blend with surrounding wood.
- After staining, seal with a clear protective finish and lightly sand between coats for a uniform, durable surface.
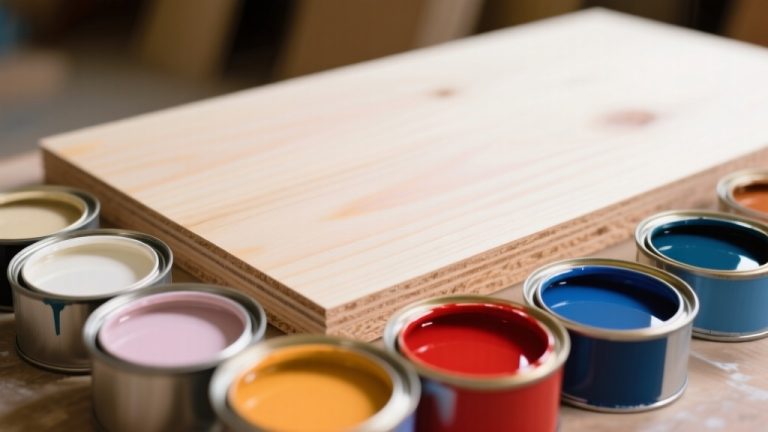
Selecting the Appropriate Wood Filler for Staining

When selecting a wood filler for staining, you need to focus on products specifically designed to absorb stain and blend seamlessly with the surrounding wood. Store-bought stainable fillers like Minwax Stainable Wood Filler, DAP Plastic Wood, and FamoWood Latex Wood Filler are formulated for this purpose.
These fillers are tested on pine samples and prepared carefully to provide the best stain absorption and color matching. You can also create homemade fillers by mixing sawdust from your wood species with wood glue to improve color matching. Using tools with enhanced control can help achieve a more precise application of filler.
Avoid epoxy or two-part fillers for staining, as they often don’t assimilate stain uniformly. Test your chosen filler on a scrap piece of the same wood before applying it to your project to ensure compatibility.
Consider the texture and sanding properties of the filler, since these affect stain absorption and the final appearance. Sandability of fillers is an important factor that influences how well the filler will accept stain and blend with the wood surface.
Preparing Wood Filler for Application
Selecting the right wood filler for staining sets the foundation, but preparing the surface properly guarantees the filler adheres effectively and delivers a smooth, stain-ready finish.
Start by thoroughly cleaning the area to remove dust and loose fibers with a brush or vacuum. Inspect for cracks or debris, then clear out old material using a putty knife. Ensure joints are tight and the surface is dry, maintaining controlled humidity and temperature for optimal adhesion.
Considering the material choice of the filler will improve the overall durability and stain absorption. Lightly sand to remove imperfections and existing finishes. Use appropriate tools to apply filler and allow it to cure fully before sanding smooth.
| Step | Action |
|---|---|
| Clean | Remove dust and loose fibers |
| Inspect | Identify cracks and debris |
| Clear Debris | Use putty knife to clean area |
| Check Joints | Secure loose joints |
| Sand Surface | Smooth imperfections |
Techniques for Applying Wood Filler Smoothly

Although applying wood filler may seem straightforward, achieving a smooth, seamless repair requires deliberate technique and the right tools.
Use a flexible putty knife or plastic spreader for controlled, even coverage, and work in thin layers to reduce shrinkage and cracking. Feather edges beyond damaged areas to blend repairs seamlessly, and slightly overfill holes to compensate for drying shrinkage.
Selecting the appropriate filler type based on the size of the repair and the location (interior or exterior) will enhance the durability and finish of the repair, ensuring better adhesion and longevity (Choosing the Right Wood Filler).
Proper tool ergonomics and control, similar to the finesse needed with a dovetail saw, can improve the precision of filler application. Follow these steps for smooth application:
- Apply filler in manageable sections, shaping and smoothing the surface before drying for easier sanding.
- Avoid excessive rewetting of waterborne fillers to prevent coagulation and uneven texture.
- For intricate areas, use smaller tools or sculpting instruments to match contours precisely.
Drying and Sanding Wood Filler Before Staining
You need to let wood filler dry thoroughly before sanding, which can take from one hour to several hours depending on filler thickness and environmental conditions.
Use fine-grit sandpaper, typically between 120 and 180 grit, to smooth the filler flush with the surrounding wood. Always sand with the grain. Proper drying and precise sanding ensure even stain absorption and prevent surface imperfections.
Achieving uniformity in surface texture is crucial to obtaining a consistent finish when staining.
Optimal Drying Time
When working with wood filler, allowing adequate drying time before sanding and staining is essential to achieve a smooth, even finish. Drying time varies by product and fill depth, so always consult manufacturer guidelines.
Generally, shallow fills dry in under an hour, while deeper fills require 2–6 hours or more. This filler dries very hard, making it sandable and ready for sealing once fully cured. To guarantee ideal drying:
- Check dryness by touch; filler should be hard, not tacky, and visually confirm no wet spots remain.
- Sand a small area; filler should powder smoothly without clogging sandpaper.
- Consider environmental factors like temperature and humidity, which can extend drying time. Proper environmental control can also prevent issues like resin buildup that affect finish quality.
Following these steps prevents blotchy staining, filler damage, and poor adhesion. Plan your work in stages, applying thin layers and allowing full curing before proceeding.
Sanding Techniques and Grit
Before staining, sanding wood filler with the correct grit is essential to guarantee a smooth, level surface that blends seamlessly with the surrounding wood. Start with medium grit sandpaper (120-150 grit) to level roughness without sealing pores.
Progress to finer grits, up to 220 for water-based stains or around 180 for oil-based stains on softwoods, to optimize stain absorption. Always sand gently along the wood grain to prevent damage or unevenness.
Avoid oversanding, which can expose filler edges or create dips. Use a light touch, especially when hand sanding or using an orbital sander. After sanding, remove all dust with a dry cloth or vacuum before staining.
Inspect the area carefully and patch any imperfections with filler to ensure a flawless, consistent finish. Regular maintenance and cleaning, similar to preventing residue buildup, help preserve the integrity and appearance of wood surfaces before staining.
Best Practices for Staining Wood Filler

Although staining wood filler can be challenging, following best practices guarantees a consistent and natural-looking finish. First, select a stainable wood filler that matches your wood’s color and dries hard for smooth sanding. Choose a high-quality filler formulated with wood fibers to mimic wood’s absorption properties and ensure better stain blending.
Next, apply the filler slightly above the surface in thin layers, feathering edges for seamless blending. After thorough sanding with progressively finer grits (120 to 220), remove all dust with a damp cloth to assure uniform stain absorption.
- Pre-treat the filler with a wood conditioner if it absorbs stain unevenly.
- Stain along the wood grain using light brush strokes, feathering outward to blend gradients.
- Apply stain in thin, progressive coats, allowing full drying between layers to avoid blotchiness.
Methods for Achieving Perfect Color Matching
You’ll start by selecting a filler color that matches the lightest background tone of your wood, testing samples to guarantee accuracy. It is important to choose the correct color to ensure a seamless repair. Proper sanding in the direction of the wood grain helps achieve a smooth surface for better filler adherence.
Next, tint your filler by blending pigments or sawdust incrementally, documenting ratios for consistency.
Finally, apply post-stain touch-ups using thin glaze layers to correct minor color discrepancies and achieve seamless integration. Proper sanding ensures a gouge-free, smooth finish and helps restore the wood’s natural appearance, while avoiding sanding beyond 320 grit to maintain wood pore integrity.
Choosing Filler Color
When matching wood filler color, focus on the lightest tone of the wood’s surface rather than the darker grain lines to guarantee the best visual integration.
Selecting filler to match the main background color ensures minimal contrast after finishing, as fillers absorb stain differently than wood. Note that commercial fillers are often not an exact colour match to the wood, which can affect the final appearance.
Proper lighting and a clean workspace can enhance the accuracy of color evaluation during this process. To choose the right filler color:
- Prepare samples by applying filler to scrap wood, sand, and finish identically to your project piece.
- Assess color match under the same lighting conditions as the final installation, checking at all stages—wet, dry, and post-finish.
- Use commercial color charts or create custom filler by mixing fine sawdust from your project wood with adhesive for optimal color fidelity. This DIY approach allows you to customize filler more precisely than store-bought options. Additionally, understanding the wood grain direction can improve how the filler interacts visually with the surrounding wood.
Tinting Fillers Effectively
Since achieving a perfect color match requires precision, tinting wood fillers effectively demands careful selection and gradual incorporation of pigments compatible with the filler base. Start by mixing white pigment to lighten, then add red or yellow for hue, and black to darken. Use alcohol-soluble dyes for water-based fillers and epoxy-compatible pigments for epoxy fillers.
Test small batches to confirm compatibility and avoid drying issues. For enhanced precision, consider tools with micro-adjustable bevel angle features to ensure exact edge finishes on your stained wood surfaces. Maintain consistent stirring to prevent streaking.
Pre-tint fillers before application for uniform color and smooth sanding results. Combine parts A and B according to product instructions and mix thoroughly until a uniform consistency is achieved before adding pigments.
Post-Stain Touch-Ups
Although achieving a seamless color match after staining can be challenging, employing careful post-stain touch-up techniques guarantees professional results. Start by sanding the cured filler smooth, then clean the surface thoroughly.
Since wood filler does not accept stain the same as natural wood, using alternative color-matching methods may be necessary. Use a fine brush to apply thin coats of stain or acrylic paint, feathering edges with a fan brush or cloth to blend gradations fluidly.
Follow these steps for perfect color matching:
- Layer stains and pigments gradually, allowing full drying between coats to avoid blotchiness.
- Use dotting techniques or colored pencils for precise shading on blotchy spots.
- After touch-ups, apply clear protective finishes, sanding lightly between coats to unify texture and color.
Choosing the Right Finishing Products After Staining
Selecting the right finishing products after staining wood filler directly impacts both the appearance and durability of your repair. Choose clear topcoats like polyurethane, lacquer, or shellac to protect and preserve color.
Match your finish to the filler type: use water-based finishes with latex fillers and oil-based finishes with solvent-based fillers to ensure adhesion. Epoxy fillers work with most finishes, but test first. It is important to note that epoxy provides structural integrity and should be carefully matched with compatible finishes.
Apply thin, even coats and sand lightly between applications for smoothness. Seal filler edges to avoid visible lines. Using finishes with film-forming properties enhances the protection and longevity of the repaired surface.
For durability, use film-forming finishes like polyurethane or varnish, especially for high-traffic or exterior surfaces. Consider color shift; water-based finishes remain clear, while oil-based finishes may amber over time. Finish the entire surface uniformly to maintain a consistent sheen and protection across your project.
Troubleshooting Common Wood Filler Staining Issues
When you encounter uneven staining or blotchy spots on wood filler, the root causes often involve the filler’s composition and application. Wood filler lacks natural fibers, so it absorbs stain differently than wood, leading to lighter or blotchy areas.
Application errors like overfilling or insufficient drying worsen this issue. Proper drying of wood filler is essential before staining to prevent these uneven absorption problems. To troubleshoot effectively:
- Sand the entire surface evenly to unify texture and improve stain absorption; avoid sanding filler flush immediately to allow shrinkage.
- Use a fine brush with artist oil paints (raw sienna, burnt umber) to touch up lighter filler spots after staining.
- Confirm filler and stain compatibility by testing on scrap wood; choose water-based fillers for water-based stains and consider mixing dyes into filler for better matching.
Frequently Asked Questions
Can I Reuse Leftover Wood Filler After Staining?
You generally shouldn’t reuse leftover wood filler once it’s been stained. The stain changes its composition, causing poor adhesion and uneven color absorption. This can lead to visible mismatches and texture differences.
For best results, use fresh filler for critical repairs. If you must reuse it for hidden areas, mix it with fresh filler and test on scrap wood first. Proper storage of unstained filler is key to preserving its usability.
How Long Should I Wait Between Stain Coats on Filler?
You’ll want to give each stain coat on filler a patient nod of at least 24 hours before applying the next. This pause ensures the stain fully settles and absorbs evenly, preventing blotchiness.
Remember, drying times can vary with stain type and environment, so test dryness by touch or a cloth rub. Follow manufacturer instructions closely to achieve a smooth, uniform finish that adheres well and lasts.
Is It Safe to Stain Filler Indoors Without Ventilation?
No, it’s not safe to stain filler indoors without ventilation. Stains contain harmful solvents that release toxic fumes, which can cause respiratory irritation, headaches, and dizziness.
Without airflow, these vapors build up, increasing health risks. Always guarantee proper ventilation by opening windows or using fans. Wear protective gear like gloves and a respirator. Prioritize safety to avoid acute or long-term health issues during staining indoors.
What Tools Clean Stain off Wood Filler Mistakes?
You’ll need soft cloths or fine-bristle brushes to apply cleaning solvents gently, avoiding damage to surrounding wood. Use mineral spirits for oil-based stains, water for latex-based, and acetone cautiously for tougher stains.
Fine-grit sandpaper (120–220 grit) or sanding sponges help remove overspill mechanically once dry. Chemical stain removers require gloves and ventilation; apply carefully in small sections. For minor spots, household items like baking soda paste or vinegar and olive oil mix work well.
Can Wood Filler Be Stained on Painted Surfaces?
Only about 20% of wood fillers stain evenly, so you’ll likely notice a color mismatch on painted surfaces. You shouldn’t stain wood filler on painted wood because fillers don’t absorb stain like natural wood.
Instead, apply filler, sand smooth, prime, then paint for a uniform finish. Choose paintable fillers designed for this purpose. This method guarantees seamless repairs without the blotchy appearance that staining causes.
Color Matching: The Secret to Natural-Looking Results
By selecting the right wood filler and preparing it carefully, you set the stage for a flawless finish. Apply smoothly, dry thoroughly, and sand evenly to guarantee your stain soaks in like a sponge.
Matching colors precisely and sealing with the right finish will make your repair virtually invisible. With these steps, staining wood filler becomes as straightforward as following a blueprint—turning imperfections into seamless beauty every time.