Can You Use Polycrylic Over Paint? Expert Tips and Tricks
Yes, you can use polycrylic over paint, but make sure the paint is fully dried and cured, ideally for at least 24 hours or longer for latex. Lightly sand the surface to promote adhesion and clear away any dust before applying thin, even coats with a synthetic brush.
Polycrylic offers durable, clear protection without yellowing, enhancing your paint’s finish. If you want to guarantee flawless results and learn the best application tips, keep exploring these essential details.
Key Takeaways
- Polycrylic can be applied over fully dried and cured latex paint for a clear protective finish.
- Avoid using polycrylic over oil-based paints as it may not adhere properly.
- Lightly sanding the painted surface before application improves polycrylic adhesion.
- Apply thin, even coats of polycrylic with a synthetic brush and allow full drying between coats.
- Polycrylic enhances paint durability without yellowing, making it ideal for indoor painted surfaces.
Understanding Polycrylic and Its Compatibility With Painted Surfaces
Although polycrylic is often chosen for its clear, non-yellowing finish, understanding its chemical makeup and compatibility with different paints is essential to achieving durable results.
Polycrylic is a water-based protective finish composed primarily of acrylic and polyurethane, offering superior scratch resistance and a clear coating ideal for interior wood and painted furniture. Its waterborne formula contributes to reduced fumes and faster drying times compared to solvent-based finishes.
It’s chemically compatible with latex paints, provided the paint is fully dried and cured, preventing peeling or adverse reactions. However, polycrylic may not bond well with oil-based paints, so matching base layers carefully is critical.
Available in gloss, semi-gloss, and satin sheens, polycrylic enhances without yellowing. Its waterborne formula ensures easy cleanup with soap and water, simplifying maintenance without compromising finish quality. Before application, it is important to lightly sand the painted surface with fine-grit sandpaper to ensure smoothness and promote adhesion.
Preparing Painted Surfaces Before Applying Polycrylic
Before applying polycrylic, you must guarantee the painted surface is fully dry and cured to prevent adhesion problems such as peeling or crackling. Allow at least 24 hours for typical latex or acrylic paints to dry, ensuring no tackiness or moisture remains. Maintaining appropriate environmental conditions similar to those recommended for power tools can also benefit the curing process.
Ensure paint is completely dry and cured—at least 24 hours—to avoid peeling or crackling before polycrylic application.
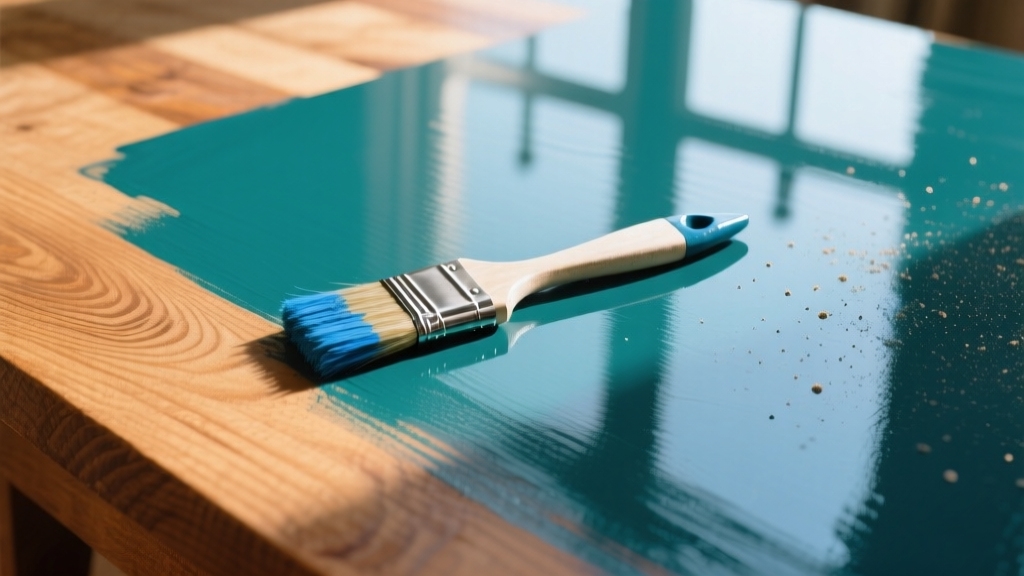
Lightly sand the surface with 220-grit sandpaper to create a slight texture, which improves polycrylic adhesion. Use gentle pressure to avoid damaging the paint or exposing the substrate. The preferred application method is with a synthetic bristle brush, applying in the direction of the grain with long, continuous strokes to reduce streaks.
After sanding, thoroughly remove dust using a vacuum followed by a tack cloth; avoid wet cloths to prevent moisture interference. Verify no contaminants like wax or oils remain by cleaning with mild detergent if necessary.
Maintain appropriate environmental conditions—60-80°F with low humidity—to optimize curing. Handle the surface carefully until polycrylic application and drying are complete.
Best Techniques for Applying Polycrylic Over Paint
When applying polycrylic over paint, choosing the right tools and techniques is essential to achieve a smooth, durable finish. Start with a clean, fully dried surface, lightly sanded with 220 grit paper to ensure adhesion and remove imperfections.
Use a tack cloth to remove any dust or debris before applying the polycrylic, as a dust-free finish is crucial for proper adhesion. Using flexible tools similar to those designed for fine joinery work can help in achieving better control during application.
Use a high-quality synthetic bristle or foam brush for smooth application, avoiding rollers that cause bubbles.
- Apply thin, even coats in one direction, crossing lightly on larger surfaces to minimize marks and bubbles.
- Allow each coat to dry thoroughly, typically several hours, before sanding lightly with fine grit to reduce texture buildup.
- Work in a well-ventilated, moderate temperature environment to promote proper drying and prevent streaking or tackiness.
Durability and Benefits of Using Polycrylic as a Protective Finish
Applying polycrylic correctly sets the foundation for a durable protective finish that preserves your painted surfaces. It forms a hard, clear barrier resistant to scratches, stains, and wear, enhancing paint color without yellowing or clouding.
Each thin, fast-drying coat builds durability, suitable for indoor furniture, trim, and cabinets. Because it is a water-based, clear protective finish, polycrylic is environmentally friendly and easy to work with.
Though less robust than oil-based polyurethane, polycrylic withstands moderate use and moisture, making it ideal for low-traffic areas. Its water-based formula reduces VOC emissions and odor, ensuring safer indoor application and easy cleanup with soap and water. However, achieving optimal results requires precise application techniques similar to those needed for complex finishes.
Available in multiple sheens, polycrylic maintains clarity on light colors, preserving texture and vibrancy. Overall, it delivers strong protection, environmental benefits, and aesthetic enhancement, extending the life and appearance of painted surfaces efficiently.
Common Challenges and How to Avoid Them When Using Polycrylic
Since polycrylic is water-based and fast-drying, mastering application techniques is essential to prevent common issues such as streaks, bubbles, and uneven coverage. You must guarantee the paint is fully dry and cured, ideally four weeks for latex, before application.
Use thin coats and a fresh can to maintain smooth consistency. Apply polycrylic in a low-humidity, dust-free environment at moderate temperature for best results, ensuring conditions that promote blade stability in woodworking are similarly beneficial for finish applications.
Master polycrylic application by ensuring fully cured paint, using thin coats, and applying in ideal conditions for a flawless finish
To avoid challenges:
- Lightly sand the painted surface with 220-grit to improve adhesion, removing dust thoroughly before polycrylic. Avoid over-brushing to prevent brush strokes and streaks during application.
- Use a foam roller, rolling in one direction and lightly across if needed, to spread evenly and minimize marks.
- Allow ample drying time between coats to prevent moisture entrapment and bubbling.
Frequently Asked Questions
Can Polycrylic Be Tinted to Change Its Color?
Yes, you can tint polycrylic by mixing it with oil-based stains or water-based dyes like TransTint. You’ll want to blend the tint right before application to avoid color shifts or matte finishes.
Keep in mind, quick drying requires fast brushing to prevent marks. Adjust tint strength carefully to maintain clarity and durability.
Testing compatibility and applying in thin layers ensures a smooth, custom-colored protective finish that enhances both color and wood grain.
How Long Does Polycrylic Take to Fully Cure?
Polycrylic typically takes about 24 hours to fully cure after the final coat.
However, full hardness might extend to several days or even weeks depending on coat thickness and number.
You should wait this long before subjecting the surface to heavy use or contact to guarantee maximum scratch and scuff resistance.
Environmental factors like temperature and humidity can influence curing time, so maintain ideal conditions around 77°F and moderate humidity for best results.
Is Polycrylic Safe for Children’s Furniture?
Yes, polycrylic is safe for children’s furniture once fully cured, typically within a month. Its low VOC, water-based formula reduces harmful fumes during application, and it forms a hard, durable film resistant to chipping or ingestion.
You should guarantee proper ventilation and allow sufficient curing time before use.
For maximum safety, apply according to manufacturer guidelines and consider certified child-safe products if you want an added layer of assurance.
Can Polycrylic Be Used Outdoors on Painted Surfaces?
You shouldn’t use polycrylic outdoors on painted surfaces because it lacks UV protection and isn’t weather-resistant.
It bonds better with latex paint but tends to cloud, peel, and lose adhesion when exposed to sunlight, moisture, and temperature changes.
For outdoor durability, opt for exterior-grade polyurethane or spar urethane instead. These provide superior UV resistance and moisture protection, ensuring your painted surfaces stay intact and clear much longer in outdoor conditions.
How Should Leftover Polycrylic Be Stored?
Think of storing leftover polycrylic like preserving a fine wine. You should seal the can tightly, using a rubber mallet if needed, and store it upside down to create a liquid barrier that prevents evaporation.
Keep it in a cool, stable spot between 50°F and 80°F, away from heat and moisture.
Transfer small amounts into airtight containers to reduce air exposure, stir before sealing, and label with the date to maintain quality and consistency.
Seal the Deal: Protect Your Paint With Polycrylic
You can confidently coat your painted projects with polycrylic to protect and preserve their polished perfection. Preparing your painted surface properly prevents peeling and promotes a smooth, sturdy shield. Applying polycrylic precisely, using thin, even layers, ensures lasting luster without streaks or smudges.
While challenges can crop up, careful care and correct techniques create a clear, clean, and durable defense. Embrace polycrylic’s protective power to prolong your paint’s pristine presentation.