How to Use a Hand Plane? Beginner’s Guide to Fine Shavings
To use a hand plane effectively, first choose the right plane for your project and sharpen its blade to create fine shavings. Adjust the blade depth so it just barely extends beyond the sole.
Stand with feet apart and knees bent, gripping the rear tote with your dominant hand and the front knob with the other.
Apply pressure starting at the front, shifting to the rear as you push forward smoothly along the grain. Mastering these basics sets a solid foundation for more advanced techniques.
Key Takeaways
- Select the appropriate hand plane type and size based on your project and wood material.
- Sharpen and set the blade depth so it produces thin, even shavings for smooth cuts.
- Position your body with feet shoulder-width apart, knees bent, and use legs and core to push the plane.
- Grip the rear tote firmly with your dominant hand and control the front knob with the other for balance and pressure.
- Start each stroke applying pressure on the front knob, shift to the rear tote mid-stroke, and follow the wood grain with overlapping passes.
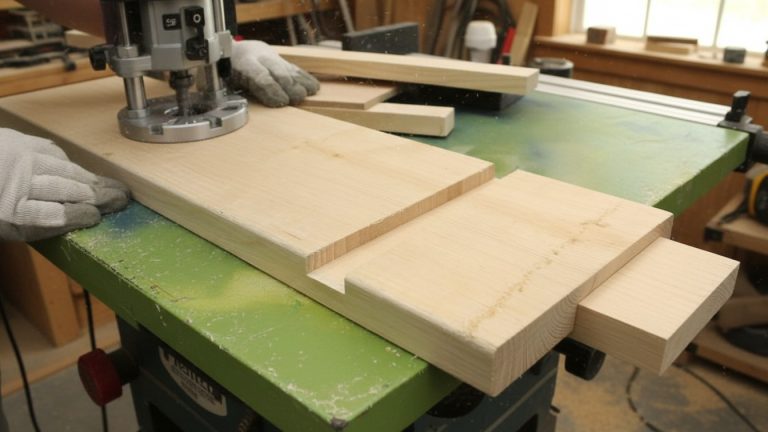
Selecting the Right Hand Plane for Your Project
When selecting the right hand plane for your project, you need to contemplate the specific tasks you’ll be performing and the characteristics of the wood you’re working with.
For rough work or removing material quickly, choose a jack plane. If you’re aiming for a fine surface finish, a smoothing plane is your go-to. To joint long edges, pick a jointer plane.
For small, detailed tasks, a block or finger plane works best. Hand planes come in various styles and materials, including all wood, all metal, or hybrid types, which can affect their performance and suitability.
Jack planes excel at rough work, smoothing planes perfect finishes, jointer planes align edges, and block planes detail small tasks.
Consider the wood type too; delicate woods demand more precise planes to avoid damage. Also, match the plane size to your project; larger planes handle thick, big boards, while smaller ones suit thin or intricate pieces. Additionally, the blade material of the plane plays a crucial role in its durability and cutting quality.
Understanding the Parts of a Hand Plane
Choosing the right hand plane sets you up for success, but understanding its parts lets you use it effectively and maintain it properly.
The main body, usually cast iron or bronze, provides structure, while the flat sole glides smoothly over wood. The mouth, a slot in the sole, controls shaving size and surface finish.
The blade, or iron, slices wood fibers, and the cap iron reduces tear-out by controlling shaving curl. Inside, the frog holds the blade at the correct angle, allowing depth adjustment and influencing mouth size.
You’ll grip the plane with the rear tote and front knob, designed for comfort and control. Additional features like the lever cap secure the blade assembly tightly, ensuring stability during planing.
Preparing and Adjusting the Plane Blade
Before you start planning, make sure your blade is sharp by sharpening and honing it at the correct angle. Using a honing guide can help maintain the set angle during sharpening. Proper blade maintenance is essential for achieving smooth and accurate results similar to those obtained with specialized tools such as a miter saw.
Next, set the blade depth carefully so it just barely extends beyond the sole for thin, smooth shavings. Finally, align the blade properly to guarantee even cutting and prevent uneven planing marks.
Blade Sharpening Techniques
Although sharpening a hand plane blade demands patience and care, mastering the process guarantees consistently clean, precise cuts. Start by selecting the right whetstone grit: coarse for reshaping, medium for honing, and fine for polishing.
Sharpen the bevel progressively, feeling for a burr along the entire edge—this confirms readiness to move to the next grit. Feel the burr carefully by sliding your finger along the edge to ensure the sharpening has reached the very edge of the blade.
Remove the burr by lightly lapping the blade’s back on a flat stone, ensuring it stays perfectly flat. Hone a secondary bevel at about 30 degrees on the cutting edge tip to strengthen the blade.
Break the corners slightly to prevent chipping. Use a honing guide for control if needed. Regularly test the blade’s sharpness by producing fine shavings, repeating honing until ideal sharpness is achieved.
Setting Blade Depth
Once your hand plane blade is sharpened to a keen edge, the next step involves setting its depth for accurate cutting. Start by slightly retracting the blade to avoid deep initial cuts.
Tap the top of the blade gently with a hammer to advance it, or tap the front of the plane on wood grain for fine adjustments. If your plane has a depth-adjuster wheel, turn it slowly while watching the blade’s extension at the sole.
Make small adjustments and test cut after each to check shaving thickness. Aim for thin, continuous, almost translucent shavings.
Use finger pressure on the sole to feel blade projection, ensuring it’s even side to side. Always secure the blade and keep adjustment screws lightly lubricated for smooth, consistent control.
Accurate settings, similar to the importance of blade width measurement, are essential for achieving precision in your cuts.
Aligning Blade Properly
When you align the blade properly, you’ll guarantee smooth, even shavings and prevent the workpiece from drifting off square. Start by centering the blade edge in the mouth, ensuring it protrudes just slightly.
Use the lateral adjuster to pivot the blade parallel to the sole, correcting any skew by moving the lever toward the high side. Adjusting the blade to the correct cutting angle is crucial because the effective cutting angle influences how cleanly the plane shears the wood fibers.
Sight along the sole to confirm the blade edge appears straight and even. Tighten the lever cap just enough to hold the blade firmly without distortion.
Remember, the sole must be perfectly flat and clean for consistent contact; check it periodically with a straightedge. Regular maintenance practices like cleaning and lubrication ensure smooth blade operation and longevity.
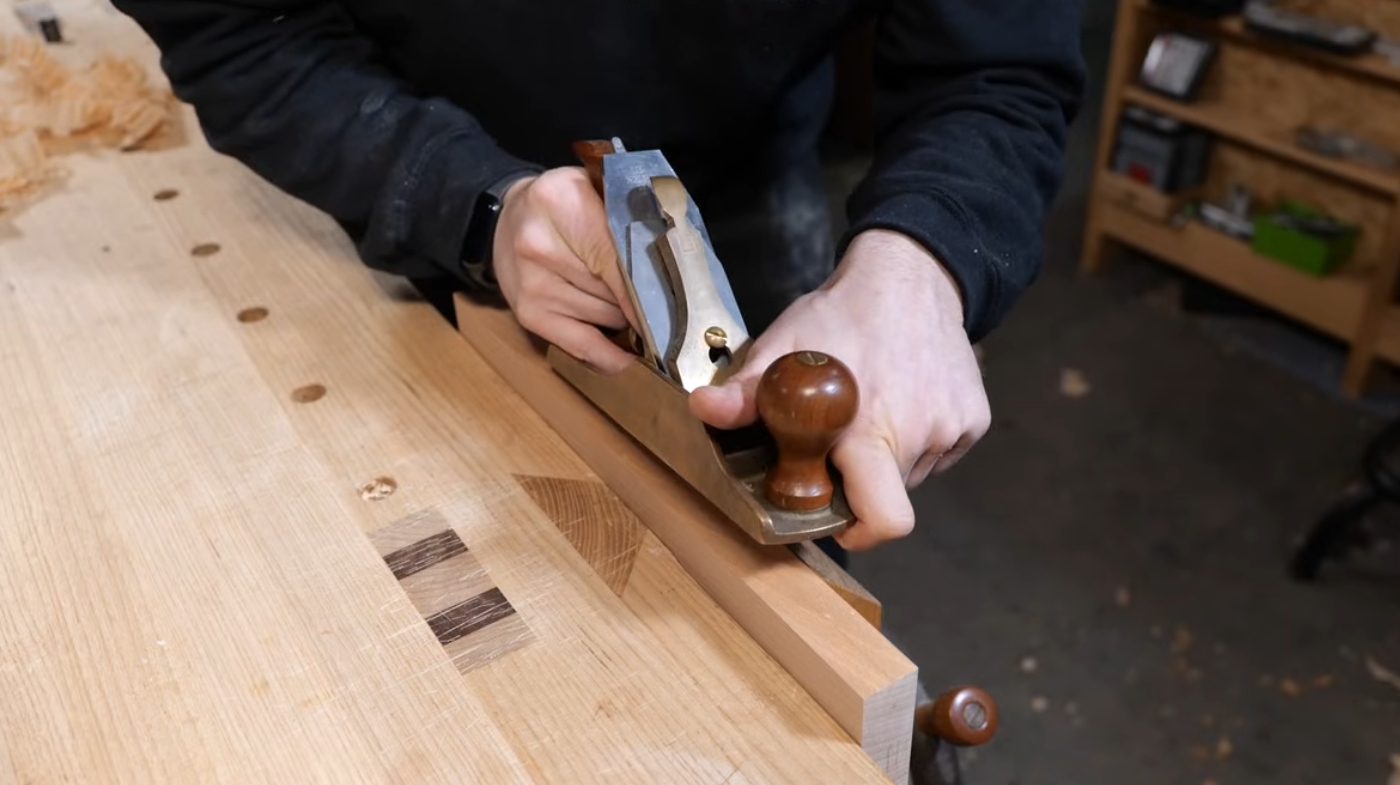
Proper Hand Plane Grip and Body Positioning
Start by wrapping your right hand firmly around the rear handle, ensuring your thumb traps the second finger for control while applying steady downward pressure. This proper grip creates necessary control tension between the index and little fingers for precise planing.
Position your left hand differently depending on whether you’re planing the face or edge, focusing on grip stability and steering. Stand with feet shoulder-width apart, shift your weight to the rear foot, and use your whole body to push the plane smoothly while balancing pressure between front and rear grips.
Correct Hand Placement
Although mastering a hand plane depends on various factors, your hand placement plays a crucial role in control and efficiency. Grip the rear handle firmly with three fingers wrapped through it, locking your right thumb against the second finger for stability.
Keep your right index finger inside the frog casting, away from the blade. Choosing tools with appropriate ergonomic design can further enhance comfort during prolonged use.
Press your palm down firmly on the tote, applying downward pressure. With your left hand, press the front knob or use a pincer grip depending on the board width, applying steady pressure and guiding the plane. Hook your left front finger over the edge as a fence to maintain consistent distance.
Balance pressure evenly between hands—right hand pushing down, left hand guiding—to ensure smooth, controlled strokes without tipping or blade misalignment.
The handle alignment should keep the plane in line with your arm, forearm, upper arm, and shoulder to make the plane feel like an extension of your body (proper alignment).
Body Alignment Techniques
Because proper body alignment directly impacts your control and endurance during planing, you’ll want to stand with your feet slightly apart, placing one foot forward and the other back with knees bent.
Movement should be initiated from the legs, with upper body remaining stable to reduce strain. Keep your torso aligned and hips parallel to the workpiece to apply force evenly.
Lean forward gradually, using your legs and core to drive the plane, not just your arms. Holding the tool with a proper grip helps maintain accuracy and reduces fatigue.
Hold the plane close to your body’s centerline, shifting weight smoothly from back foot to front as you push or pull. Keep your arms relaxed and close to your torso to reduce fatigue and maintain precision.
For longer boards, slide your back foot backward slightly to preserve leverage and balance. This whole-body engagement lets you plane efficiently with steady, controlled strokes.
Grip Pressure Control
When you grip a hand plane correctly, you gain precise control and reduce fatigue during long strokes. Your right hand wraps firmly around the rear tote, pushing forward with body weight, while your thumb traps the second finger for tension and stability. This method enhances cutting flexibility and allows for better handling of intricate work.
The left hand adjusts: use a palm-on knob grip for wide boards or a pincer grip near the mouth for edges to steer and balance.
Apply pressure starting firmly on the front knob, then gradually shift it rearward to preserve energy and keep the blade engaged. Always point a finger when using a hand plane to improve control and leverage.
Remember:
- Keep your grip firm but relaxed to avoid fatigue.
- Use consistent thumb and finger contact for steering.
- Coordinate grip pressure with your body’s rocking motion.
- Avoid twisting to maintain smooth, accurate cuts.
Techniques for Effective Planing
Mastering effective planing techniques starts with controlling pressure throughout each stroke to keep the blade cutting smoothly and the sole flat against the wood. Apply pressure on the front knob at the start, balance it evenly mid-stroke, and shift to the back tote near the end.
A sturdy work surface is essential to maintain stability while planing. Stand with feet shoulder-width apart, use your body weight to push, and keep a relaxed but firm grip.
Take fine cuts, plane with the grain, and overlap strokes to blend surfaces seamlessly. Adjusting the plane’s throat (mouth) appropriately allows for finer or deeper cuts, enhancing the quality of your work.
| Stroke Phase | Pressure Focus | Purpose |
|---|---|---|
| Start | Front knob | Engage blade smoothly |
| Middle | Front knob & back tote | Maintain flat sole contact |
| End | Back tote | Prevent nosedive |
Maintaining and Sharpening Your Hand Plane
Although regular use can wear down your hand plane, maintaining and sharpening it guarantees consistent performance and extends its lifespan.
Start by removing debris and applying mineral spirits to clean sticky residues. Treat rust spots immediately and protect metal parts with light machine oil and paste wax.
Disassemble the plane thoroughly to clean all components, including cracks and crevices, ensuring optimal preparation for rust removal and polishing initial cleaning. Regular maintenance helps prevent damage and prolongs tool life.
Regular cleaning and rust treatment keep your hand plane performing smoothly and lasting longer.
Sharpen the blade regularly using sharpening stones, maintaining the bevel angle between 25-30 degrees for smooth cuts. Flatten the sole with progressively finer sandpapers to ensure accuracy and prevent wood marring. Keep adjustment mechanisms clean and lightly oiled to avoid seizing.
- Clean and oil adjustment screws for smooth operation
- Hone the blade edges consistently for razor-sharp performance
- Flatten the sole carefully without removing excess material
- Store your plane in a dry, temperature-stable environment to prevent rust
Common Applications for Different Types of Hand Planes
Because each type of hand plane serves a distinct purpose, selecting the right one for your project guarantees efficiency and quality results.
You’ll use bench planes like the jack for rough flattening and the smoothing plane for final finishing. Bench planes are typically made of wood or metal, which affects their size and heft, influencing handling and performance.
Block planes excel at trimming end grain and beveling edges. Specialty planes tackle joinery details, while detail and curve planes handle intricate shapes and contours.
| Plane Type | Common Uses | Best For |
|---|---|---|
| Bench Planes | Flattening, jointing, smoothing | Large boards, hardwood surfaces |
| Block Planes | End grain trimming, beveling | Small workpieces, one-handed control |
| Specialty Planes | Rabbets, shoulders, grooves | Precise joinery and inlays |
| Detail/Curve Planes | Curves, fine detailing | Irregular or contoured wood surfaces |
Frequently Asked Questions
Can I Use a Hand Plane on Hardwood Without Damaging the Blade?
You can use a hand plane on hardwood without damaging the blade by keeping it razor-sharp and using a blade designed for hardwood.
Make sure to plane parallel to the grain, applying balanced pressure and taking lighter cuts to reduce strain.
Skew the plane to handle tricky grain patterns and keep your strokes continuous.
Regularly maintain the blade and plane alignment, and adjust the plane’s body to suit the hardwood’s density for smooth, damage-free planing.
How Do Temperature and Humidity Affect Hand Plane Performance?
You’ll notice temperature and humidity impact your hand plane’s performance considerably. Heat can cause metal parts to expand, altering blade alignment, while cold may make metals brittle.
High humidity swells wood and risks rust on metal parts, reducing efficiency. Low humidity dries wood, increasing tear-out risk.
To keep your plane effective, adjust blade sharpness, check fittings regularly, and store your tool in a stable, climate-controlled environment to maintain precision.
Are There Safety Concerns Specific to Using Hand Planes?
Yes, you need to watch for sharp blades that can cause cuts. Always check the wood for nails or knots to avoid kickback.
Don’t wear loose clothing or jewelry that might get caught, and tie back long hair.
Wear safety glasses and consider a dust mask to protect your eyes and lungs from wood particles.
Keep your hands clear of the blade and never adjust the plane while it’s in use.
What Are Signs That My Hand Plane Sole Needs Flattening?
Imagine your plane’s sole as a flat skating rink—if it’s bumpy, your blade won’t glide smoothly. You’ll notice skipping, sticking, or uneven shavings, signaling it needs flattening.
Run your finger along the sole to feel bumps or dips, or hold a straight edge with light behind it to spot gaps. If you struggle to maintain consistent cuts or feel extra vibration, it’s time to flatten your sole for better control and finish.
Can Hand Planes Replace Power Tools for All Woodworking Tasks?
You can’t replace power tools with hand planes for all woodworking tasks. Hand planes excel at fine tuning, delicate shaping, and finishing where control is key. But for heavy stock removal, large repetitive cuts, or complex joinery, power tools save you time and effort.
They offer consistent speed and precision on big projects. Use hand planes for detail work and portability, but rely on power tools when speed and volume matter most.
Grasp Hand Plane Skills and Elevate Your Woodworking
Now that you’ve got the hang of selecting, adjusting, and wielding your hand plane, you’re ready to carve smooth paths through any project.
Like a painter with a brush, your steady grip and precise strokes will transform rough wood into polished masterpieces. Keep your blade sharp and your technique sharpener, and you’ll glide effortlessly, turning each shaving into a ribbon of craftsmanship. Remember, practice is your best tool—so plane on with confidence.