How to Use a Circular Saw without a Table: 2 Methods
I’ve figured out that using a circular saw without a table for wooden projects is possible and can yield precise and professional results. According to my findings, there are two most effective ways to use a circular saw without a table.
The first method uses a rigid foam insulation sheet as a makeshift table. This provides a stable surface for cutting wood and helps prevent the saw from slipping or causing damage.
Another option is to use sawhorses with moisture-rich plywood placed on top. This combination creates a sturdy support system for precise and safe cutting.
Here, I’ll discuss how to use a circular saw effectively without a table. It will allow you to tackle woodworking projects with confidence and ease.
How to Use a Circular Saw Without a Table for Wooden Projects?
Regarding using a circular saw without a table for woodworking projects, there are two methods that I find to be effective.
- First method: Rigid foam insulation sheet
- Prepare the workspace
- Mark the cut line
- Adjust blade depth
- Secure material
- Guide the circular saw
- Complete the cut
- Second method: Sawhorses with moisture-rich plywood
- Select plywood
- Set up sawhorses
- Attach special saw blade
- Mark the cut line with the edge guide
- Adjust blade depth
- Secure plywood
- Guide the circular saw
- Complete the cut
First Method: Rigid Foam Insulation Sheet
Step 1. Prepare the Workspace
After setting up a stable work surface, such as a workbench, you can begin by placing a 4×8 rigid foam insulation sheet on top. This sheet will act as a makeshift table for your circular saw.
The foam insulation provides a cushioned surface that helps prevent any damage to the workpiece and reduces noise and vibrations. With this setup, I believe you can safely and efficiently use your circular saw for carpentry projects.
Step 2. Mark the Cut Line
I recommend using a straight edge or a ruler to draw a straight line along the desired cutting path. Then, apply a strip of masking tape directly on the line, ensuring it sticks firmly to the material. The tape will act as a visual guide for the circular saw, allowing you to follow the line accurately as you make the cut.
Step 3. Adjust Blade Depth
Lowering the blade depth is crucial for circular saws without tables that are used for wood-based projects. I suggest using a rigid foam insulation sheet to adjust the blade depth without a table.
Start by placing the sheet on a sturdy surface, ensuring it’s larger than the material you’re cutting. Then, position the circular saw on top of the sheet and adjust the depth by turning the blade depth adjustment knob. Ensure the blade is set just below the thickness of the material to achieve clean and accurate cuts.
Step 4. Secure Material
Clamp the material securely before cutting wood without a table to ensure stability. Place the rigid foam insulation sheet on a stable surface like a workbench.
Then, use clamps to secure the sheet tightly. This prevents any movement during the cutting process, ensuring safety and precision. The clamps provide a firm grip on the material, allowing you to make accurate cuts without wobbling or shifting.
Step 5. Guide the Circular Saw
I advise holding the saw firmly with both hands and positioning the blade right next to the line. Slowly push the saw forward, letting the blade do the cutting.
Maintain a steady pace, allowing the foam insulation to support the material and reduce the risk of tear-out. It’s important to stay focused and follow the line accurately for a clean and precise cut.
Step 6. Complete the Cut
To finish the cut without a table, position the rigid foam insulation sheet underneath the material as a support. This provides stability and helps prevent any tear-out or splintering.
Carefully guide the circular saw along the cut line, maintaining a steady and controlled movement. As you approach the end of the cut, slow down slightly to ensure a clean finish. Once the cut is complete, carefully lift the saw out of the material, being cautious not to damage the edge.
Second Method: Sawhorses with Moisture-Rich Plywood
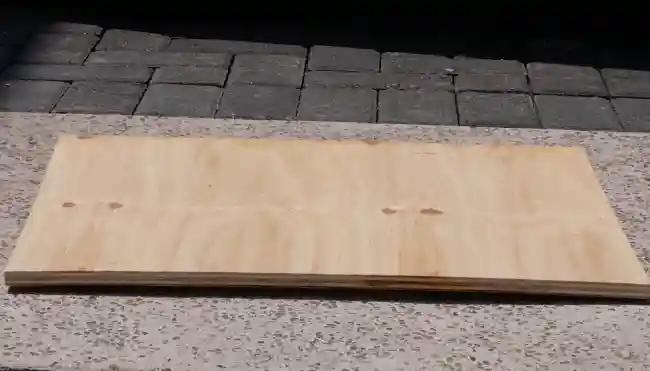
Step 1. Select Plywood
After carefully considering the options, you can use moisture-rich plywood for the work surface when using a circular saw without a table for your wooden projects.
Moisture-rich plywood provides stability and durability, making it an excellent choice for this application. The plywood’s moisture content helps prevent warping and ensures a flat and sturdy work surface. This is crucial for achieving accurate and precise cuts with the circular saw.
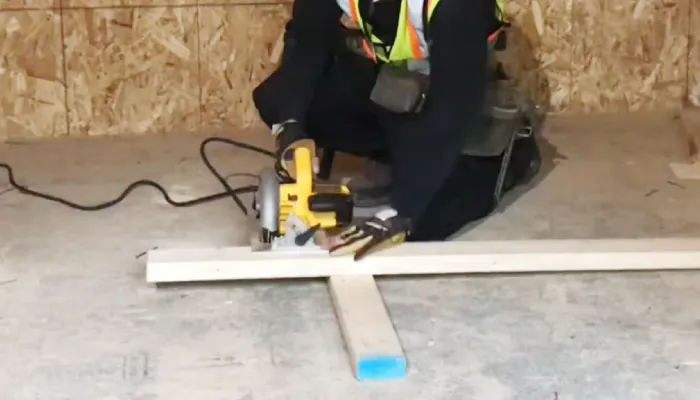
Step 2. Set Up Sawhorses
Carefully position two stable and level sawhorses to support the moisture-rich plywood for your wooden projects. Place them parallel to each other to ensure that the sawhorses are sturdy and properly spaced.
This provides a solid foundation for the plywood, preventing it from sagging or wobbling during cutting. The sawhorses must be at a height that allows you to use the circular saw comfortably, otherwise, it becomes dangerous.
Step 3. Attach Special Saw Blade
I prefer using a carbide-tipped blade for wooden projects as it provides clean and precise cuts. Before attaching the blade, ensure that the saw is unplugged for safety.
Then, follow the manufacturer’s instructions to attach the blade securely to the circular saw, ensuring it’s tightened properly.
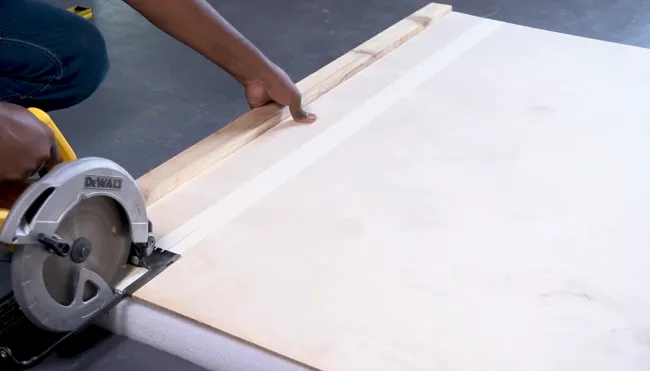
Step 4. Mark the Cut Line with the Edge Guide
I strongly suggest ensuring precise and straight cuts, a guide edge should be used to mark the cut line on the moisture-rich plywood. Position the edge guide along the desired cut line and secure it using clamps. Make sure the guide is parallel to the edge of the plywood.
Use a pencil to mark the cut line along the edge guide, ensuring accuracy and consistency throughout the project.
Step 5. Adjust Blade Depth
Most circular saws have an adjustable blade depth feature that can be easily adjusted using a depth adjustment lever or knob.
Start by loosening the depth adjustment mechanism and then set the blade depth to match the plywood thickness you’re working with. Once you set the desired blade depth, tighten the depth adjustment mechanism to secure it.
This will ensure that the blade cuts through the plywood without going too deep or not deep enough, resulting in accurate and precise cuts.
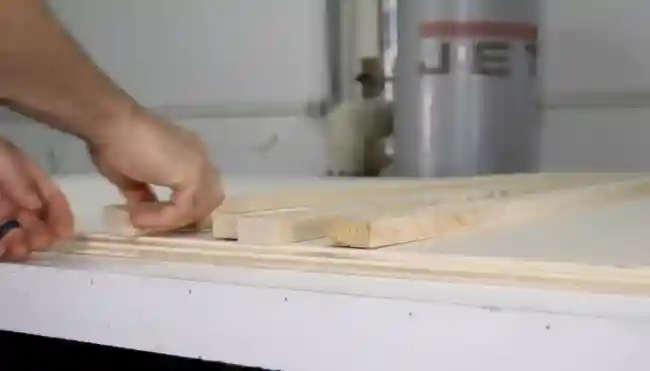
Step 6. Secure Plywood
Position the plywood on top of the sawhorses and use clamps to secure it tightly. By distributing the weight evenly across the sawhorses, you can create a stable surface for cutting. Without a table, it’s hard to maintain safety and accuracy.
Step 7. Guide the Circular Saw
Position the circular saw along the marked cut line, using the edge guide for accuracy and relying on the secure clamping of the plywood to the sawhorses for stability.
With a firm grip on the saw handle, slowly push the saw forward, allowing the blade to cut through the wood smoothly. Maintaining a steady pace and following the marked line, ensuring a clean and straight cut. Keeping focus and control throughout the process is important to achieve the desired result.
Step 8. Complete the Cut
Continue cutting until you reach the end of the plywood. Remember to maintain control and precision throughout the process for the best results. After reaching the end of your cut, switch off the saw and carefully slide it out from under the plywood.
Can I use a circular saw without a table for large sheet materials?

I think using a circular saw without a table for large wooden sheet materials requires special methods. One option is to place a rigid foam insulation sheet on the ground and place the sheet material on top of it. The foam insulation will provide a supportive and stable surface for cutting.
Another option is to use sawhorses with a sheet of plywood placed on top. This creates a makeshift table that can support the sheet material while you make your cuts. Whatever method you choose, it’s important to ensure the sheet material is securely supported to prevent accidents or damage.
Can I achieve precise cuts without a table when using a circular saw?
Proper techniques and tools can be employed to cut precisely with a circular saw without a table. An edge guide is one of the most important tools that help maintain a straight and accurate cut. By clamping the edge guide to the workpiece, you can run the saw along it, ensuring a straight line.
Additionally, marking techniques such as using a straightedge or a pencil line can guide the saw along the desired cut.
I know that choosing the right blade for the material you’re cutting is also crucial. A fine-toothed blade is ideal for clean and precise cuts, while a rougher blade may cause splintering.
Achieve Precision Cuts with a Circular Saw
It’s now clear that a circular saw can achieve precise cuts without a table if you use the right tools and techniques.
Whether working with large sheet materials or smaller pieces, the methods I outlined above, involving rigid foam insulation or sawhorses with plywood, offer accessible and practical solutions.
The quality of your cuts won’t be compromised by the lack of a table if you follow safety measures, mark accurately, and support your material properly. So grab your trusty circular saw and let your creativity soar as you embark on your next wooden project.