How to Spray Paint Wood: Tips for a Smooth Professional Finish
Start by cleaning your wood thoroughly to remove dirt and grease. Then sand any rough or glossy areas.
Fill dents or cracks with wood filler and make certain the surface is dry. Apply a bonding primer in light, even coats, allowing proper drying time.
When spray painting, hold the can 8–12 inches away. Use smooth, overlapping strokes with multiple thin coats.
Between coats, inspect and smooth imperfections before finishing with a protective clear layer. For full details on each step, keep exploring techniques.
Key Takeaways
- Clean and sand wood thoroughly to remove dirt and create a smooth surface before spray painting.
- Apply a bonding primer in light, even coats, allowing proper drying time between applications.
- Hold the spray can 8 to 12 inches away, using steady, overlapping strokes for even paint coverage.
- Apply multiple thin coats of paint, allowing each to dry and sanding imperfections lightly between coats.
- Finish with a clear protective coat suitable for the wood’s use and environment to ensure durability.
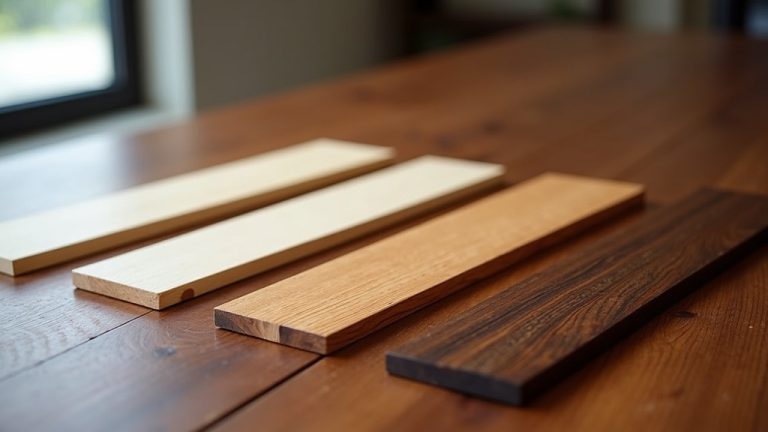
Clean, Sand, and Fill Wood Before Spray Painting

Before you start spray painting, always clean the wood thoroughly to remove dirt, grease, and dust that can prevent proper paint adhesion.
Use soapy water and a soft cloth for light cleaning; for grimy surfaces, apply trisodium phosphate (TSP).
Wipe down afterward with a damp cloth or mild solvent like acetone.
Next, sand the wood to achieve a smooth surface, focusing on bare, weathered, or unfinished areas.
Use fine-grit sandpaper to lightly scuff glossy spots.
Pay extra attention to edges and tops.
After sanding, fill dents, cracks, or veneer chips with wood filler or Bondo.
Once dry, sand the filler flush with the surface.
This preparation guarantees a uniform base that promotes strong adhesion and a flawless finish when spray painting.
Also, ensure the wood’s moisture content is below 13% to prevent adhesion problems during spraying wood moisture content.
Select and Apply the Best Primer for Wood
Choose a bonding primer specifically formulated for wood to guarantee strong adhesion and seal the surface effectively.
Opt for a wood-specific bonding primer to ensure excellent adhesion and a well-sealed surface.
Select gray primer for dark paints and white for lighter shades to optimize color coverage.
Apply the primer evenly, holding your spray can about 8 inches from the surface.
Use an inverted spray motion to prevent drips and assure consistent layers.
Allow the primer to dry for at least one hour before handling.
For enhanced protection against tannin bleed-through and improved finish durability, apply a second primer coat once the first is fully dry.
Avoid thick coats; instead, opt for two light layers to maintain a smooth surface.
Proper priming is essential to prevent paint peeling and to achieve a professional, long-lasting wood finish.
Using a high-quality wood primer improves adhesion and blocks stains effectively for superior results.
Spray Paint Wood Like a Pro
When you spray paint wood, keep the can 8 to 12 inches away and start spraying just off the surface to guarantee even coverage without drips.
Use light, consistent strokes, overlapping each pass slightly. Apply 2 to 3 thin coats, allowing a few minutes between each for drying. Shake the can thoroughly for at least one minute before and during use to maintain paint consistency.
To spray paint wood like a pro:
Hold the can steady and move continuously to prevent runs. Spray corners and edges with lighter coats to avoid buildup. Test spray on scrap wood to adjust technique. Maintain ideal temperature (50-90°F) with proper ventilation.
For best results, ensure the wood is clean and dry before painting to improve paint adhesion and finish durability.
Following these steps assures a smooth, durable finish without imperfections.
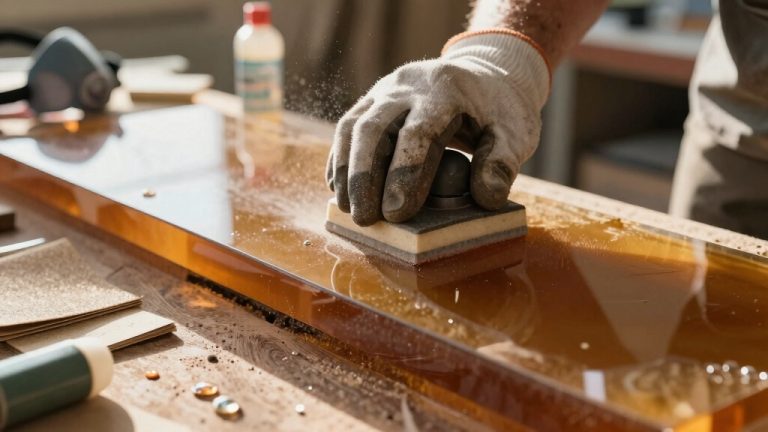
Fix Dents and Flaws Between Paint Coats
Address dents and flaws promptly between paint coats to guarantee a flawless finish. After each coat dries, inspect the surface under good lighting for imperfections.
Use fine-grit sandpaper (220-320 grit) to smooth out runs, bubbles, or rough spots carefully without cutting through the paint layer. For deeper dents or holes, apply a thin layer of wood filler or spackling compound, then sand smooth once fully cured.
Remove dust with a tack cloth before applying the next coat. This process makes certain each layer adheres properly and the final surface remains uniform.
Avoid skipping this step to prevent visible defects in the finish. Consistent inspection and correction between coats are essential for professional-quality spray painting on wood surfaces. For best results, ensure the surface is clean and free from dust and debris before each coat.
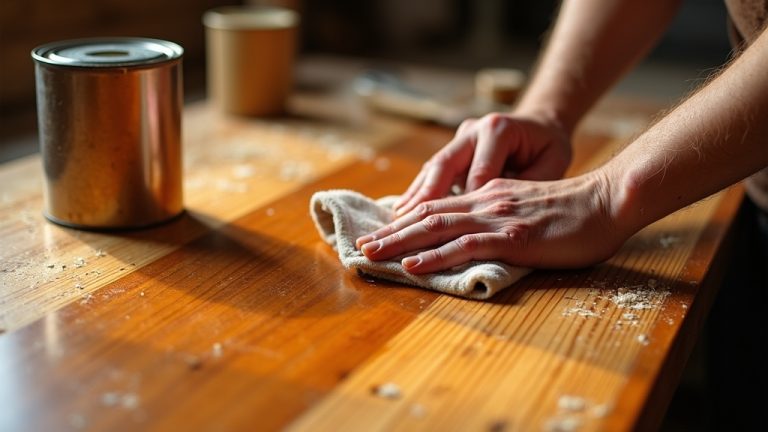
Finish and Protect Your Painted Wood

Protection guarantees your painted wood maintains its appearance and durability over time.
After your final paint coat cures, apply a clear protective finish tailored to your project’s exposure and use. Choose finishes that enhance longevity without altering color or texture.
Use polyurethane for high-traffic or outdoor wood. Opt for water-based to avoid yellowing. Apply a thin, even layer with a synthetic brush or spray and maintain consistent strokes.
Allow full drying between coats—typically 2-4 hours—and lightly sand with fine-grit paper before recoating. For furniture, consider wax or oil finishes as alternatives for a softer sheen and added moisture resistance.
Following these steps guarantees your spray-painted wood resists wear, moisture, and UV damage, preserving its fresh, smooth look. Additionally, maintaining a clean workshop environment free from dust enhances the finish quality and durability of your painted wood projects.
Frequently Asked Questions
Can I Spray Paint Wood Indoors Safely?
You can spray paint wood indoors only if you guarantee excellent ventilation, wear a proper mask, and protect surfaces with drop cloths.
Avoid enclosed spaces without airflow to prevent inhaling harmful fumes.
Disassemble hardware and maintain temperatures between 50-90°F.
If possible, use a well-ventilated garage or open windows and fans to circulate air.
Always test spray on scrap material to avoid overspray problems.
Safety and air quality are vital indoors.
How Do Weather Conditions Affect Spray Painting Wood?
Weather conditions greatly impact spray painting wood. You should work between 50-90°F; colder temps slow drying, while heat can cause runs.
Avoid painting in high humidity or rain, as moisture affects adhesion and finish quality. Wind can spread overspray unevenly and carry dust onto wet paint.
Always pick calm, dry days or a controlled indoor space with ventilation to guarantee smooth, durable results.
What Type of Spray Paint Is Best for Outdoor Wood?
Picture your outdoor wood glowing with vibrant, lasting color. That’s what an exterior acrylic enamel spray paint delivers.
You’ll want one that’s weather-resistant, UV-protected, and designed specifically for wood. These paints bond well, resist cracking, and handle moisture without peeling.
Look for rust inhibitors if there’s metal nearby. Opt for a spray can labeled “exterior” or “outdoor,” ensuring your project withstands sun, rain, and temperature swings beautifully.
Can I Use Spray Paint on Wood Furniture With Existing Varnish?
You can use spray paint on wood furniture with existing varnish, but you need proper preparation.
First, lightly sand the varnished surface with fine-grit sandpaper to degloss and create adhesion.
Clean thoroughly to remove dust and oils. Apply a bonding primer designed for glossy surfaces to make sure spray paint sticks well.
Once primed and dry, apply multiple light coats of spray paint, holding the can 8-12 inches away to prevent drips.
How Long Should I Wait Between Spray Paint Coats?
You should wait a few minutes, typically 5 to 10, between spray paint coats, following the can’s instructions. This allows each light coat to dry enough to prevent drips but remain tacky for proper adhesion of subsequent layers.
Avoid heavy applications; apply 2-3 light coats with overlapping strokes. If unsure, test on scrap wood and make certain the surface feels dry but not fully cured before recoating for the best finish.
Crafting the Perfect Finish: Spray Paint Techniques That Shine
Now that you’ve mastered each step—from cleaning and sanding to priming and perfecting your finish—your wood project is ready to shine like a polished gem.
Remember, patience and precision are your best tools; rushing through can lead to flaws that steal the spotlight.
Keep your workspace clean, apply thin, even coats, and fix imperfections promptly. Follow these techniques closely, and you’ll spray paint wood with professional results every time.