How to Set Up a Bandsaw? Easy Steps for Smooth Cutting
To set up a bandsaw, first choose a blade that suits your material and cutting needs, then inspect it for damage. Install the blade with teeth facing down, and tension it properly using deflection tests.
Adjust the blade guides and thrust bearings close to but not touching the blade. Align and level the table so it’s parallel to the blade, and securely position the fence for accurate cuts.
Perform test cuts to check everything before starting your project. Detailed steps will help you master each setup aspect effectively.
Key Takeaways
- Select a blade suitable for your material, check for damage, and clean thoroughly before installation.
- Install the blade with correct tension using the pluck or deflection test to ensure smooth operation and avoid vibration.
- Adjust blade guides and thrust bearings close to the blade without contact, ensuring proper alignment and minimal wear.
- Align and secure the fence parallel to the blade and table, setting appropriate height and locking all screws firmly.
- Perform safety checks including blade guard positioning, wear PPE, verify training, and conduct test cuts before full operation.
Selecting the Appropriate Bandsaw Blade
When selecting the appropriate bandsaw blade, you’ll need to contemplate several key factors that directly affect cutting performance and blade longevity.
Start by choosing the blade material: carbon steel suits general cutting and non-ferrous metals, bi-metal offers high-speed steel teeth for faster cuts, and carbide blades handle hard metals like titanium with excellent durability. Bi-metal blades, with their superior heat resistance, also help prevent blade overheating during prolonged cutting sessions.
Choose blade materials wisely: carbon steel for general use, bi-metal for speed, carbide for tough metals like titanium.
Next, consider blade width; narrower blades (around 1/8”) excel at tight curves but wear faster, while wider blades provide stability for resawing thick materials. The blade thickness and width should be matched to your machine size to ensure optimal performance and avoid issues.
Also, ensure the blade length matches your bandsaw’s wheel size to avoid fit issues, which can cause vibration or damage.
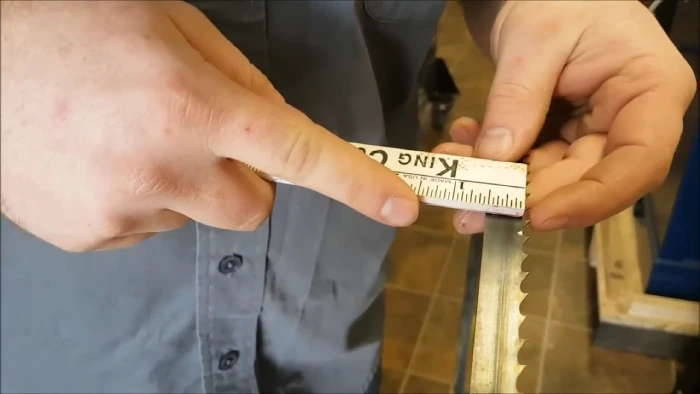
Finally, factor in tooth pitch and kerf thickness to balance cutting smoothness, speed, and material yield, optimizing your blade choice for the task at hand.
Inspecting and Installing the Blade
Before you install the blade, make sure it’s the right type for your material and in good condition, free from damage or debris. Selecting blades designed for specific materials, considering factors like material hardness and thickness, helps reduce gumming and improves cutting efficiency.
Carefully inspect the teeth and check for proper tension to avoid issues during cutting. Each bandsaw should be equipped with a tension control device indicating proper tension for standard saws.
When installing, align the blade guides and apply the correct tension to guarantee safe and precise operation. Properly set blade guides ensure effective debris clearance and prevent resin buildup on the blade.
Selecting the Right Blade
Although selecting the right bandsaw blade might seem straightforward, it requires careful attention to blade type, width, and length to guarantee ideal performance for your specific cutting tasks.
Start by choosing the blade type based on the material—carbon steel for general wood, bi-metal for versatility, and carbide-tipped for tough jobs. Applying the correct lubricant to the blade can significantly enhance its performance and lifespan.
Then, pick the appropriate blade width: narrow blades (1/8”–1/4”) for tight curves, wide blades (1/2”–1”) for stability and straight cuts. Finally, ensure the blade length matches your bandsaw model to avoid slippage or breakage.
Follow these steps to select your blade:
- Identify material and cut type
- Choose blade type accordingly
- Select blade width based on cut precision
- Verify blade length matches your machine’s specs
Checking Blade Condition
Selecting the right bandsaw blade sets the foundation for clean, accurate cuts, but ensuring that the blade is in good condition and properly installed is just as important for safe and effective operation.
Start by visually inspecting the blade for cracks, missing teeth, rust, or bends. Check for uneven wear and buildup, and document your findings. Proper blade alignment is essential before installation to promote precise cutting and reduce wear.
Next, perform a tactile exam to feel for burrs or rough spots, and gently flex the blade to test rigidity. Tap the blade lightly to detect hidden cracks. Always wear appropriate PPE such as safety glasses and gloves during inspection to protect yourself.
Make sure the teeth are secure and free from debris. Clean the blade thoroughly, removing chips and buildup from teeth and gullets.
Proper Blade Installation
When installing a new bandsaw blade, you’ll want to start by removing the old blade completely and cleaning the saw’s mechanisms to guarantee smooth operation. Always remember to wear gloves to protect your hands from sharp edges during this process.
Next, back out the side guides to avoid interference during installation. Now, carefully slide the new blade through the slot in the saw table, ensuring the teeth face down at the front.
Engage the blade with both wheels and apply slight tension to hold it in place. It is important to use blades with no more than 3 teeth per inch to prevent blade drift and ensure optimal cutting performance.
Follow these steps for proper installation:
- Align the blade with the center of both wheels.
- Adjust the tracking so the gullet aligns with the top wheel’s center.
- Apply enough tension to secure the blade without over-tightening.
- Fine-tune side guides and thrust bearings for smooth blade movement.
Adjusting Blade Tension and Tracking
Since proper blade tension and tracking directly impact your bandsaw’s cutting accuracy and safety, it’s essential to adjust both carefully before use.
Proper blade tension and tracking are crucial for precise and safe bandsaw operation.
Start by setting blade tension according to the blade material: carbon steel blades need 15,000–20,000 psi, while bimetal or carbide-tipped blades require 25,000–30,000 psi.
Use the pluck test—tighten the blade until it emits a clear pitch—or check that the blade deflects no more than 1/4 inch when pressed sideways with moderate force.
Additionally, many woodworkers use the eighth-inch movement test to ensure the blade moves only about an eighth of an inch when tapped lightly for optimal tension. Proper tension also helps prevent blade wear and improves cutting performance.
Next, adjust the tracking by moving the upper wheel so the blade runs centered on both wheels. Watch for blade drift during test runs; poor tracking causes uneven cuts. Recheck tension and tracking regularly to maintain clean, safe, and efficient cutting.
Setting Up Blade Guides Properly
To set up your bandsaw blade guides properly, start by positioning the thrust bearing about 1mm behind the blade without letting it touch during rotation.
Next, adjust the side guides so their bearings sit roughly 2mm behind the blade’s gullets, close enough to stabilize but not contact the teeth.
These precise placements prevent blade damage and guarantee smooth, accurate cuts. Ensuring the guides are accurately positioned complements the overall cutting versatility of your woodworking tools.
Proper thrust adjustment and side guide positioning help prevent fishtailing and bearing contact during operation, contributing to consistent, accurate cuts.
Thrust Bearing Placement
Although it might seem like a minor adjustment, placing the thrust bearings correctly is essential for your bandsaw’s performance and blade longevity.
You want the bearings set just a few thousandths of an inch behind the blade so they don’t contact it when idle but support it under cutting pressure. This setting helps to reduce blade binding and wear, ensuring smooth operation.
Here’s how to get it right:
- Use a thin gauge, like a dollar bill, to measure the small gap between the bearing and blade.
- Ensure the bearings stay stationary as the blade moves freely but rotate slightly under light pressure.
- Visually inspect to confirm no constant contact with the blade’s back edge, accounting for blade wavering.
- Adjust iteratively, testing with cuts until the blade runs smoothly without binding or damage.
Side Guide Adjustment
When you adjust the side guides, you’ll position their front edges about 1/16″ behind the blade’s gullet to keep the guides from touching the cutting teeth.
First, power off the bandsaw and loosen the side guide set screws. Locate the blade’s gullet—the deepest groove behind the teeth—and move the guides so their fronts sit just behind it, not in contact with the teeth. This prevents flattening and damage to the blade.
Securely retighten the set screws, then check both top and bottom guides for consistent placement. It is important to clean guides and bearings with a brush to remove sawdust buildup before making adjustments.
Ensure the blade moves freely without rubbing the guides. Proper blade tensioning systems are crucial for reliable cutting and should be checked regularly. Adjust the guides each time you change blades to maintain straight cuts, reduce vibration, and prolong blade life.
Preventing Blade Damage
Adjusting the side guides correctly sets the foundation for protecting your bandsaw blade from damage. You want the guides positioned close to the blade without actually touching it, ensuring stability without causing friction. Proper guide adjustment also helps maintain blade alignment during operation.
Here’s how to set up blade guides properly:
- Loosen the guide adjustment knobs to move the side guides close to the blade sides.
- Position the guides about 1mm from the blade to prevent rubbing.
- Adjust the thrust bearing behind the blade to about 1mm away, ensuring it stops backward movement without contact.
- Tighten all adjustments securely and rotate the blade by hand to confirm smooth movement without binding. It is important to rotate wheels during guide adjustments to verify proper clearance and contact.
Aligning and Leveling the Bandsaw Table
Since proper alignment and leveling are critical for accurate cuts, you’ll start by loosening the table bolts just enough to allow movement without removing them.
Next, use a mallet to gently tap the table until it aligns parallel to the blade edge. Check that the table is square to the blade by visually inspecting the angle, adjusting as needed.
It’s important to note that table mounting holes in the trunnions may be oversized, so careful adjustment is necessary to achieve precise alignment.
Once aligned, tighten the bolts securely. To level the table, identify the adjustment points near the mounting bolts and use a level tool to check for evenness.
Loosen the bolts slightly, adjust the table until perfectly level, then retighten the bolts. Finally, verify the table remains square after leveling and ensure it’s properly supported.
Positioning and Securing the Fence
After you’ve aligned and leveled the bandsaw table, the next step is positioning and securing the fence to guarantee accurate, stable cuts. Start by choosing the fence side—left is best for most workflows, offering better support and clearance, but right side works if your layout demands it.
Most woodworkers prefer the fence on the left side of the blade because it provides unlimited room on the right for large workpieces. Attach the fence in its tall position for resawing or shorter if cutting thinner stock.
Next, align the fence parallel to the blade and table by lightly touching the blade teeth, setting the cursor to zero, and adjusting screws for precision.
The fence should be attached in the tall position during setup to ensure proper alignment and ease of adjustment. Finally, lock all screws and clamps tightly to prevent any movement during cutting.
Test stability with light pressure before proceeding to ensure safety and consistent results.
- Choose fence side based on workflow and board size
- Set fence height to suit workpiece thickness
- Align fence parallel to blade and table
- Secure firmly, verify no movement before cutting
Using Ripping Accessories Effectively
When you want precise, straight cuts while ripping, using the right accessories is essential. Start by installing a rip fence aligned perfectly with the blade to maintain consistent, repeatable cuts. Adjust blade guides close to the blade to minimize deflection and improve control.
Choose a ripping blade with larger teeth and appropriate width for your material’s thickness, ensuring smooth, aggressive cuts. Maintain proper blade tension using the tensioning hardware to avoid wandering cuts and increase safety.
It is important to select saw blades based on material thickness, ensuring at least three teeth per material thickness for efficient cutting blade selection.
For angled cuts, use a miter gauge to enhance precision. Regularly clean and lubricate bearings, wheels, and other moving parts for smooth operation. Always check accessory alignment before ripping to prevent errors and vibrations.
Performing Test Cuts and Safety Checks
Before you start making precise cuts with your bandsaw accessories, you need to perform test cuts and safety checks to guarantee everything operates smoothly and safely.
First, inspect the blade for damage or missing teeth and confirm the blade guard sits no more than 1/4 inch above the workpiece.
Next, secure loose clothing, wear safety glasses, and ensure you’re fully trained to operate the saw. Seek special training and permission before operating the table saw or band saw to ensure safety compliance.
Then, adjust blade tension, tracking, and speed settings according to your material. Finally, plan your test cut by marking the waste side, waiting for full blade speed, and feeding the workpiece steadily using push sticks if needed.
After cutting, turn off the saw and wait for the blade to stop before inspecting the cut and blade condition.
Maintaining and Cleaning the Bandsaw
Although setting up your bandsaw correctly is essential, maintaining and cleaning it regularly guarantees consistent performance and safety.
Start by using a brush or vacuum to remove dust and debris from the wheel housing, table, guides, and hard-to-reach areas. Clean the blade’s teeth to remove chips, and use compressed air to clear sawdust from guides and other parts.
Frequently Asked Questions
How Do I Choose the Right Bandsaw for My Workshop Size?
To select the appropriate bandsaw for your workshop size, start by measuring your available floor and vertical space.
Pick a model with a wheel diameter that fits comfortably, usually 14 or 16 inches for small shops. Consider a welded steel frame to save space.
Make certain your ceiling height accommodates the saw, especially with riser blocks. Finally, check your power supply matches the saw’s motor requirements, ideally 2 HP for heavy-duty tasks.
What Safety Gear Is Recommended When Operating a Bandsaw?
You should always wear safety glasses rated for impact to protect your eyes from flying debris; prescription glasses won’t cut it. Use hearing protection like earplugs or earmuffs to guard against loud noise.
Tie back long hair, avoid loose clothing, and skip gloves to prevent entanglement. Wear close-toed shoes and remove jewelry. Consider a dust mask if dust is heavy. Always use push sticks to keep your hands safe near the blade.
Can I Use a Bandsaw for Cutting Metal and Wood Interchangeably?
You can use a bandsaw for both metal and wood, but it’s not always ideal. Metal-cutting bandsaws handle both materials but run slower and need cooling systems.
Wood bandsaws lack durability for metal. You’ll have to swap blades, adjust tension, and change speed settings each time. Without proper maintenance, switching materials frequently might shorten your saw’s lifespan. So, if you switch often, prepare for extra care and adjustments.
How Often Should I Replace the Bandsaw Blade for Optimal Performance?
You should replace your bandsaw blade as soon as you notice signs like teeth falling off, increased noise, heat buildup, or dull cutting.
For high-volume use, change blades weekly; for average woodworking, every few weeks; and infrequent users can stretch it to months. Always monitor blade performance closely, maintain proper tension, clean regularly, and choose the right blade for your material to optimize lifespan and keep cuts accurate.
What Are Common Troubleshooting Steps if the Bandsaw Motor Stalls?
When your bandsaw motor stalls, it’s like a heartbeat skipping—something’s off. First, check the power supply and capacitor for startup juice.
Inspect electrical connections for looseness or corrosion. Look over the drive belt and pulleys for wear or misalignment. Ensure the blade isn’t binding or dull, which can overload the motor.
Finally, verify the circuit breaker and test with lighter cuts to pinpoint the issue before restarting full power.
Set Up Your Bandsaw Properly and Cut with Total Precision
Now that you’ve selected the right blade, installed it securely, and adjusted tension and tracking, you’re ready to align guides and level the table. Position the fence accurately, use ripping accessories wisely, and perform test cuts carefully.
Remember to clean and maintain your bandsaw regularly. By setting up your bandsaw properly, adjusting it precisely, and checking it thoroughly, you’ll guarantee safe, efficient, and accurate cutting every time you use it.