Can You Sand Wet Wood: Key to a Cleaner Finish
You can sand wet wood, but you need to use waterproof sandpaper with a grit of 180 or finer and keep the surface damp without soaking it. Apply light, even pressure using a sanding block, and frequently rewet both wood and sandpaper to prevent damage and clogging.
This method reduces dust, extends sandpaper life, and smooths the finish effectively. If you want to master this technique safely and efficiently, understanding the right tools and steps will help you get there.
Key Takeaways
- Wet sanding wood is possible using waterproof sandpaper and controlling moisture to avoid wood damage.
- Use fine-grit sandpaper (220+) soaked in soapy water for effective sanding without clogging.
- Keep the wood surface damp, not soaked, to prevent swelling or warping during sanding.
- Apply light, even pressure with a sanding block, sanding along the grain for best results.
- Allow wood to dry between sanding sessions to avoid moisture-related damage and ensure smooth finish.
The Basics of Wet Sanding
Although wet sanding wood requires careful preparation, it offers precise control over the smoothing process by using waterproof sandpapers and maintaining a damp surface. You’ll want to select sandpapers with grits from 180 to 400+ that resist disintegration when wet.
Use a sanding block or orbital sander to apply even pressure and maintain control during sanding. Keep the surface damp with a spray bottle—too much moisture risks grain raising and warping, so balance is key.
It is also important to keep sandpaper damp during sanding and rewet it every few minutes to prevent drying out. Maintaining the right pressure and technique helps avoid damage to the wood fibers during sanding.
Apply even pressure with a sanding block and keep the surface damp, avoiding excess moisture to prevent damage.
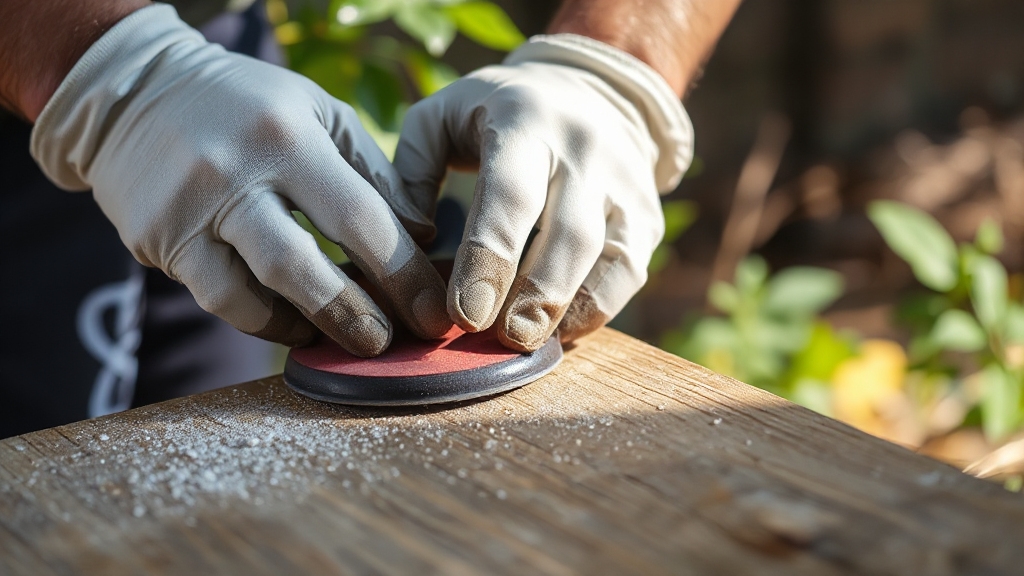
Before starting, clean the wood thoroughly to remove dirt and old finishes; this guarantees effective sanding. Work in small, circular motions to avoid uneven removal and damage. Wearing gloves and safety glasses protects you during the process.
Benefits of Sanding Wood While Wet
When you sand wood while wet, you considerably reduce airborne dust, making your workspace safer and cleaner. This method prevents dust inhalation hazards and keeps surfaces free from dust settling, ensuring better finish adhesion.
Wet sanding also extends sandpaper life by reducing clogging, which improves efficiency and lowers costs. Additionally, it helps you achieve a smoother, more uniform finish by controlling finish thickness and smoothing imperfections effectively.
Water acts as a barrier during sanding, preventing sandpaper clogging with dust and extending sandpaper lifespan. Using the right tools and equipment enhances safety and effectiveness during sanding.
| Benefit | Explanation |
|---|---|
| Dust Reduction | Limits airborne particles, improving air quality |
| Smoother Finish | Enhances polish by smoothing minor surface flaws |
| Tool Longevity | Water lubricates, reducing sandpaper clogging |
| Surface Preparation | Moistens grain, fills cracks, and improves adhesion |
Essential Tools and Materials for Wet Sanding
Reducing dust and achieving a smooth finish depends heavily on the right tools and materials for wet sanding. To optimize results, focus on these essentials:
Essential tools and materials are key to reducing dust and achieving a flawless wet sanding finish.
- Waterproof Sandpaper: Use silicon-carbide grit (220 and above) soaked in soapy water or mineral spirits to prevent disintegration and clogging.
- Sanding Blocks and Sponges: Employ wooden sanding blocks for even pressure on flat surfaces and sponges for contours, avoiding edge damage.
- Lubricants and Water Management: Maintain consistent dampness with spray bottles; use mild soap solutions to reduce heat and abrasive residue.
- Protective Gear: Wear gloves, safety goggles, and respirators to guard against irritation, splashes, and fine particles, ensuring safety during wet sanding.
Using the appropriate lubricant types and application techniques can enhance the wet sanding process by reducing friction and preventing material damage. These tools and materials ensure effective abrasion, surface preservation, and user protection throughout the wet sanding process.
Step-by-Step Guide to Sanding Wet Wood
Before you begin wet sanding wood, prepare both the surface and your materials carefully to guarantee ideal results. Start by cleaning the wood to remove dust and debris, and ensure any finishes are fully cured.
Avoid soaking bare wood; instead, lightly mist the surface with a spray bottle. This method is similar to automotive wet sanding where water acts as a lubricant to reduce friction and prevent damage.
Soak wet/dry sandpaper in soapy water for 5-10 minutes to lubricate it. Using a sanding block, sand gently with light, even pressure in small circular motions. Frequently wipe the surface to remove residue and assess progress.
Progress through finer grit sandpapers to achieve a polished finish, allowing the wood to dry completely between sessions. This prevents moisture damage and raised grain. Finish by thoroughly cleaning and drying the surface before applying any sealants or finishes.
Safety Tips and Best Practices for Wet Sanding
Since wet sanding involves moisture and abrasive materials, prioritizing safety is vital to safeguard yourself and guarantee effective results. Follow these best practices to maintain safety and efficiency:
- Wear safety goggles, gloves, and a mask to protect your eyes, skin, and lungs from debris and dust.
- Inspect all electrical tools for damage, keep them dry, and use properly rated extension cords to prevent electrocution and overheating. Always check for electrical safety before starting your work to avoid hazards.
- Prepare the wood by cleaning and ensuring it’s damp but not saturated, avoiding excess water that can damage both wood and tools.
- Sand with light pressure along the wood grain, using a sanding block, and frequently wipe away slurry to monitor progress and avoid surface damage.
Frequently Asked Questions
Can Wet Sanding Remove Deep Scratches or Gouges in Wood?
You can use wet sanding to reduce deep scratches in wood, but it’s not ideal for deep gouges. Wet sanding smooths surfaces effectively by using oil-based lubricants to prevent grain swelling.
For deep gouges, start with dry sanding or shaping tools to remove material, then switch to wet sanding with progressively finer grits. This approach refines the surface, minimizing scratch visibility and preparing wood for a smooth final finish.
Does Wet Sanding Affect the Wood’s Natural Color or Grain Pattern?
Think of wet sanding like a gentle rain awakening wood’s hidden hues. When you wet sand, you slightly raise the grain, letting stain seep deeper and evenly, enriching the natural color subtly. This process softens sanding marks, enhancing grain clarity without blotching.
By reopening pores, it balances texture and absorption, giving you a richer, clearer grain pattern. Just remember, overdoing it won’t boost effects after a point.
How Long Should Wood Dry After Wet Sanding Before Finishing?
You should let wood dry for at least 24 to 48 hours after wet sanding before applying any finish. Drying time varies with humidity, temperature, and ventilation, so guarantee good air circulation and, if possible, use fans or sunlight to speed drying.
Check for visible moisture or use a moisture meter, aiming for 6-8% moisture content. Rushing this step can cause finish defects like blistering or peeling, compromising durability.
Is Wet Sanding Suitable for All Types of Wood Finishes?
Wet sanding isn’t suitable for all wood finishes. You’ll find it works best with water-based finishes, as moisture helps smooth the surface. Avoid wet sanding oil-based finishes because residual water can cause adhesion problems.
Shellac might allow compatibility between finishes, but you must confirm solvent compatibility first. Also, finishes like urethane or spar varnish require dry, cured surfaces wet sanding these risks damaging the finish.
Can Wet Sanding Be Used on Outdoor Wooden Furniture?
You can use wet sanding on outdoor wooden furniture, but only with caution. It’s best reserved for smoothing sealed or finished surfaces, not raw wood. Excess moisture risks warping or mold if the wood isn’t fully dry afterward.
For basic prep, stick to dry sanding with coarse to fine grits. If you wet sand, guarantee thorough drying before finishing to maintain durability and prevent damage.
Dust-Free Perfection: Wet Sanding Enhances Surface Quality
Sanding wet wood is like smoothing a rough river stone, controlled and deliberate. By embracing moisture, you reduce dust and reveal a cleaner surface, making your finish sharper and more precise. With the right tools and careful technique, you’ll avoid tear-out and achieve professional results.
Remember to stay safe and patient; wet sanding demands attention but rewards you with a flawless, even texture that dry sanding alone can’t match. Keep your workspace tidy and your grit consistent for the best outcomes.