Can You Sand Latex Paint: Tips for a Smooth Finish
You can sand latex paint safely once it’s dry enough to avoid smearing or clogging your sandpaper.
Typically, light sanding is best after 3 to 12 hours, but waiting longer (12 to 32 hours) means smoother results without damaging the surface.
Use fine grit (120–220) and apply gentle, even pressure. Avoid sanding too early or aggressively to prevent surface damage.
Keep in mind temperature, humidity, and thickness affect drying times. There’s more to learn about prepping, sanding techniques, and cleanup for the best finish.
Key Takeaways
- Yes, you can sand latex paint once it is dry to the touch, preferably after 3 to 12 hours for light sanding.
- Use fine-grit sandpaper (120–150 grit) initially to avoid damaging the fresh latex paint surface.
- Avoid sanding too early to prevent smearing, gum buildup, and clogged sandpaper; test a small area first.
- Light, even pressure with long, overlapping strokes ensures smooth results without gouging or peeling the paint.
- Wet sanding with fine grit (320–400) is effective for dust nibs and rough patches, reducing dust and sandpaper clogging.
Can You Sand Latex Paint Safely?

Although you can sand latex paint safely, timing and technique are crucial to avoid damaging the finish.
Sanding latex paint requires precise timing and careful technique to preserve a flawless finish.
You need to wait until the paint is dry enough to handle abrasion but not so fresh that sanding smears or gums it.
Light pressure and fine-grit sandpaper, typically between 120 and 220 grit, work best to smooth imperfections or prepare the surface for recoating.
Using sanding blocks or flexible sponges helps control the process, especially on trim or contoured surfaces.
Avoid coarse grits, which can scratch uncured paint. Wet sanding reduces dust and clogging when tackling drips or rough patches.
Remember, sanding too early risks ruining the finish and wasting effort.
With patience and care, you’ll achieve a smooth, professional-looking surface every time.
Proper surface preparation, including removing dust with a ShopVac and tack cloth, ensures better adhesion and a flawless finish.
How Long Should Latex Paint Dry Before Sanding?
When it comes to sanding latex paint, you’ll want to give it some time to dry—generally, that’s between 3 to 12 hours.
But, keep in mind, this can really depend on the specific formula you’re using and the conditions around you.
Humidity and temperature play a big role here. If it’s humid or cooler, the paint might take longer to cure.
So, it’s a good idea to check the conditions before you dive in.
If you sand too early, you might end up smearing or gumming the paint, which can damage the finish.
For best results, make sure to allow paint to dry fully before sanding to avoid damaging the surface.
Drying Time Guidelines
Determining the right drying time before sanding latex paint is essential to avoid damaging the finish or gumming up your sandpaper.
Generally, latex paint needs at least 3 hours to dry enough for light sanding. However, waiting 12 to 32 hours is safer for more thorough smoothing.
Keep in mind, “dry to the touch” doesn’t mean the paint is ready for aggressive sanding. It won’t fully cure for days or even weeks.
Sanding too early can smear or gum the surface, ruining the finish. When in doubt, opt for longer drying times and use fine-grit sandpaper with light pressure.
This approach helps guarantee clean sanding and better adhesion for recoating without compromising the paint’s integrity.
Maintaining proper temperature conditions during drying helps ensure optimal curing and adhesion before sanding.
Factors Affecting Cure
Drying times vary considerably because several factors influence how long latex paint needs to cure before you can sand it effectively.
Temperature plays a major role; warmer conditions speed curing, while cold or damp environments slow it down.
Humidity also affects drying; high moisture levels extend curing time.
The paint’s thickness matters too: thicker coats take longer to cure fully.
Different paint formulas cure at varying rates, so always check manufacturer recommendations.
Even if the surface feels dry to the touch after a few hours, the underlying layers may remain soft.
To sand latex paint effectively without damaging it, you typically need to wait anywhere from 12 to 32 hours.
Full curing might take days or weeks depending on these factors.
Patience guarantees a smoother, more durable finish.
For best results, ensure the paint is fully cured before applying polycrylic, as it requires a fully dried and cured surface for proper adhesion.
Risks Of Early Sanding
Although it’s tempting to sand latex paint as soon as it feels dry, doing so too early can cause serious problems. When the paint hasn’t fully cured, sanding risks gumminess, smearing, and surface damage.
Dry-to-the-touch doesn’t mean it’s ready. Latex paint often needs 12 to 32 hours before sanding, and full curing can take days or weeks. Sanding too soon clogs sandpaper with rubbery residue, reducing effectiveness and potentially ruining the finish.
To avoid this, use fine-grit sandpaper with light, controlled pressure and test a small area first. If the paper gums up, wait longer. Patience guarantees a smooth, durable finish and prevents costly rework.
For the best results, consider applying a water-based clear coat after sanding to protect and enhance the finish durability.
Sanding Fresh vs. Fully Cured Latex Paint: What’s Different?
When you sand fresh latex paint, you need to be especially gentle because the surface hasn’t fully hardened and can easily gum up your sandpaper or smear.
Fresh paint remains soft and pliable, so aggressive sanding risks damaging the finish or creating uneven spots.
Sanding too soon often clogs your sandpaper, making the process inefficient.
In contrast, fully cured latex paint has hardened completely, allowing you to sand more confidently without compromising the surface.
The finish sands cleanly and evenly, letting you smooth imperfections or prepare for recoating with less effort.
Understanding this difference helps you choose the right timing and technique, ensuring an optimal outcome and prolonging the life of your paint job.
Patience is key for effective sanding results.
Additionally, environmental factors like humidity and temperature can affect drying and curing times, so always consider these when planning your sanding to achieve the best drying and curing conditions.
What Grit Sandpaper Works Best for Latex Paint?
When it comes to sanding latex paint, picking the right grit sandpaper is super important. You definitely want to steer clear of damaging that finish. Generally, fine grits between 120 and 220 are your best bet.
If the paint is still fresh, you might lean toward the lower end of that range. But if it’s fully cured, you can go higher. Just a heads up—using coarser grits can leave scratches on your surface, and nobody wants that!
On the flip side, really fine grits are perfect for those little touch-ups or if you want a super smooth finish. So, keep that in mind while you’re working!
For best results, consider using an ergonomic sanding block with multi-grit options to help evenly distribute pressure and control sanding.
Recommended Grit Ranges
Choose the right sandpaper grit to achieve the best results when sanding latex paint. For fresh latex paint, start with a fine grit between 120 and 150 to avoid damaging the surface.
Once the paint has cured further, use 180 to 220 grit for general smoothing and preparing the surface for another coat. For very fine touch-ups, like removing dust nibs or smoothing minor imperfections, 320 to 400 grit works best.
Avoid coarse grits, as they can scratch or remove uncured paint. Light pressure combined with these finer grits helps maintain a smooth, even finish. Selecting the appropriate grit based on the paint’s drying stage guarantees effective sanding without compromising the latex paint’s integrity. To prevent damage during sanding, always wear protective gear such as safety glasses and gloves.
Sandpaper Selection Tips
Understanding the right sandpaper grit is key to protecting your latex paint while achieving a smooth finish. For fresh latex paint, start with 120 to 150 grit to avoid damaging the surface.
If you’re smoothing a cured coat, 180 to 220 grit works well for general sanding. For delicate touch-ups or removing dust nibs, opt for finer 320 to 400 grit paper.
Avoid coarse grits; they can scratch or gouge uncured paint. Use light pressure and consider sanding blocks or foam sponges for better control, especially on trim or curved surfaces.
If dust buildup occurs or the paper gums up, your paint likely isn’t fully cured yet. In those cases, switch to wet sanding or wait longer before sanding to guarantee a flawless finish.
For added protection after sanding, applying a water-based clear top coat can help maintain the durability and appearance of your painted furniture.
How to Sand Latex Paint Without Causing Damage?
Start by ensuring the latex paint is fully dry and ideally cured before you sand to prevent smearing or damage.
Begin sanding only after the latex paint is completely dry and cured to avoid smearing or damage.
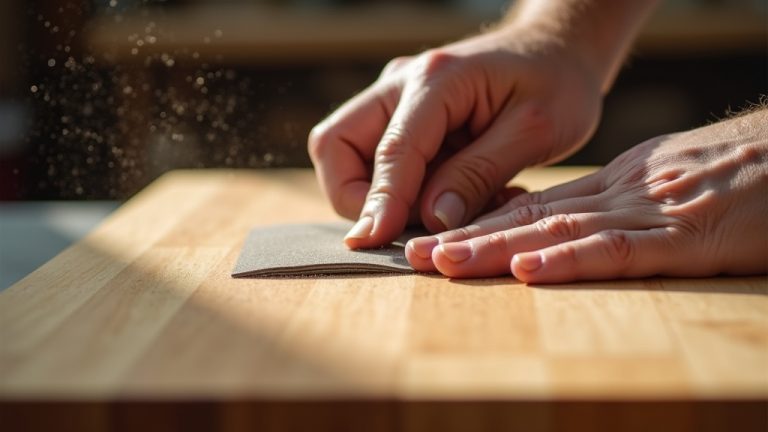
Use fine-grit sandpaper, typically between 120 and 220 grit, applying light, even pressure.
Avoid aggressive sanding, which can gouge or peel the paint.
Work with a sanding block or foam sponge for better control, especially on curved or detailed surfaces.
Sand in long, overlapping strokes to maintain an even finish and avoid creating uneven spots.
Keep the painted surface clean and free of dust or grease before you start, and wipe away sanding dust frequently to prevent buildup.
If your sandpaper gums up, the paint isn’t cured enough; wait longer.
Following these steps helps you smooth latex paint without compromising the finish.
For best results, always apply sanding over a properly primed surface to ensure better adhesion and finish quality, as recommended for surface preparation.
When and How to Use Wet Sanding for Latex Paint?
Wet sanding can be a game changer, especially when you’re facing issues like drips, dust nibs, or those pesky heavier imperfections on latex paint.
It really helps to reduce dust, and you won’t have to worry as much about your sandpaper clogging up. Plus, the whole process ends up being a lot smoother and cleaner.
To get the best results, make sure you grab some fine-grit sandpaper.
It’s all about using light pressure and keeping the surface wet while you sand. Trust me, this approach makes a world of difference!
Benefits Of Wet Sanding
Frequently, wet sanding offers a cleaner and more controlled way to smooth latex paint surfaces, especially when dealing with drips, dust nibs, or heavier imperfections.
Using water to lubricate the sanding process helps minimize dust, prevents sandpaper from clogging, and reduces the risk of scratching the paint.
You’ll find it especially helpful when working on delicate areas or when the paint isn’t fully cured but dry enough to handle light abrasion.
Here are three key benefits of wet sanding:
- Cuts down airborne dust, keeping your workspace cleaner and healthier.
- Keeps sandpaper effective longer by washing away paint residue.
- Allows smoother, more even abrasion, reducing the chance of gouges or uneven spots.
Wet sanding is your best bet when you want precision and less mess with latex paint.
Wet Sanding Techniques
Mastering wet sanding techniques lets you smooth latex paint effectively while minimizing dust and surface damage.
Use wet sanding when you want to avoid clogging sandpaper or reduce airborne dust, especially on drips or rough spots.
Always wait until the paint is dry but not fully cured to avoid smearing. Use fine-grit sandpaper and keep the surface wet with a sponge or spray bottle.
Light, even pressure is key.
| Step | Description |
|---|---|
| Surface Prep | Clean and dry the painted area |
| Sandpaper Grit | Use 320–400 grit for fine finish |
| Wet Surface | Keep surface moist during sanding |
| Cleanup | Wipe off residue before recoating |
Wet sanding helps you achieve a smooth finish without damaging latex paint.
Preparing Latex Paint Surfaces for Sanding
Before sanding latex paint, make sure the surface is thoroughly clean, dry, and free of grease or loose flakes. Proper preparation guarantees smooth sanding and prevents damage or clogging.
Follow these key steps:
- Clean the Surface: Remove dirt, dust, and grease with mild detergent and water. Let it dry completely.
- Check for Loose Paint: Scrape off any peeling or flaking areas to avoid uneven sanding.
- Confirm Dryness: Assure the paint is dry to the touch. Ideally, wait longer to allow partial curing for better sanding results.
These preparation steps help you achieve an even finish, minimize sanding difficulties, and improve adhesion for subsequent coats.
Skipping preparation can cause smearing, clogging, and a compromised surface ready for sanding.
Why Light Pressure Is Key When Sanding Latex Paint?
Applying light pressure when sanding latex paint prevents damage to the finish and guarantees a smooth, even surface.
Heavy pressure can easily gouge or remove paint, especially if it’s not fully cured. You want to abrade just enough to smooth imperfections or prepare for another coat, not strip the paint off.
Light, controlled strokes let you maintain the integrity of the paint film while achieving the desired texture.
| Sanding Pressure | Effect on Latex Paint |
|---|---|
| Light | Smooth finish, minimal damage |
| Moderate | Risk of uneven abrasion |
| Heavy | Paint removal, gouging |
| Variable | Inconsistent surface texture |
Keep your sanding gentle and steady to protect your work and get the best results.
How to Clean Up After Sanding Latex Paint?
Once you finish sanding latex paint, you’ll need to remove all dust and debris to ensure a clean surface for recoating. Dust left behind can interfere with paint adhesion and cause an uneven finish.
Follow these steps to clean up effectively:
- Vacuum or wipe down the surface and surrounding area to pick up loose dust particles. Use a vacuum with a brush attachment if possible.
- Dampen a clean cloth with water or a mild detergent solution and gently wipe the sanded surfaceedto remove fine dust. Avoid soaking the surface.
- Allow the surface to dry completely before applying any new paint or primer. This prevents trapping moisture under the next coat, which could affect curing.
Proper cleanup ensures a smooth, professional-looking finish.
How Sanding Improves Latex Paint Adhesion and Finish?
Sanding latex paint creates a slightly textured surface that helps new coats adhere better, preventing peeling or flaking.
When you lightly sand between coats, you remove gloss and smooth imperfections. This allows the next layer to bond more effectively.
This texture gives fresh paint something to grip onto, improving durability and finish quality.
Sanding also evens out dust nibs, drips, or rough patches, resulting in a smoother, more professional-looking surface.
To avoid damaging the paint, use fine-grit sandpaper and gentle pressure, especially if the paint isn’t fully cured.
Remember, sanding too soon can gum up your paper and ruin the finish.
Done correctly, sanding enhances both adhesion and the overall appearance of your latex paint job, making it last longer and look cleaner.
Frequently Asked Questions
Can You Sand Latex Paint Over Wallpaper?
You shouldn’t sand latex paint directly over wallpaper because the sanding process can damage or loosen the wallpaper.
Instead, remove the wallpaper first, then clean and prime the wall before painting.
If you sand painted wallpaper, you risk creating uneven surfaces and peeling.
To guarantee a smooth finish and proper adhesion, always prep the bare wall rather than sanding paint on wallpaper.
Is It Necessary to Prime Before Sanding Latex Paint?
Don’t put the cart before the horse. You don’t need to prime before sanding latex paint.
Sanding’s job is to smooth the surface or improve adhesion for the next coat. Priming usually comes after sanding, especially if you’re exposing bare drywall or making a big color change.
Focus on sanding gently with fine grit, then clean thoroughly. Prime only when the surface calls for extra sealing or stain blocking before repainting.
How Do Humidity and Temperature Affect Sanding Latex Paint?
Humidity and temperature directly impact how latex paint cures, affecting your sanding results. High humidity slows drying and curing, making the paint softer and more prone to gum up your sandpaper.
Low temperatures also delay curing, increasing sanding risks. You’ll want to wait longer before sanding in these conditions to avoid surface damage or smearing.
Ideally, sand latex paint in moderate, dry conditions for cleaner, smoother results.
Can Sanding Latex Paint Cause Harmful Dust or Fumes?
Sanding latex paint can create dust, but it generally doesn’t produce harmful fumes since latex paint is water-based and low in volatile organic compounds (VOCs).
However, you should still wear a dust mask or respirator to avoid inhaling fine particles, especially if you sand large areas.
Working in a well-ventilated space and using wet sanding techniques can further reduce dust exposure and protect your respiratory health effectively.
What Tools Are Best for Sanding Large Latex-Painted Surfaces?
Like wielding a painter’s brush, the right tool makes all the difference.
For large latex-painted surfaces, a random orbital sander is your best bet. It offers smooth, even sanding without harsh swirl marks.
Pair it with fine-grit sandpaper, around 180 to 220 grit, to avoid damaging the paint.
Use light pressure and keep the sander moving steadily.
Sanding blocks or foam sponges work well for edges and curves, ensuring a flawless finish.
The Best Way to Sand Latex Paint for Better Results
You absolutely can sand latex paint, and doing it right will transform your project from “meh” to masterpiece.
Just remember to wait for proper drying, use fine grit sandpaper, and apply gentle pressure, like you’re coaxing a secret out of a whisper.
Skip these steps, and you’re asking for a disaster. Nail the sanding, and you’ll boost adhesion, smoothness, and finish like a pro.
Sand smart, and watch your walls thank you!