How to Darken Wood Stain: Elegance Within the Grain
To darken wood stain effectively, start by sanding the surface with coarser grit to open wood pores for better pigment absorption. Choose high-pigment stains like gel or oil-based types in darker shades, and apply multiple thin coats, allowing each to dry fully to build depth evenly.
Test on scrap wood to fine-tune results. Seal with a compatible topcoat for durability and enhanced richness. Mastering surface prep, stain selection, and layer control guarantees a deep, uniform finish.
Key Takeaways
- Prepare wood by sanding with coarser grit to open pores for better stain absorption and remove dust completely before staining.
- Choose darker stain shades like ebony or walnut and consider gel or glaze stains for higher pigment concentration.
- Apply multiple thin coats of stain, allowing full drying between layers to build color depth gradually and evenly.
- Extend wipe time to let solvents evaporate, increasing pigment deposition and resulting in a darker finish.
- Lightly sand between coats to smooth the surface and improve stain adhesion for consistent, rich color.
Prepare Wood to Absorb Darker Stain
To achieve a deeper, more even wood stain, start by sanding the surface with a coarser grit to open the grain and enhance absorption.
Use a random-orbit sander, progressing to hand sanding with the grain to smooth the surface without closing pores. This preparation promotes uniform stain penetration, preventing blotchy results.
Before staining, test on scrap pieces to calibrate sanding depth and grain openness, ensuring consistent darkening. For controlled effect, you can slightly dampen the surface, especially when applying dyes like Transtint.
Prioritize high-tannin woods such as oak when possible, as their natural chemistry reacts strongly with stains. Proper sanding and prep maximize pigment uptake, directly influencing the final color intensity and uniformity.
This sets a reliable foundation for subsequent layering or manipulation techniques. Additionally, sanding between coats with ultra-fine grit improves smoothness and helps achieve a flawless finish.
Choose the Right Stain to Darken Wood
With your wood properly prepared for ideal stain absorption, selecting the right stain becomes the next step in achieving a deeper, richer finish.
Opt for stains with higher pigment concentration, such as gel or glaze stains, which provide stronger color saturation than standard liquid stains.
Choose gel or glaze stains for richer, more saturated color than typical liquid options.
Make certain you choose a stain compatible with your intended topcoat to maintain adhesion and durability.
Consider oil-based stains for deeper penetration in hardwoods, or water-based stains for quicker drying but potentially lighter results.
Darker pigments like ebony, walnut, or mahogany typically yield richer tones.
Avoid stains with excessive solvents that can evaporate rapidly, reducing color intensity.
Testing your chosen stain on a scrap piece lets you verify the exact darkness and compatibility before committing to the entire project.
Also, allow stains to fully cure for at least 24–72 hours to ensure optimal adhesion and prevent issues when applying subsequent finishes.
Layer Thin Stain Coats to Build Dark Color
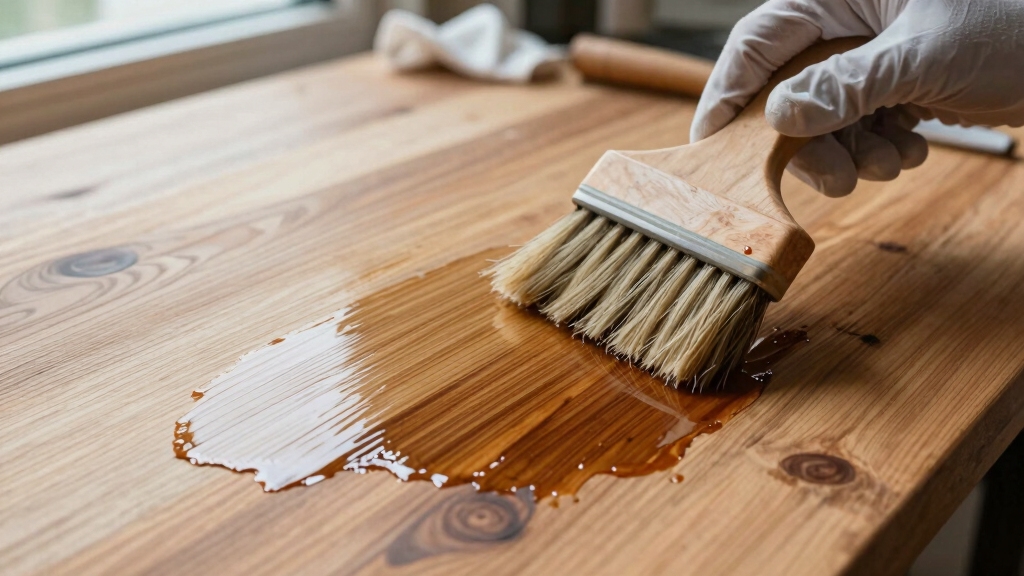
Although applying a single thick coat might seem faster, you’ll achieve a richer and more controlled darkening by layering several thin coats of stain.
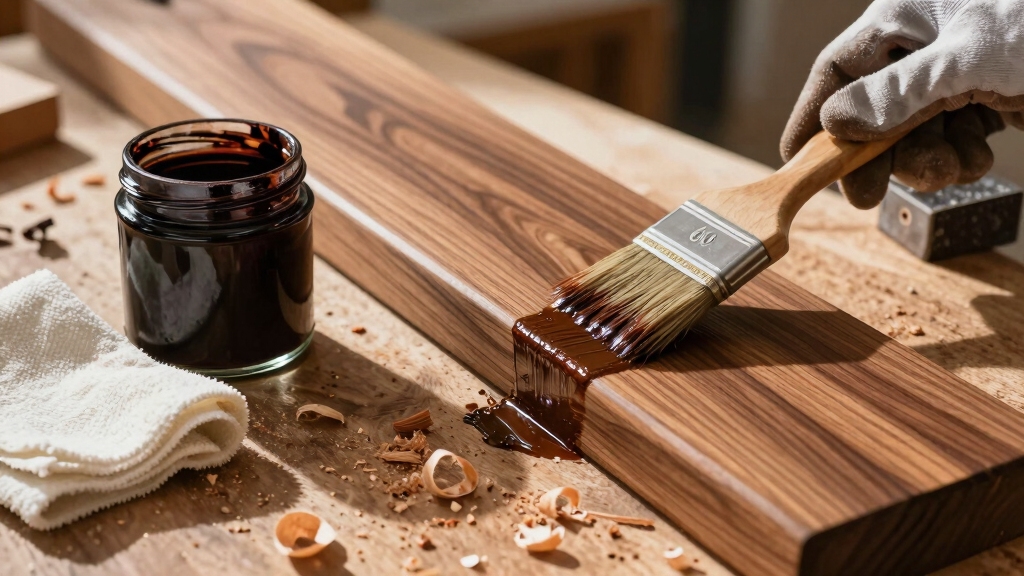
Start by stirring the stain thoroughly to guarantee pigment uniformity. Apply the first thin coat using a brush, cloth, or sponge in a circular motion, working the stain into the wood grain for even absorption.
Allow the coat to dry completely before applying the next layer; this drying time is essential for adhesion and depth. Each subsequent thin coat intensifies the color without risking blotching or unevenness common with thick applications.
Make certain your stain type matches your intended topcoat to maintain finish compatibility. This gradual build-up method offers superior control over darkness and enhances the wood’s natural texture.
For best results, ensure you wait the recommended drying time between coats to avoid tackiness and promote proper adhesion.
Test and Adjust Stain Darkness for Best Results
Before diving into your project, it’s super important to test your stain on a scrap piece of the same wood. This way, you can get a feel for how dark the stain will actually turn out.
Start by applying multiple thin coats, allowing each one to dry in between. This gradual approach really helps you control the color depth just the way you want it.
And hey, don’t hesitate to tweak your technique based on the results from those tests. It’s all about finding that perfect shade without going overboard and making it too dark!
Also, remember that allowing adequate drying and curing times between coats ensures the finish develops properly and lasts longer.
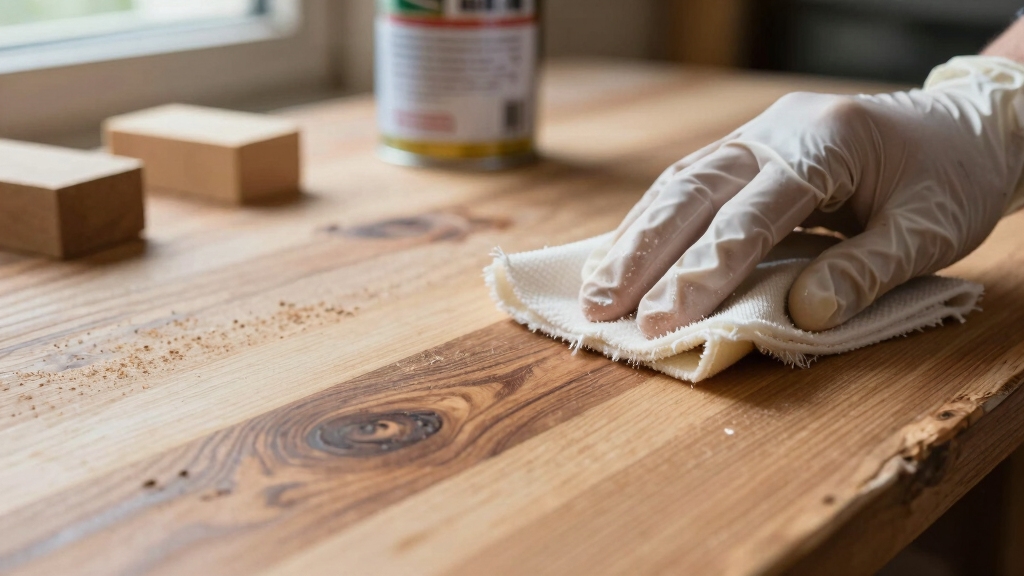
Sample On Scrap
Before applying any stain to your project, always try it out on a scrap piece of the same wood to dial in the exact darkness and tone you want.
This step lets you assess how the wood absorbs the stain and reveals its true color once dried.
Apply the stain with your intended method, such as brush, cloth, or sponge, and note drying times and pigment intensity.
Adjust your formula by varying pigment concentration or application duration based on the sample results.
Document these variables meticulously for consistent replication.
Testing on scrap avoids costly mistakes and guarantees uniformity across your project.
Remember, wood species and grain influence absorption, so matching scrap to final material is essential.
This disciplined approach secures precise control over stain darkness and finish quality.
For best results, consider the type of stain you are using, as solid color and semi-transparent stains behave differently on wood surfaces.
Gradual Color Build
When aiming for an even, rich wood stain, building color gradually through multiple thin coats guarantees better control over darkness and depth.
Start by thoroughly stirring your stain to guarantee pigment distribution. Apply a thin, even coat using a brush or cloth in a circular motion to work the stain into the grain.
Allow each coat to dry fully before applying the next to promote adhesion and prevent blotching. Test on scraps to calibrate desired darkness.
Adjust darkness by adding coats incrementally rather than saturating the wood at once. This method provides precision, avoids uneven absorption, and enhances uniformity.
Matching stain type to your chosen topcoat guarantees compatibility and durability. This controlled layering approach yields professional, repeatable results with superior color depth.
For added protection and a natural finish, consider using 100% pure tung oil as a food-safe, durable topcoat that penetrates wood fibers without leaving an oily residue.
Avoid Common Mistakes That Lighten Wood Stain

Hey there! So, when it comes to applying wood stain, one of the biggest mistakes you can make is overapplying it. If you slather on thick layers, it can lead to uneven drying, which might leave your wood looking lighter than you intended. Nobody wants that, right?
And let’s talk about surface preparation for a second. If you don’t sand the wood properly, it’s going to affect how well the stain absorbs. This can really weaken the color depth, and we definitely want a rich, vibrant finish!
Oh, and choosing the right stain type is super important too. If you pick the wrong one, it can mess with how the pigments adhere and affect the final darkness of your wood. So, take your time to match the stain to the wood and finish carefully. Trust me, it’ll make a world of difference!
Also, ensuring your finish is properly thinned and applied in thin, even coats—like with wipe-on polyurethane—can help maintain the richness and durability of your stained wood.
Overapplication Risks
Although applying multiple coats can deepen wood stain, overapplication often leads to unintended lightening due to improper absorption and surface buildup.
When you apply too thick a layer or too many coats without adequate drying, the wood’s surface saturates unevenly. This causes the stain to pool or form a film that reflects more light.
This disrupts pigment penetration, resulting in a blotchy, lighter appearance rather than a rich, consistent color.
To avoid this, always apply thin, even coats, allowing each to dry fully before the next.
Overloading the surface also compromises adhesion, risking peeling or streaking.
Maintain controlled application volumes and drying times to make certain pigments bind deeply and uniformly.
This will help you achieve the desired darkening effect without surface defects or color dilution.
Additionally, carefully sanding between coats with fine-grit sandpaper ensures better stain absorption and a smoother finish.
Improper Surface Preparation
Neglecting proper surface preparation markedly reduces wood stain absorption, leading to lighter, uneven finishes. You must sand your wood thoroughly with coarser grit to open pores and enhance stain penetration.
Skipping this step leaves a sealed surface that repels pigment, causing patchiness and insufficient darkening. Always finish sanding by hand, moving with the grain to avoid scratches that disrupt uniform stain distribution.
Additionally, remove all dust and contaminants before staining; residues form barriers that lighten color intensity. Avoid wetting the surface excessively unless using specific dyes, as moisture can dilute stain concentration.
Testing preparation techniques on scrap wood helps calibrate your approach. By mastering surface prep, you guarantee peak pigment absorption, resulting in deeper, richer stain tones and a professional, consistent finish every time.
For best results, ensure the wood surface is clean and free from dust or debris by using dust and debris removal methods prior to staining.
Incorrect Stain Selection
When selecting a wood stain, matching the stain type to both the wood species and the intended topcoat is essential for achieving ideal color depth and durability.
Using a water-based stain on oily woods or pairing an oil-based stain with a water-based topcoat can compromise adhesion and lighten the final appearance.
Avoid stains with low pigment concentration if you want a darker tone; instead, choose gel or glaze stains with higher pigment content for richer color.
Be cautious with universal stains; they may not deepen color as expected on certain woods. Always verify compatibility and pigment strength before application.
Testing on a scrap piece guarantees you avoid surprises and achieve a consistent, deep finish.
Correct stain selection prevents lightening caused by chemical incompatibility or insufficient pigment load.
Ensuring that the wood surface is fully cured and properly prepared before applying stain and topcoat improves adhesion and finish durability.
Manipulate Stain Pigment and Intensity Effectively
Master the manipulation of stain pigment and intensity by adjusting the pigment-to-vehicle ratio and controlling application techniques. You can increase pigment concentration by adding oil or universal color pigments, or choose higher-pigment products like gel stains.
Control intensity by leaving the stain longer before wiping or applying multiple thin coats, allowing drying between layers for uniform depth. Use circular motions to embed pigment into the grain and avoid heavy single coats that risk unevenness.
| Method | Effect |
|---|---|
| Add oil or universal pigments | Boosts pigment concentration |
| Extend wipe time | Darkens by evaporating thinning agents |
| Multiple thin coats | Builds color gradually and evenly |
| Use gel or glaze stains | Higher pigment load for deeper color |
| Circular application motion | Ensures even pigment penetration |
Use Natural Methods to Darken Wood Stain
Beyond adjusting pigment concentration and application techniques, you can achieve wood darkening through natural methods that react chemically with the wood’s tannins or add organic colorants.
Explore natural wood darkening by harnessing tannin reactions and organic colorants for rich, authentic hues.
For example, applying iron acetate made by soaking steel wool in vinegar induces a chemical reaction with tannins, producing a deep, uniform darkening especially effective on high-tannin woods like oak.
Alternatively, multiple applications of strong brewed tea or coffee increase surface color intensity by depositing organic pigments.
Using beet juice imparts a reddish darker tone, while crushed walnut hulls soaked in water provide a rich, warm stain suitable for lighter woods.
You can also apply a baking soda paste to react with tannins, subtly deepening the wood’s shade.
Always test these natural methods on scrap pieces to calibrate the desired depth before full application.
Apply Glazes and Gel Stains for Richer Tones
Gel stains are a game-changer when it comes to achieving those richer, more uniform tones we all love. With their higher pigment concentration and thicker consistency, they really help bring out the beauty of the wood.
Now, if you apply glazes after staining, you can get even more creative! They give you precise control over color depth by allowing you to layer thin, even coats. This way, you can enhance the wood grain without worrying about any blotching.
Once you master these techniques, you’ll find you can create a durable finish that showcases complex, visually appealing hues. It’s all about layering and being patient—trust me, the results will be worth it!
Benefits of Gel Stains
Frequently chosen by professionals for their superior pigment concentration, gel stains offer distinct advantages in achieving richer, more uniform wood tones.
Unlike traditional liquid stains, gel stains sit on the surface longer, allowing you greater control over color depth and consistency. Their thick viscosity minimizes blotching, especially on soft or porous woods.
Key benefits include: Enhanced pigment load delivers deeper, more saturated coloration with fewer coats. Thick consistency prevents uneven absorption, ensuring uniform application across varied grain patterns. Extended open time lets you manipulate the stain precisely, reducing streaks and patchiness.
Applying Glazes Effectively
When applying glazes to wood, it’s crucial to build up thin, controlled layers that enhance depth without overwhelming the grain.
Start by brushing or spraying glaze thinly, allowing slight excess on vertical surfaces to settle naturally. Apply glaze over sealed stain for consistent adhesion.
Use clear polyurethane atop the glaze for uniform sheen and protection. Layering shellac tones can further tailor shade depth.
Always allow full drying between coats to maintain control over darkness.
| Step | Recommendation |
|---|---|
| Application | Thin, even coats |
| Tools | Brush, sponge, or spray |
| Drying Time | Full cure between layers |
| Topcoat Compatibility | Use polyurethane for durability |
Add Multiple Topcoats to Enhance Stain Depth
Although applying multiple topcoats may seem straightforward, it markedly enhances the depth and durability of your wood stain finish.
Each additional layer intensifies color richness by adding translucent depth and seals the surface to protect the stain.
To optimize results, keep these guidelines in mind:
- Apply thin coats evenly, allowing each to dry fully before the next to avoid trapping moisture or cloudiness.
- Use a compatible topcoat type to assure proper adhesion and maintain finish integrity over time.
- Lightly sand between coats with fine-grit paper to promote mechanical bonding and smooth out imperfections.
Protect and Maintain Darkened Wood Finishes
To preserve your darkened wood finish, apply protective coatings that shield against wear, moisture, and UV damage while maintaining color integrity.
Protect your darkened wood finish with coatings that guard against wear, moisture, and UV damage while preserving color.
Use compatible topcoats like polyurethane, shellac, or varnish, matching the stain type to guarantee adhesion and durability.
Apply multiple thin coats with adequate drying time to build a resilient barrier.
Regularly clean the surface with a soft, damp cloth to remove dust and prevent buildup without abrading the finish.
Avoid harsh chemicals that can degrade the protective layer or alter color.
Periodically inspect for signs of wear or fading; reapply sealer or topcoat as needed to maintain peak protection.
Proper maintenance extends the life and appearance of your darkened wood, preserving its depth and richness over time.
Frequently Asked Questions
Can Darkened Wood Stain Affect Indoor Air Quality?
Yes, darkened wood stain can affect indoor air quality because it often contains higher pigment concentrations and solvents that release volatile organic compounds (VOCs).
When you apply multiple coats or use glazes and additives, VOC emissions increase, potentially causing irritation or respiratory issues.
To minimize impact, you should ensure proper ventilation, choose low-VOC or water-based stains, and allow thorough curing before occupying the space.
Testing finishes on scraps helps you control emissions effectively.
How Does Wood Species Impact Stain Darkening Results?
You’ll find wood species subtly “whisper” their unique traits into stain results.
High-tannin woods like oak naturally deepen stain color due to chemical reactions, enhancing darkness.
Softer, low-tannin woods absorb stain unevenly, often yielding lighter or blotchy finishes.
Grain texture and porosity also influence pigment penetration, so you must adjust application methods accordingly.
Knowing your wood’s characteristics lets you predict and control stain darkening with precision and confidence.
What Safety Gear Is Recommended When Applying Wood Stain?
You should wear nitrile gloves to protect your skin from chemicals and solvents in wood stains.
Use safety goggles to shield your eyes from splashes or fumes. A respirator mask rated for organic vapors is essential to avoid inhaling toxic fumes, especially in poorly ventilated areas.
Work in a well-ventilated space and consider wearing long sleeves to minimize skin exposure.
Always follow manufacturer safety guidelines for best protection.
Can Dark Stain Be Removed or Lightened After Application?
Certainly, stripping stubborn stains is slightly challenging but still strong solutions exist.
You can lighten dark stain by sanding aggressively or using chemical strippers designed for wood finishes. Be sure to select solvent strength suited to your wood type and stain depth.
For precision, test on a scrap piece first. After removal, neutralize residues before refinishing.
How Long Should I Wait Before Sanding Between Stain Coats?
You should wait until the stain is completely dry before sanding between coats, typically 4 to 6 hours depending on the product and environmental conditions.
This guarantees proper adhesion and avoids lifting the stain. Use fine-grit sandpaper (220 grit) and sand lightly with the grain to smooth the surface and promote uniform absorption for the next coat.
Always test on scrap wood for precise timing and finish quality.
Let the Wood Speak: Depth, Patience, and Lasting Beauty
By carefully preparing your wood and selecting appropriate stains, you can subtly guide your project toward a richer, more sophisticated finish. Layering thin coats and employing natural darkening techniques will help you avoid unintended lightening, ensuring your wood’s character deepens gracefully.
Remember, patience and precision in application, not haste, unlock the true potential beneath the surface. With thoughtful maintenance, your darkened wood will continue to reveal its quiet strength and enduring elegance over time.