How to Joint Wood Without a Jointer? Woodworking Hacks
You can joint wood without a jointer by building a table saw jointing sled fitted with precise runners and a flat reference edge to trim straight, square edges.
Alternatively, clamp a straightedge to your workpiece and use a circular saw for guided cuts. A router with a flush-trim bit and a stable fence can create clean, accurate edges.
Employ winding sticks and shims to check and correct twist during prep. Combining these techniques helps guarantee flat, reliable joints—explore further for detailed methods.
Key Takeaways
- Use a table saw jointing sled with a flat reference edge and precision runners for straight, square edges without a jointer.
- Clamp a straightedge to the board and make clean, steady cuts with a circular saw for accurate edge jointing.
- Employ a router-based jointing sled with a flush trim bit and secure clamps to achieve smooth, glue-ready edges.
- Flatten edges on a planer using a sled with shims and stop blocks, taking light passes for consistent flatness.
- Use high-bond double-sided tape to attach a straightedge guide on the board face and cut along it with a circular saw.
Building a Table Saw Jointing Jig for Straight Edges
When building a table saw jointing jig for straight edges, you need to focus on achieving precise flatness and parallelism between the sled’s top and bottom surfaces to guarantee the cut edge is both straight and square.
Start with a stable sled bed; MDF or plywood works well. Make certain it spans the table fully to support your boards. Fit precision runners into the miter slots for accurate, lateral-play-free movement, ideally using UHMW miter bars for smooth sliding and durability.
Attach a long, flat reference board firmly to the sled; this becomes your fixed straight edge. Incorporate toggle or T-track clamps positioned to hold the workpiece securely without flexing the sled top.
Toggle clamps are especially useful because they allow you to clamp lumber to the sled firmly during the cutting process, offering a secure hold.
Cut a zero-clearance slot at the blade location to reduce tearout. Before use, test and adjust for perfect squareness and straightness using a square and straightedge.
Make certain repeatable, reliable cuts every time.
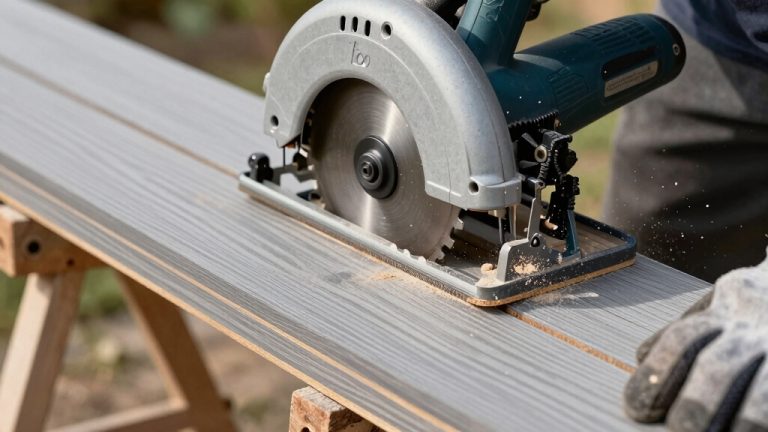
Using a Circular Saw With a Straightedge for Edge Jointing
Using a circular saw with a straightedge allows you to create clean, straight edges without a jointer by guiding the saw precisely along a stable reference. This method relies on a straight-edge guide to maintain cut accuracy and prevent deviation during the rip cut.
Ensuring your work surface is at an ergonomic height can significantly reduce fatigue and improve control during cutting.
Start by constructing a straightedge guide using a factory-cut plywood edge as a base. Secure a narrow plywood strip aligned two inches from the edge, then clamp it firmly to your workpiece.
Set your saw depth to just cut through and measure the blade-to-shoe distance for accurate offset alignment.
| Step | Key Detail |
|---|---|
| Guide Construction | Screw strip every 12″ along edge |
| Saw Setup | Clamp saw snug, guard raised |
| Cutting Technique | Maintain firm shoe contact, slow start |
Router Techniques for Creating Clean Joint Edges
Alright, let’s talk about how to create those clean joint edges using a router.
First off, you’ll want to set up a flush trim bit. Make sure the bearing is the right size to match your guide. This is super important for achieving that precise edge removal you’re after.
Now, when it comes to aligning your router fence or straightedge, take your time. It’s crucial to get it just right so that the bit tracks true along the cutline. You definitely don’t want any deviation here; it can mess up your whole project. Using clamps to secure the straightedge will prevent any movement for accurate cuts.
To ensure the best results, clamp a straightedge firmly to the plank and use a router mounted on a subbase to improve router stability during the pass.
Oh, and one more thing to keep in mind: always rout in the direction that shears the wood fibers cleanly. This will help minimize tearout and give you those smooth joint edges you’re aiming for.
Flush Trim Bit Setup
Choose the appropriate flush trim bit based on your joint and template setup to guarantee clean, precise edges. For instance, use bottom-bearing bits when your pattern lies beneath the workpiece and top-bearing bits when referencing templates above.
Compression bits excel for chip-free cuts on varied grain directions, while round-over bits adapt well for profile edges. Securely clamp the template and leave minimal overhang for accurate trimming, using larger 1/2-inch shank bits to enhance cut quality.
It is important to clamp work with slight overhang on top of the circular pattern before trimming to maintain control and accuracy. Move the router counter to the bit’s rotation to prevent climb-cutting issues.
Proper router bit setup helps avoid damage to both the workpiece and bit, ensuring smooth operation and longer tool life.
| Bit Type | Bearing Position |
|---|---|
| Bottom-bearing | Template below workpiece |
| Top-bearing | Template above workpiece |
| Compression | Handles chip-free cuts |
| Round-over | Flush trims edge profiles |
Router Fence Alignment
Aligning your router fence with precision is essential to achieve clean, accurate joint edges. Focus on the bit’s cutting reference point, not the bit body, when setting lateral fence position.
Verify fence faces are co-planar using a straightedge before locking adjustments. Remember, perfect parallelism to the table front isn’t necessary; pivot one fence end to fine-tune alignment.
When using a miter gauge, ensure the fence is parallel to miter slot for accurate guidance. Utilizing a router table insert plate can enhance stability and precision during fence alignment.
Follow these steps for peak router fence alignment:
- Retract the fence slightly to establish a “wiggle room” zero, then feed forward a preset distance to allow micro-adjustments.
- Lock one fence end and pivot the other for precise lateral movement, using shims or a dead-blow mallet for finesse.
- Align outfeed fence face to infeed fence face to guarantee continuous support and smooth bit changeover, reducing tearout.
This precision setup guarantees clean, stable joint edges without a jointer.
Grain Direction Technique
After you’ve fine-tuned your router fence for accurate cuts, the next step is to focus on grain direction to minimize tearout and achieve clean joint edges.
Start by visually inspecting and feeling the board edges to identify fiber orientation. Mark sections with a pencil where grain varies.
Understanding grain direction is crucial as it influences the choice of router bit and feed technique to reduce tearout and improve cut quality.
Feed your handheld router against the bit’s rotation, typically right-to-left for clockwise bits, to maintain control and reduce chipping. This feeding method prevents router pulling uncontrollably for safer operation.
For alternating grain, split the cut into shorter passes and adjust feed direction accordingly. Use shallow multiple passes rather than deep cuts to lessen fiber stress, which is a common practice when using thin kerf blades to achieve cleaner cuts.
Select a sharp spiral bit, preferably downcut or compression, to compress fibers and reduce splintering, especially on end-grain.
Employ sacrificial fences or backing supports to stabilize fibers at cut start and finish. This prevents breakout and ensures a smooth, clean joint edge.
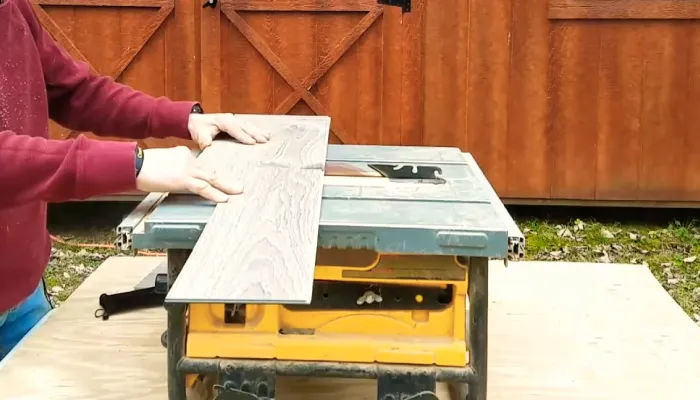
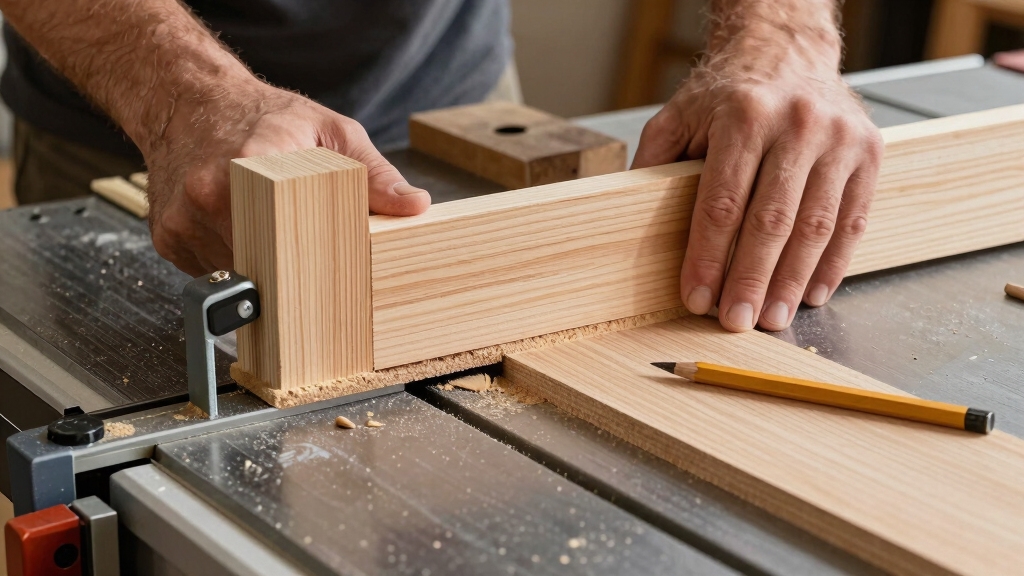
Applying Tape and Sled Methods for Table Saw Jointing
When you need to joint wood without a dedicated jointer, the tape-and-straight-edge method and a table saw sled provide reliable alternatives for producing straight, square edges.
- Tape-and-Straight-Edge Setup: Apply a high-bond double-sided tape on the board face adjacent to the edge. Attach a long, straightedge aligned flush and true to the saw blade. Use a sharp ripping blade and steady feed to trim the edge flat to the straightedge.
- This method is especially useful for edge-jointing boards wider than your joiner can handle, providing a practical workaround. Ensuring a stable feed during the cut helps achieve a cleaner, more precise edge.
- Sled Construction: Build a sled base from 3/4″ plywood with runners fitting the miter slots. Add T-track hold-downs to secure stock flat, ensuring no lift during passes. Incorporating T-track hold-downs and dovetail clamps enhances the sled’s versatility and safety during use.
- Sled Usage: Clamp the workpiece with the edge overhanging the sled edge. Set blade height for minimal cuts and run the sled past the blade to create a straight, square edge.
- This approach mirrors professional setups that allow for repeatable and safer jointing cuts on a table saw sled. Positioning featherboards just ahead of the blade can provide additional control and reduce the risk of kickback during sled use.
Both methods demand precision in setup and feed control for best jointing results.
Hand Tool Approaches for Smoothing and Straightening Edges
Relying solely on power tools to joint edges can leave you with machine marks or minor imperfections that need refinement. SawStop and Powermatic table saws provide options with various fence systems that aid in precise cuts, complementing hand tool work.
Start by using a well-tuned jointer plane (No. 7–8) to take long, light shavings and establish a straight, flat reference face. This step is crucial because smoothing is a crucial step for expert craftsmanship.
Check for twist frequently with winding sticks, adjusting your strokes to remove high corners. Consider the rip capacity of your table saw for handling larger workpieces when preparing boards before hand jointing.
For final smoothing, switch to a smoothing or block plane set for very light cuts, skewing the blade slightly to reduce chatter.
If your edges have curves, employ a spokeshave for shaping, followed by a card scraper to remove ridges and tearout.
Honing the scraper’s burr will help achieve clean cuts.
For rapid material removal on warped edges, use coarse-to-fine rasps, finishing with a scraper or sandpaper to guarantee a uniform, ready surface.
Creating a Flat Sled for Planer Face Jointing
To create a flat sled for planer face jointing, you’ll want to start with a solid base.
A great choice is a 3/4″ melamine-faced MDF that’s just a bit narrower than your planer bed. This way, you’ll have smooth sliding when you’re working.
Before you begin, make sure your tools are clean and free from rust to ensure accurate planing.
Now, if you’re dealing with warped boards, don’t worry!
Just use some shims or wedges to get everything sitting nice and flat. This will really help ensure full contact and keep your sled from rocking while you make your passes.
Wedges are typically placed under high spots every 6–12″ and are held in place by the roller pressure during planing, so you don’t need to glue or tape them.
Apply controlled, light cuts at first so you can gradually flatten the face of the board. Once you see that you’re getting consistent contact across the surface, you can start increasing the depth of cuts.
Building a Flat Sled
Frequently, building a flat sled begins with selecting materials that guarantee a perfectly level reference surface for your planer.
Use melamine sheets cut to the planer bed width or thick plywood/MDF to assure a dead-flat base. Choosing sturdy plywood sheets ensures durable and stable construction.
Follow these steps for construction:
- Cut the base slightly narrower than the planer bed (e.g., 12.5 inches wide) for smooth sliding. Flatten the underside using a jointer or hand plane before assembly.
- Attach a stop block or lip at the feed end with epoxy and screws to prevent board movement during planing.
- Secure leveling bars or strips along the base edges to support the board evenly. It is also helpful to keep the sled on the planer tables during use to maintain consistent support.
This sled provides a stable, flat platform, allowing you to joint wood faces accurately without a jointer.
Using Shims for Support
When setting up your flat sled for planer face jointing, shims play a crucial role in achieving precise, stable support. Choose shim materials based on strength, moisture resistance, and compressibility to match your sled’s needs.
Shims are commonly used to compensate for unevenness from irregular surfaces, which is essential when creating a flat sled base.
Stack shims using opposing or progressive methods to create a flat, evenly supported surface. Measure thickness with calipers and adjust for compression to maintain coplanarity under pressure.
Secure shims temporarily with tape or permanently with screws or adhesive, ensuring stability without damaging the sled.
| Shim Type | Key Property |
|---|---|
| Hardwood | High strength, durable |
| Composite | Moisture resistant |
| Plastic (Nylon) | Non-compressible |
| Metal (Brass) | Ultra-thin precision |
| Custom-cut | Tailored fit |
Planing Techniques and Tips
After properly supporting your sled with shims, focus on constructing a flat, stable sled surface tailored to your planer.
Use a 12–18 mm plywood or 18–25 mm MDF base sized with 1–2 mm clearance to fit the planer bed smoothly.
Finish the sled surface with melamine or paint to reduce friction and ease cleanup.
When preparing for face jointing, follow these key steps:
- Attach a stop block on the infeed side, set high enough to clear planer rollers, preventing workpiece migration.
- Secure the workpiece using hot-melt glue or clamps on sacrificial strips, ensuring no interference with planer rollers.
- Take light passes (0.5–1.0 mm), lowering the cutter incrementally to avoid motor strain and achieve a flat, consistent surface.
For best results, maintain consistent support by leaving the sled in place on the planer tables during use, which helps ensure stable support.
This precise setup guarantees accurate, repeatable face jointing without a jointer.
Checking Wood Edges With Winding Sticks and Shims
Although you might assume visual inspection alone suffices, accurately checking wood edges for twist requires winding sticks paired with shims. Winding sticks are pairs of straight-edged bars used to detect subtle board twists that can be difficult to see otherwise.
Position two straight sticks centered and squared across the board ends, sighting along their top edges to reveal angular deviations. Differences in the reveal under contrasting marks indicate twist, not cup or bow, so use a straightedge to check those separately.
Place two straight sticks squarely across board ends and sight along their edges to detect twist.
To quantify twist, place a shim under the low corner and lift until the sticks read parallel. Mark the shim’s elevation, halve that distance, and use it to guide material removal from the high corners during planing. Incrementally adjust shim thickness to avoid overshoot.
This method precisely isolates twist and directs corrective actions, ensuring accurate jointing without specialized machinery. Repeated plane-and-check cycles help achieve perfect flatness and alignment for quality woodworking.
Combining Multiple Techniques for Enhanced Precision
Mastering edge correction starts with accurately identifying twists and deviations, but achieving consistently precise jointing often requires blending multiple methods.
You can combine these techniques to maximize accuracy and efficiency.
- Use a router-based jointing sled with shims and pencil marks to precisely straighten edges. Follow with a glue line rip blade on the table saw to refine the edge for a perfect glue-ready surface. The choice of blade, such as a glue line rip blade, is critical for achieving a smooth, straight cut.
- Apply the tape method on your sled or plywood base to temporarily secure thin stock during jointing. This prevents movement and ensures straight cuts without complex clamping.
- For larger boards, start with a circular saw guided on a flat reference surface to roughly joint edges. Then finish with a router sled or table saw setup for fine precision and smoothness. Using a larger router base increases stability, reducing the risk of tipping during routing operations.
This multi-step approach guarantees flat, straight, and true edges every time.
Tips for Preventing Twist and Ensuring Flatness During Jointing
To prevent twist and ensure flatness during jointing, you need to carefully select and prepare your stock, as this forms the foundation for stable, accurate edges.
Careful stock selection and preparation lay the groundwork for stable, twist-free, and flat joint edges.
Choose quarter-sawn or rift-sawn boards with consistent moisture content (±2–3%) and avoid juvenile wood, large knots, or reversed grain.
Using flatsawn red oak pieces and ripping wider boards into narrower strips can reduce movement and improve flatness by limiting internal stresses in the glue-up edge-gluing strategy.
Acclimate lumber flat with stickers until moisture stabilizes.
Produce square, straight edges with gaps under 1/64″ using a hand plane or shooting board, and check against a straightedge.
During glue-up, use cauls to distribute pressure evenly and tighten clamps incrementally, alternating positions.
Apply mechanical restraints like breadboard ends or floating tenons for wide panels to resist cupping while allowing seasonal movement.
These methods collectively minimize internal stresses, guaranteeing durable, flat joints without a jointer.
Frequently Asked Questions
What Safety Gear Is Recommended When Jointing Wood Without a Jointer?
You should always wear safety glasses to protect your eyes from flying wood chips and dust.
Use a dust mask or respirator to avoid inhaling fine particles.
Hearing protection is important if you’re using noisy power tools.
Secure your workpiece firmly and avoid loose clothing to prevent entanglement.
Also, keep push sticks or featherboards handy to keep your hands safely away from blades.
These precautions help you work safely and effectively.
How Do Humidity and Wood Moisture Affect Jointing Results?
Humidity and wood moisture directly impact jointing results by causing wood to expand or contract. When moisture content rises, wood swells, risking glue joint failure and misalignment.
Conversely, low moisture causes shrinkage, leading to cracking or loose joints. You should work with wood at 6-7% moisture content and maintain 40-60% relative humidity to minimize movement.
Accounting for these factors guarantees stable, precise joints and prevents issues like warping or joint stress over time.
Can These Jointing Methods Be Used on Hardwoods as Effectively as Softwoods?
Yes, you can use these jointing methods effectively on hardwoods, but you’ll need sharper blades, slower feed rates, and firmer workpiece support to avoid tearout and burning.
Router bits and blades dull faster on hardwoods, so plan for frequent maintenance. Hand tools require sharper irons and refined technique to handle dense fibers cleanly.
With careful setup and attention to detail, these alternatives can produce precise, square edges on hardwoods just like on softwoods.
How Do I Maintain and Sharpen Blades or Bits Used in These Techniques?
You maintain blades and bits by inspecting them for chips or wear before each use. Clean resin buildup with solvent and store them properly to avoid damage.
Sharpen router bits with a diamond wheel or professional service once dull. Saw blades require professional diamond grinding when cut quality drops.
Hone planer blades regularly and regrind as needed. Always unplug tools before maintenance and test cuts afterward to verify sharp, burr-free edges before gluing.
What Are Common Mistakes to Avoid When Jointing Wood Without a Jointer?
Picture uneven edges and wobbly boards. These come from misaligned fences or sled rails.
Don’t let your board rock; shim gaps under the base. Avoid weak adhesives or relying solely on clamps.
Secure your work firmly with tape and pencil marks for guidance. Use the right blade, push boards steadily, and ensure two contact points on guides.
Finally, verify flatness and shim fences precisely to prevent gaps or bowed cuts.
Put These Wood Jointing Techniques Into Practice Today
Think of jointing wood without a jointer like piloting a river without a motorboat. You rely on steady hands and smart tools to keep your course true.
By combining jigs, saw guides, routers, and hand tools, you steer your wood edges straight and flat with precision. Just like a skilled navigator reads the currents, you’ll prevent twists and make certain smooth joints.